Surgery by Dr Konstantinos Papaioannou Prostho by Dr. Dimitris Tasakos.
Case Studies
Resource Library
Facially Driven Full Arch Implant Planning and Aesthetic Restoration Using Aoralscan Elite and MetiSmile
Dr. Konstantinos Papaioannou and Dr. Dimitris Tasakos collaborated on a state-of-the-art full-arch implant restoration using Guided Surgery for unparalleled precision.
Surgery: Performed by Dr. Konstantinos Papaioannou, featuring an internal sinus lift with Versah, LLC drills and the placement of 6 implants from Southern Implants
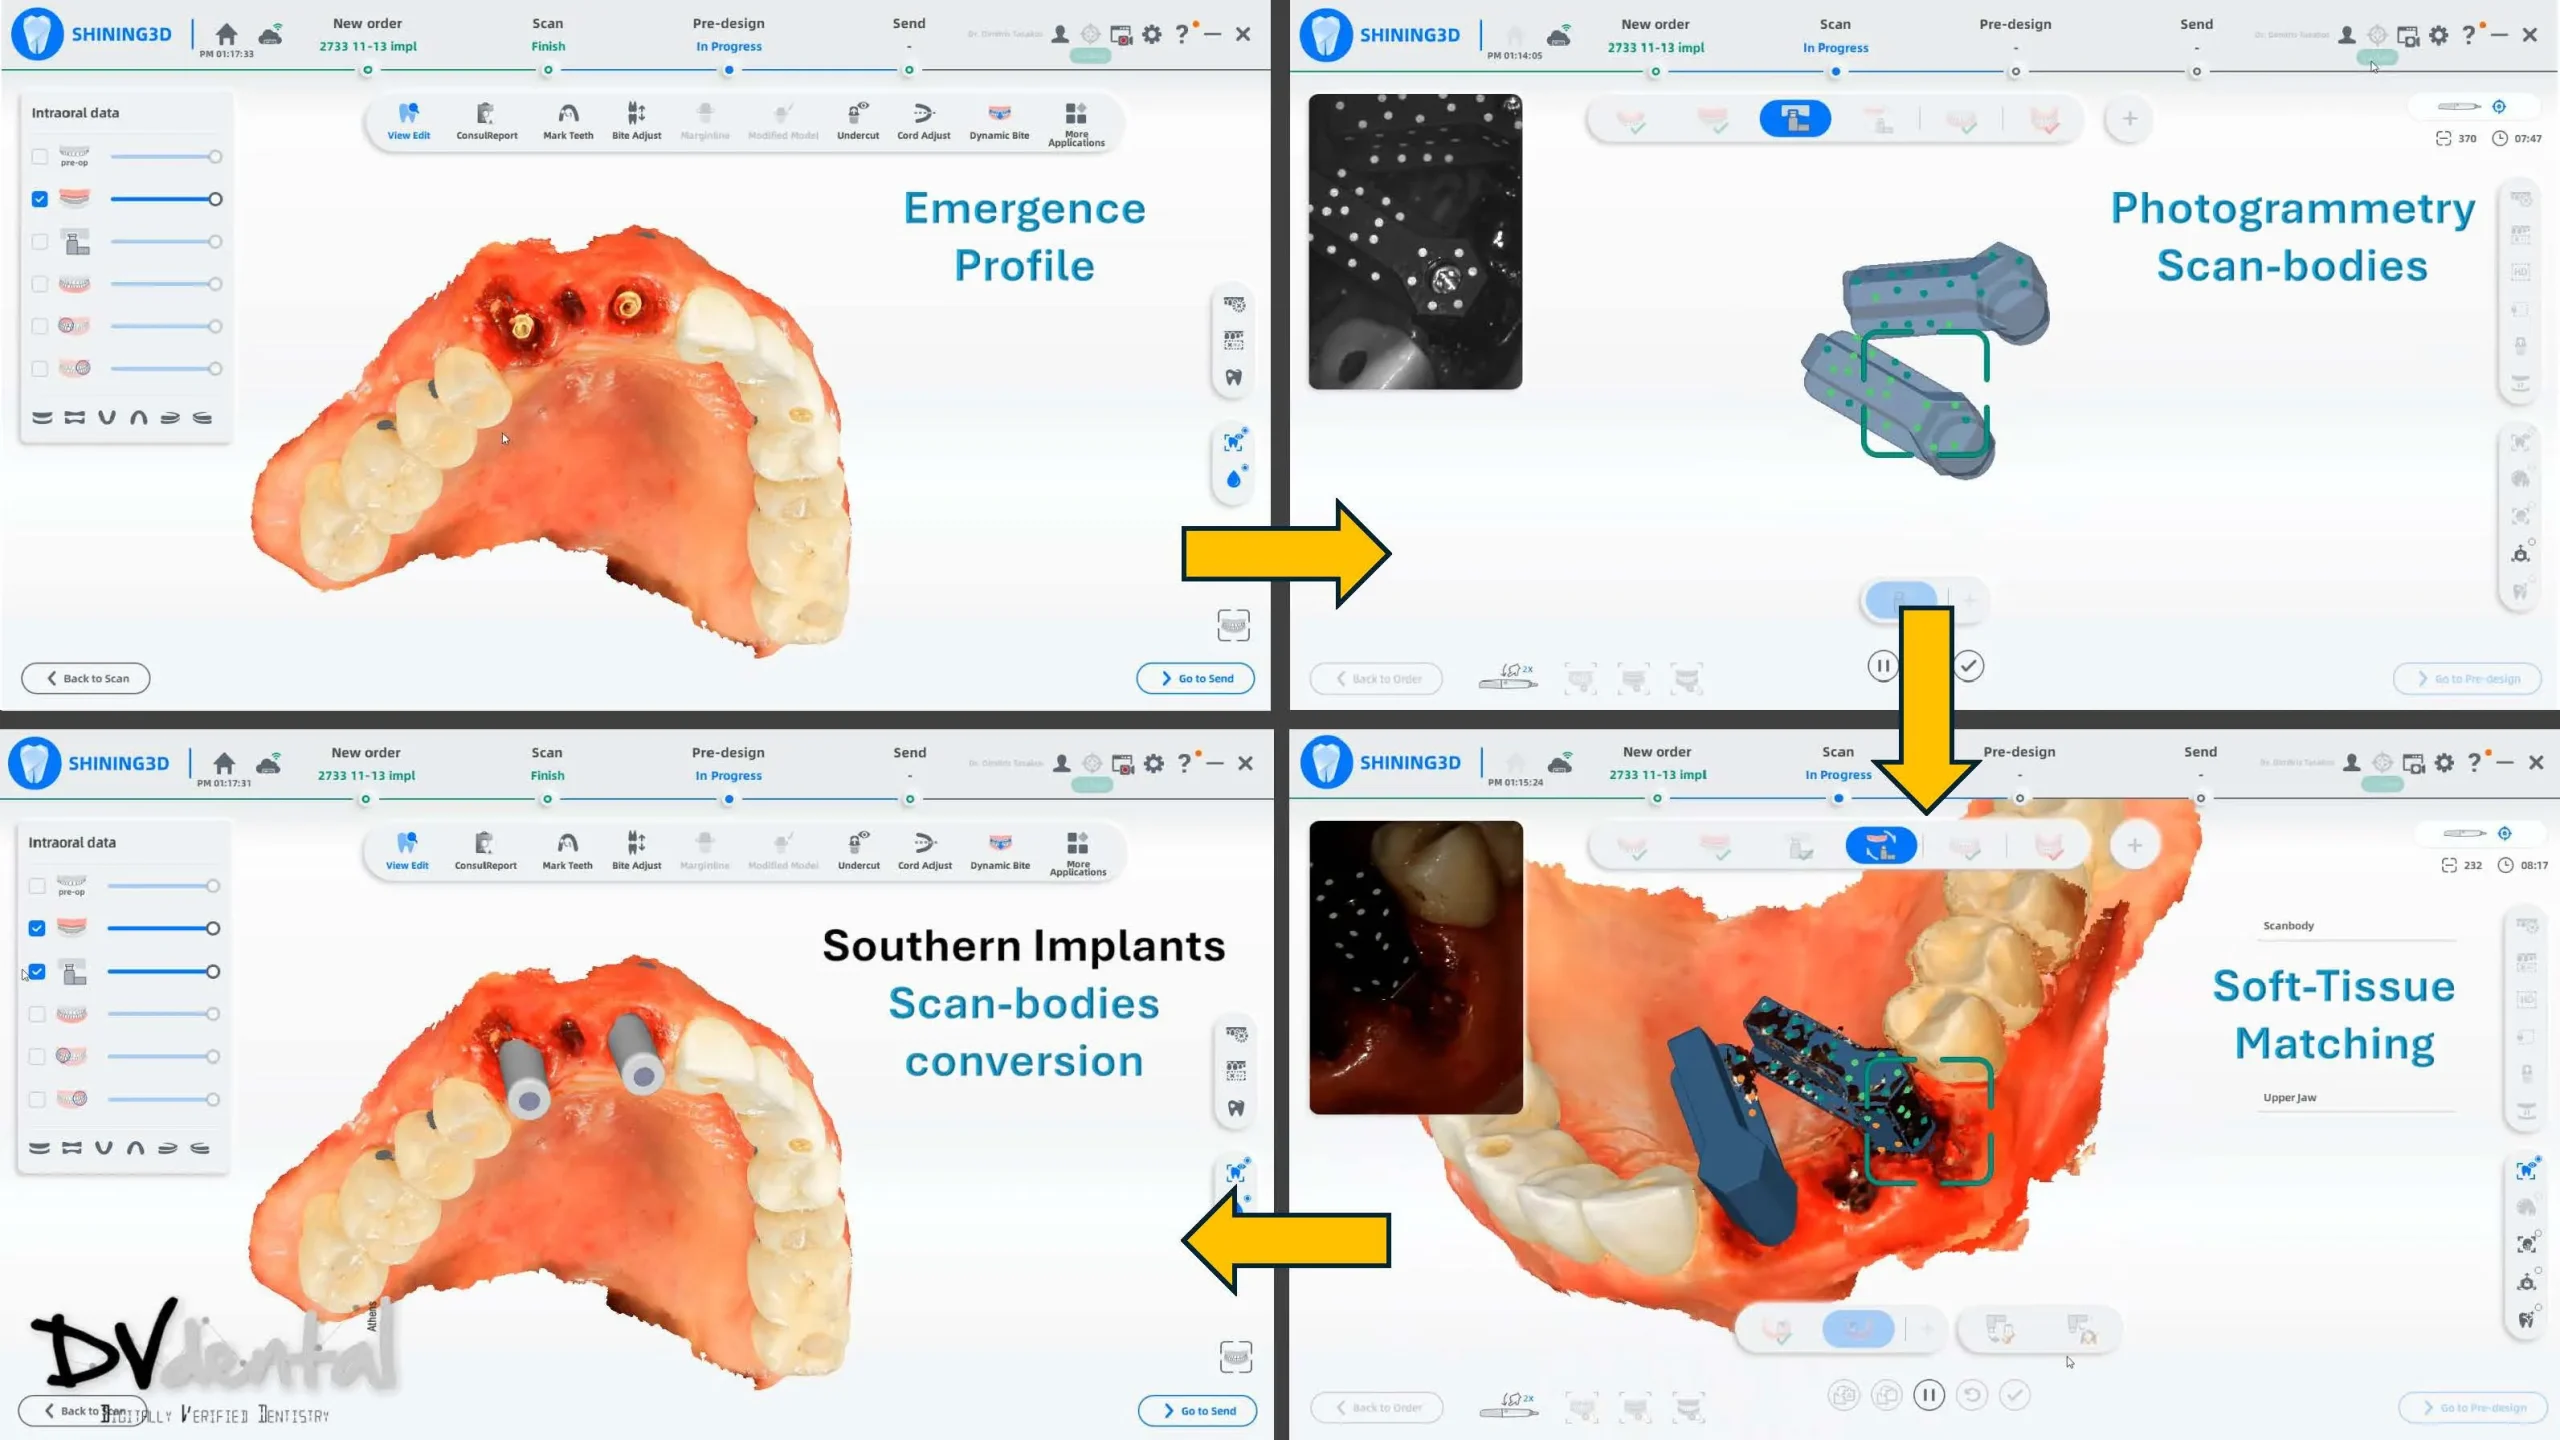
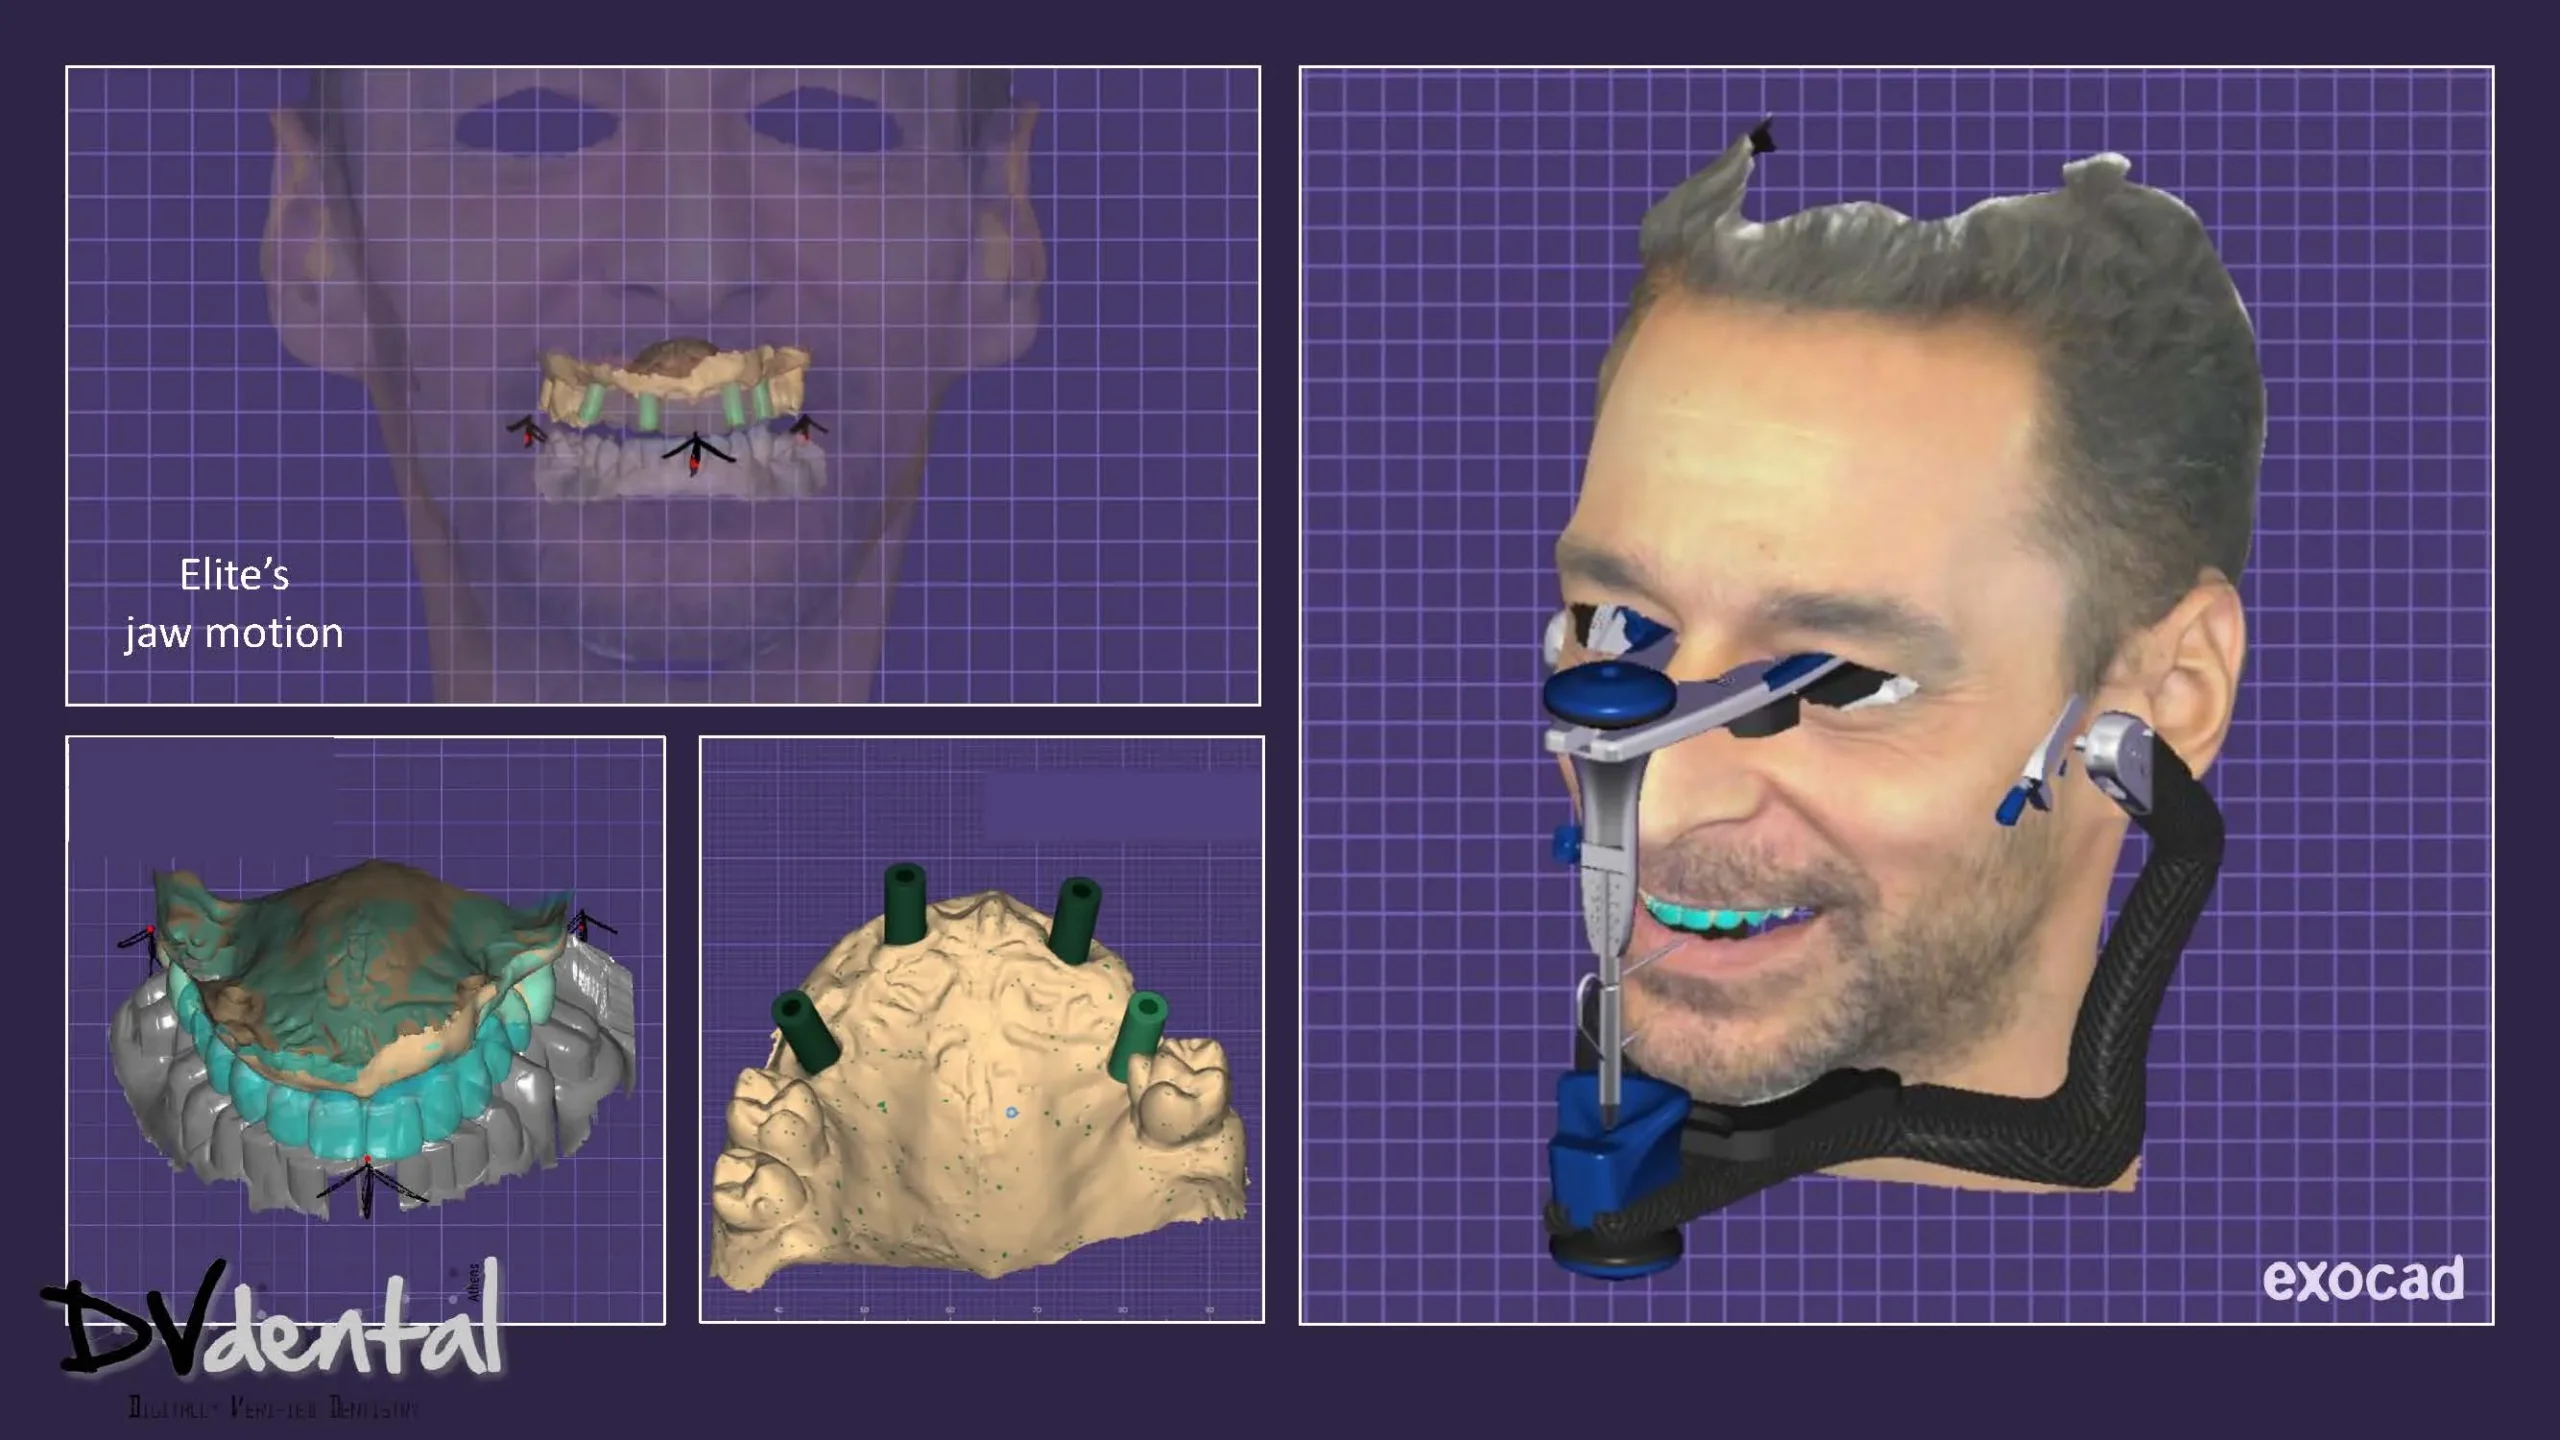
Prosthodontics: Led by Dr. Dimitris Tasakos, utilizing the SHINING 3D DENTAL Aoralscan Elite, an advanced intraoral scanner with photogrammetry, and digitally planning implant placement with Nemoscan software by Nemotec
The combination of Guided Surgery, surgical expertise, cutting-edge scanning, and precise digital planning ensured exceptional accuracy, functionality, and aesthetics in the final outcome.
Case Analysis
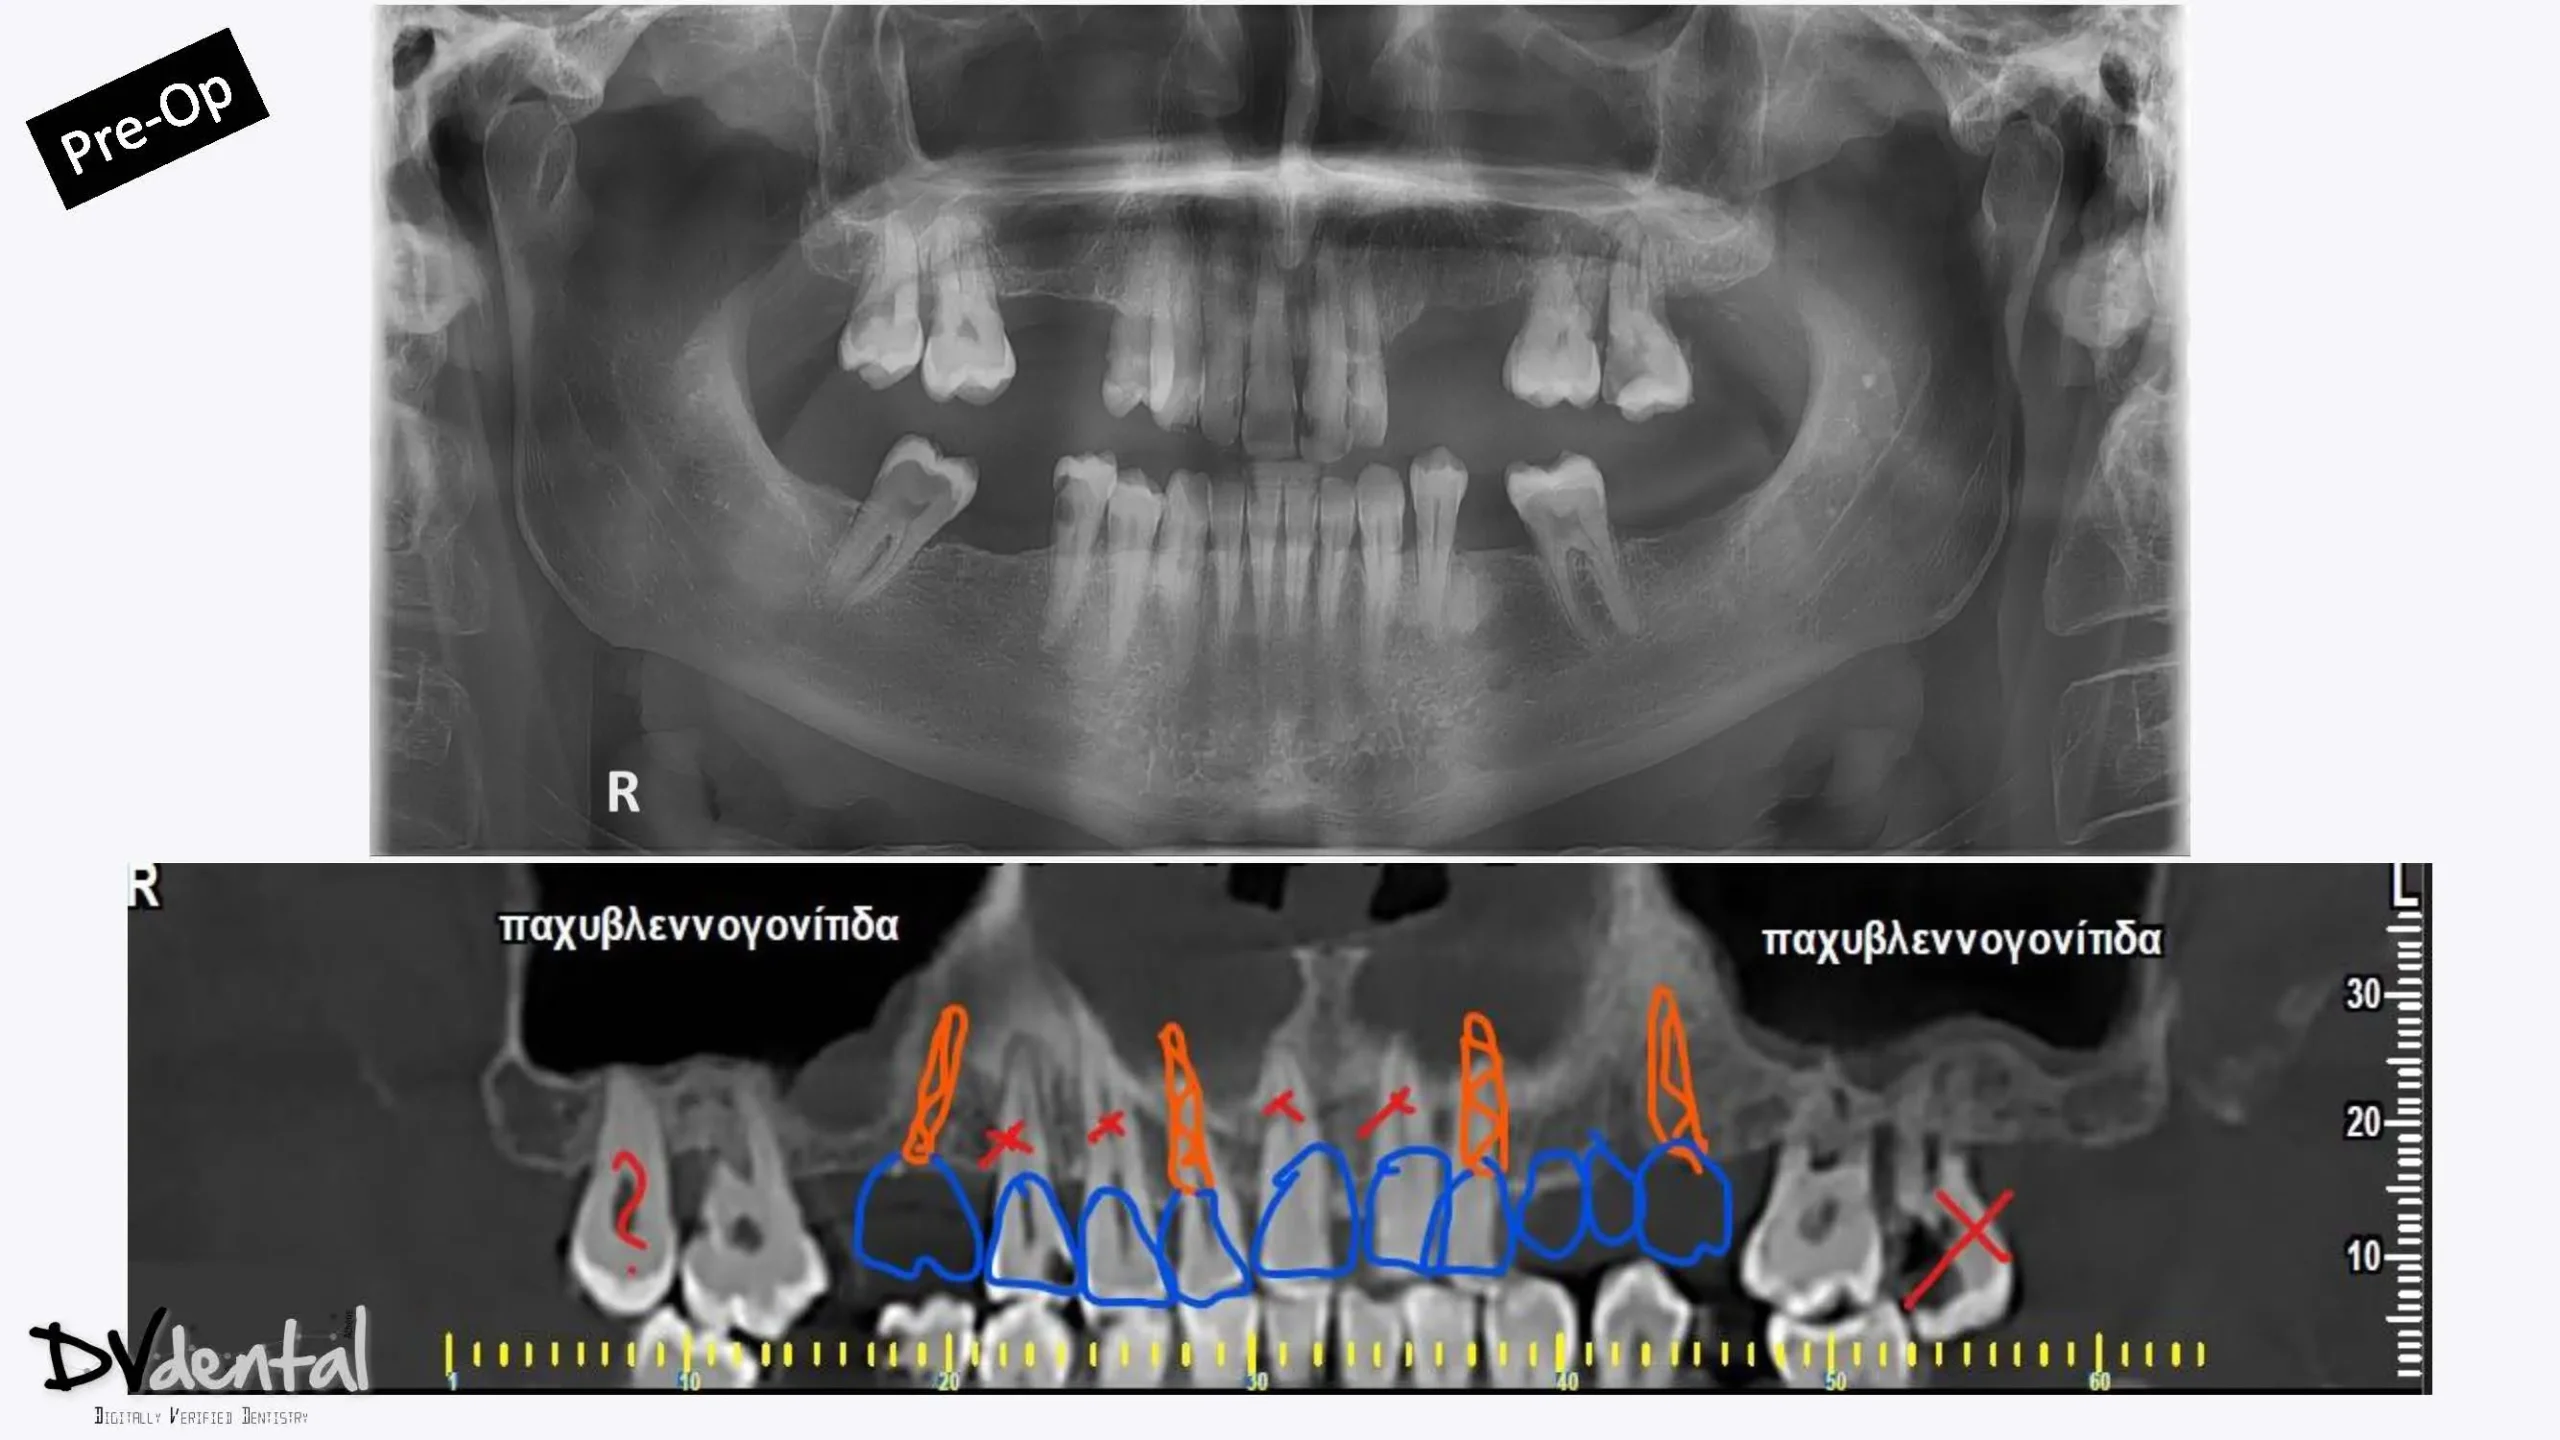
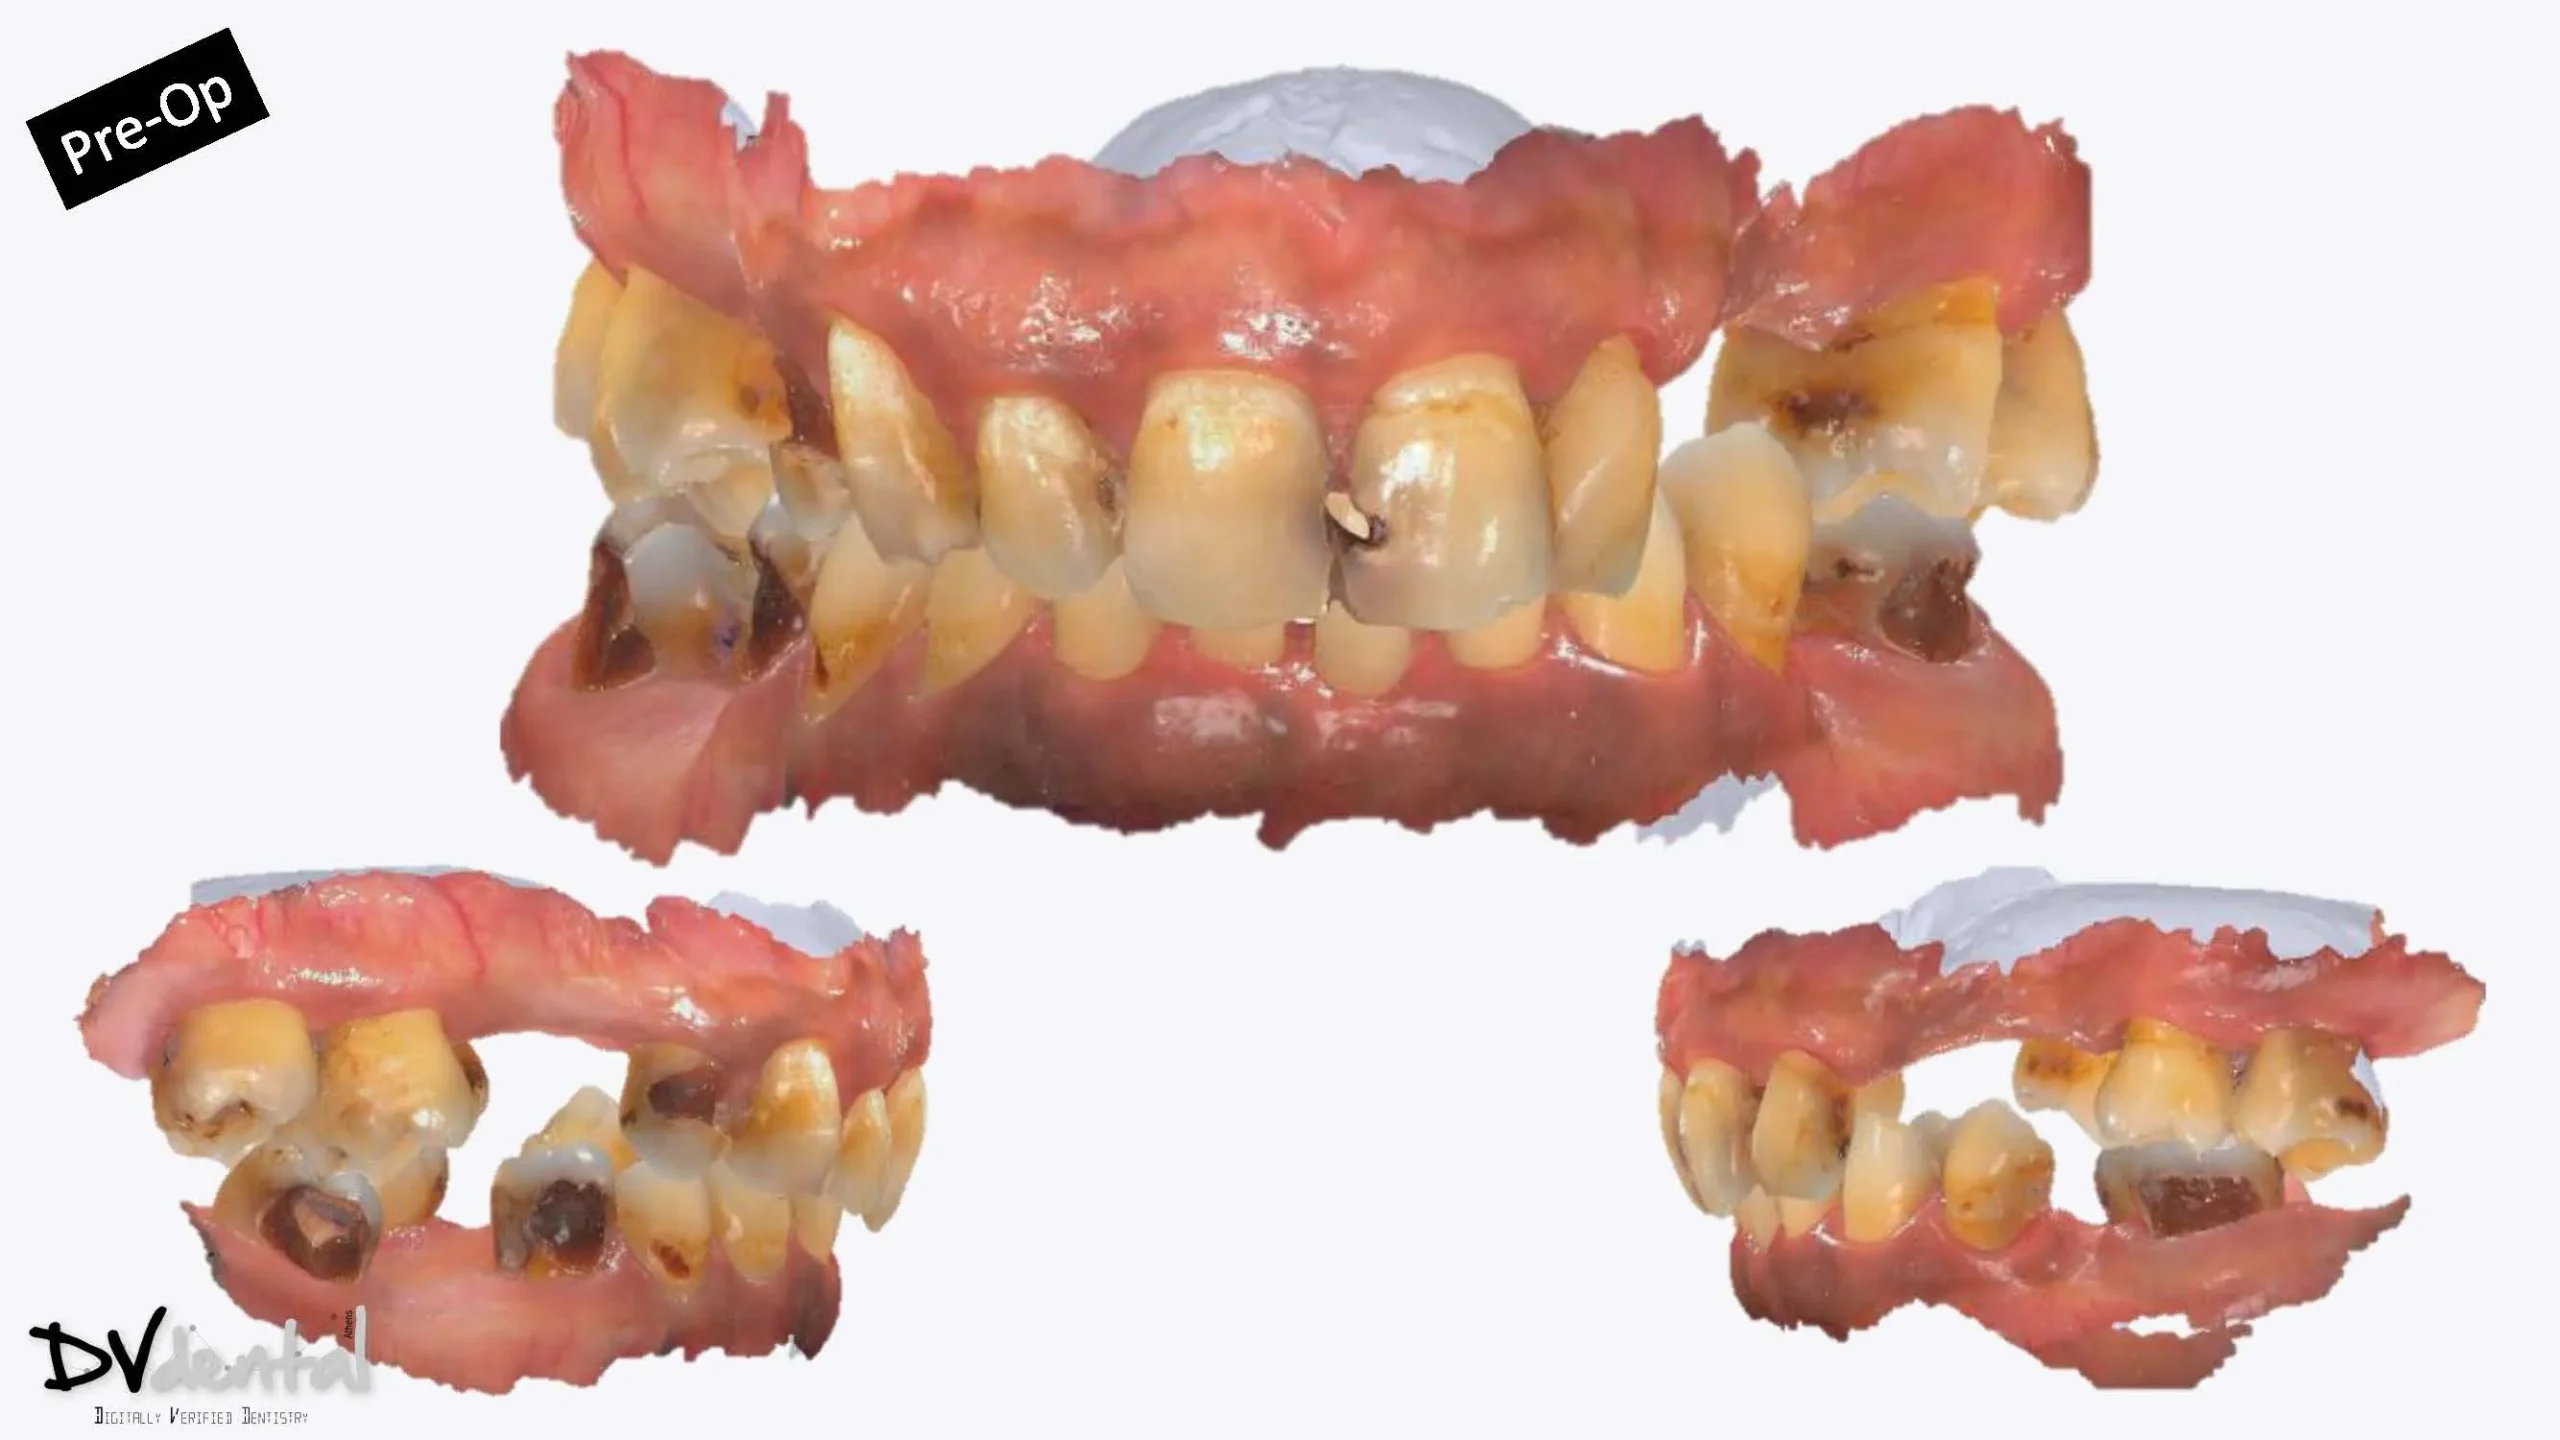
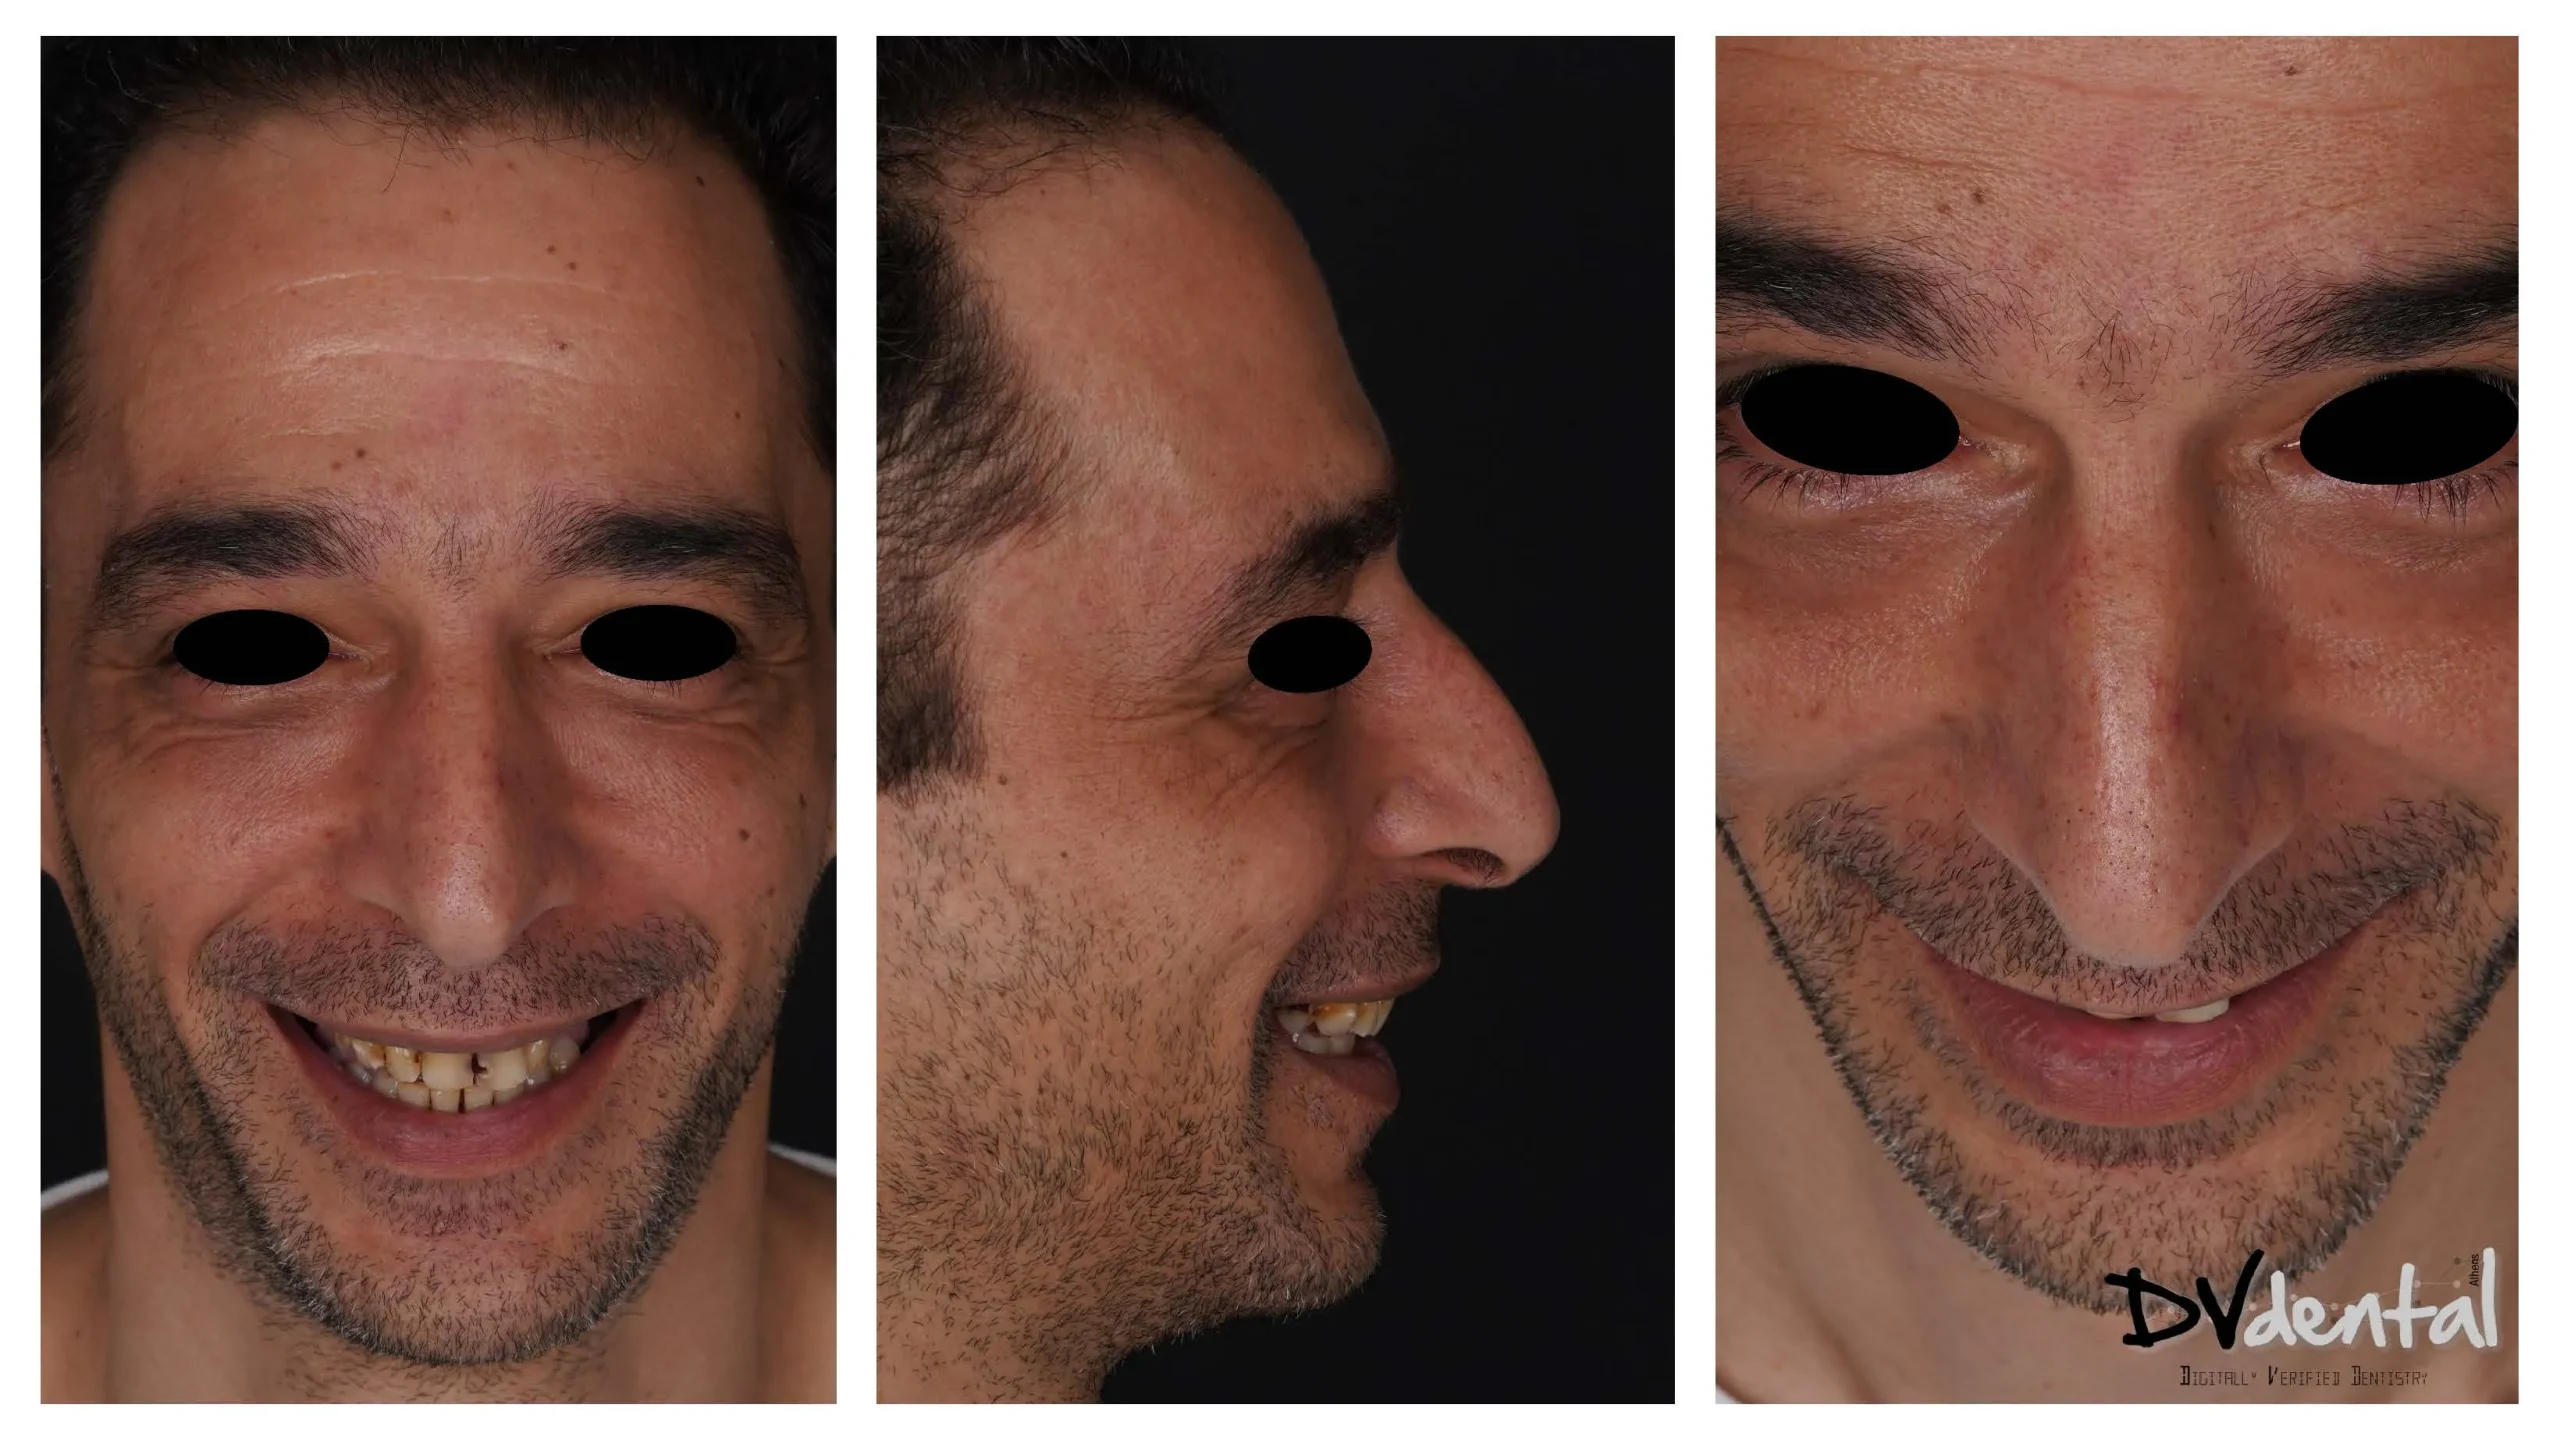
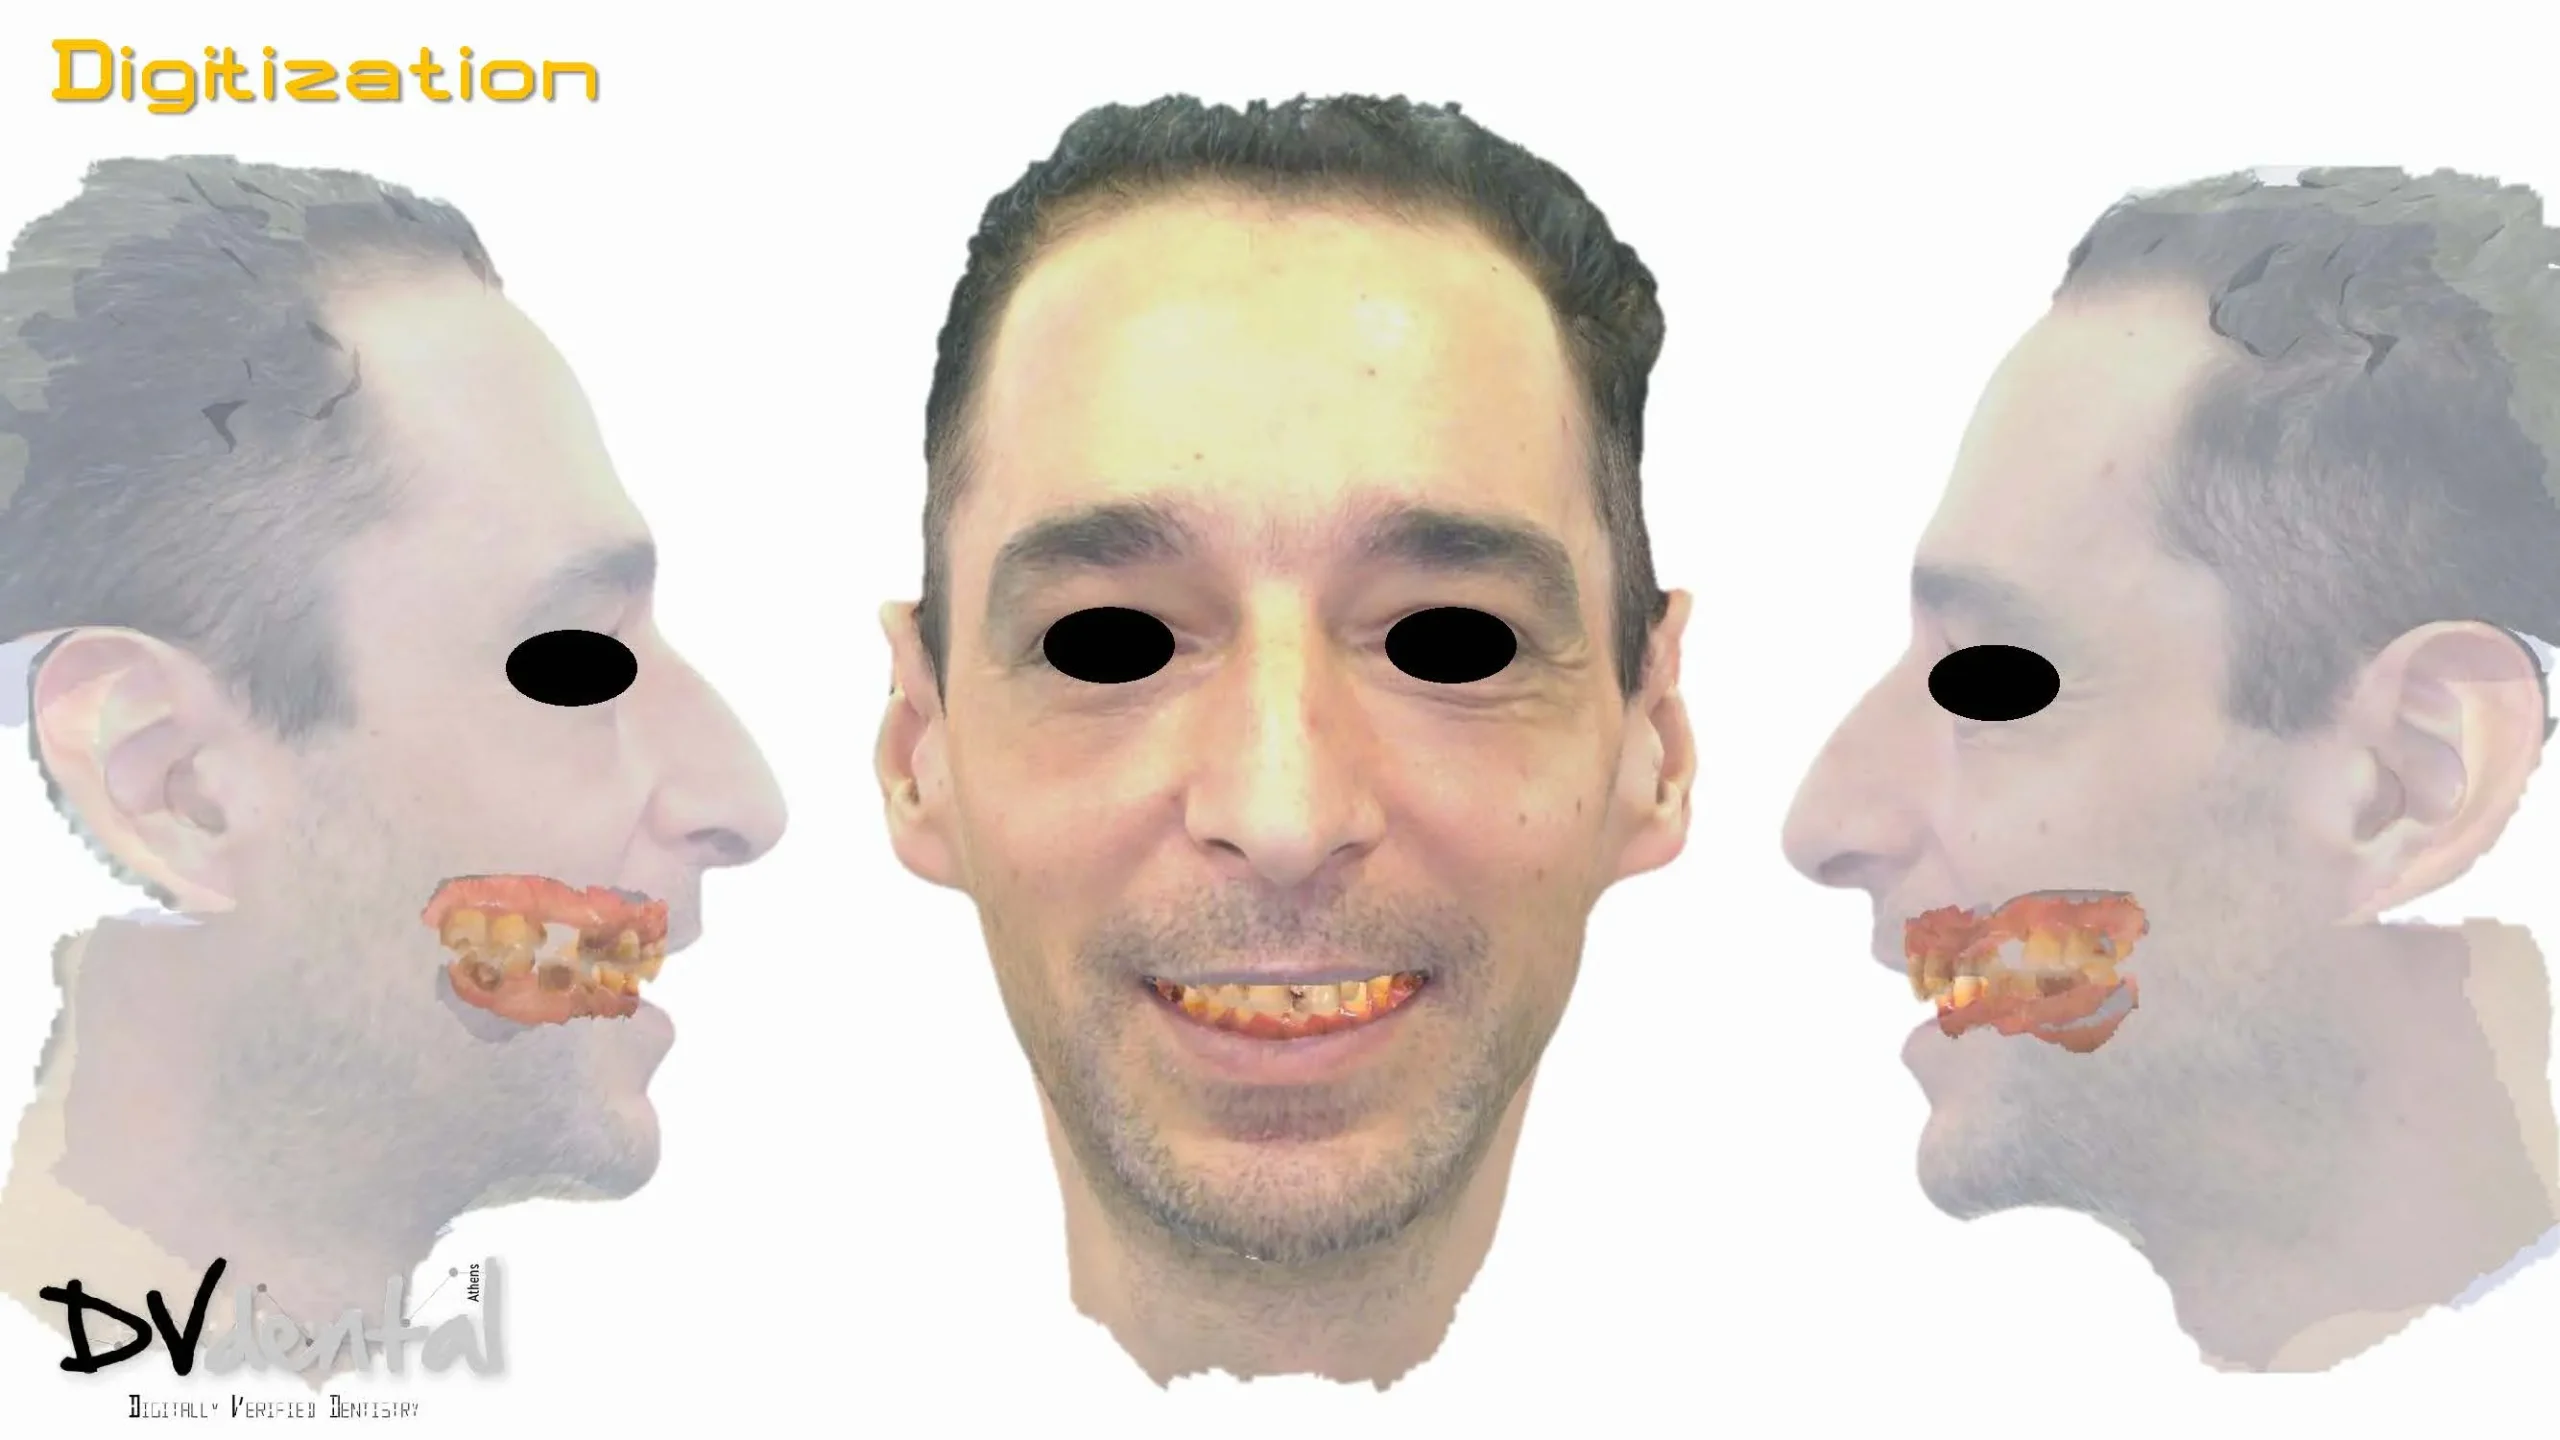
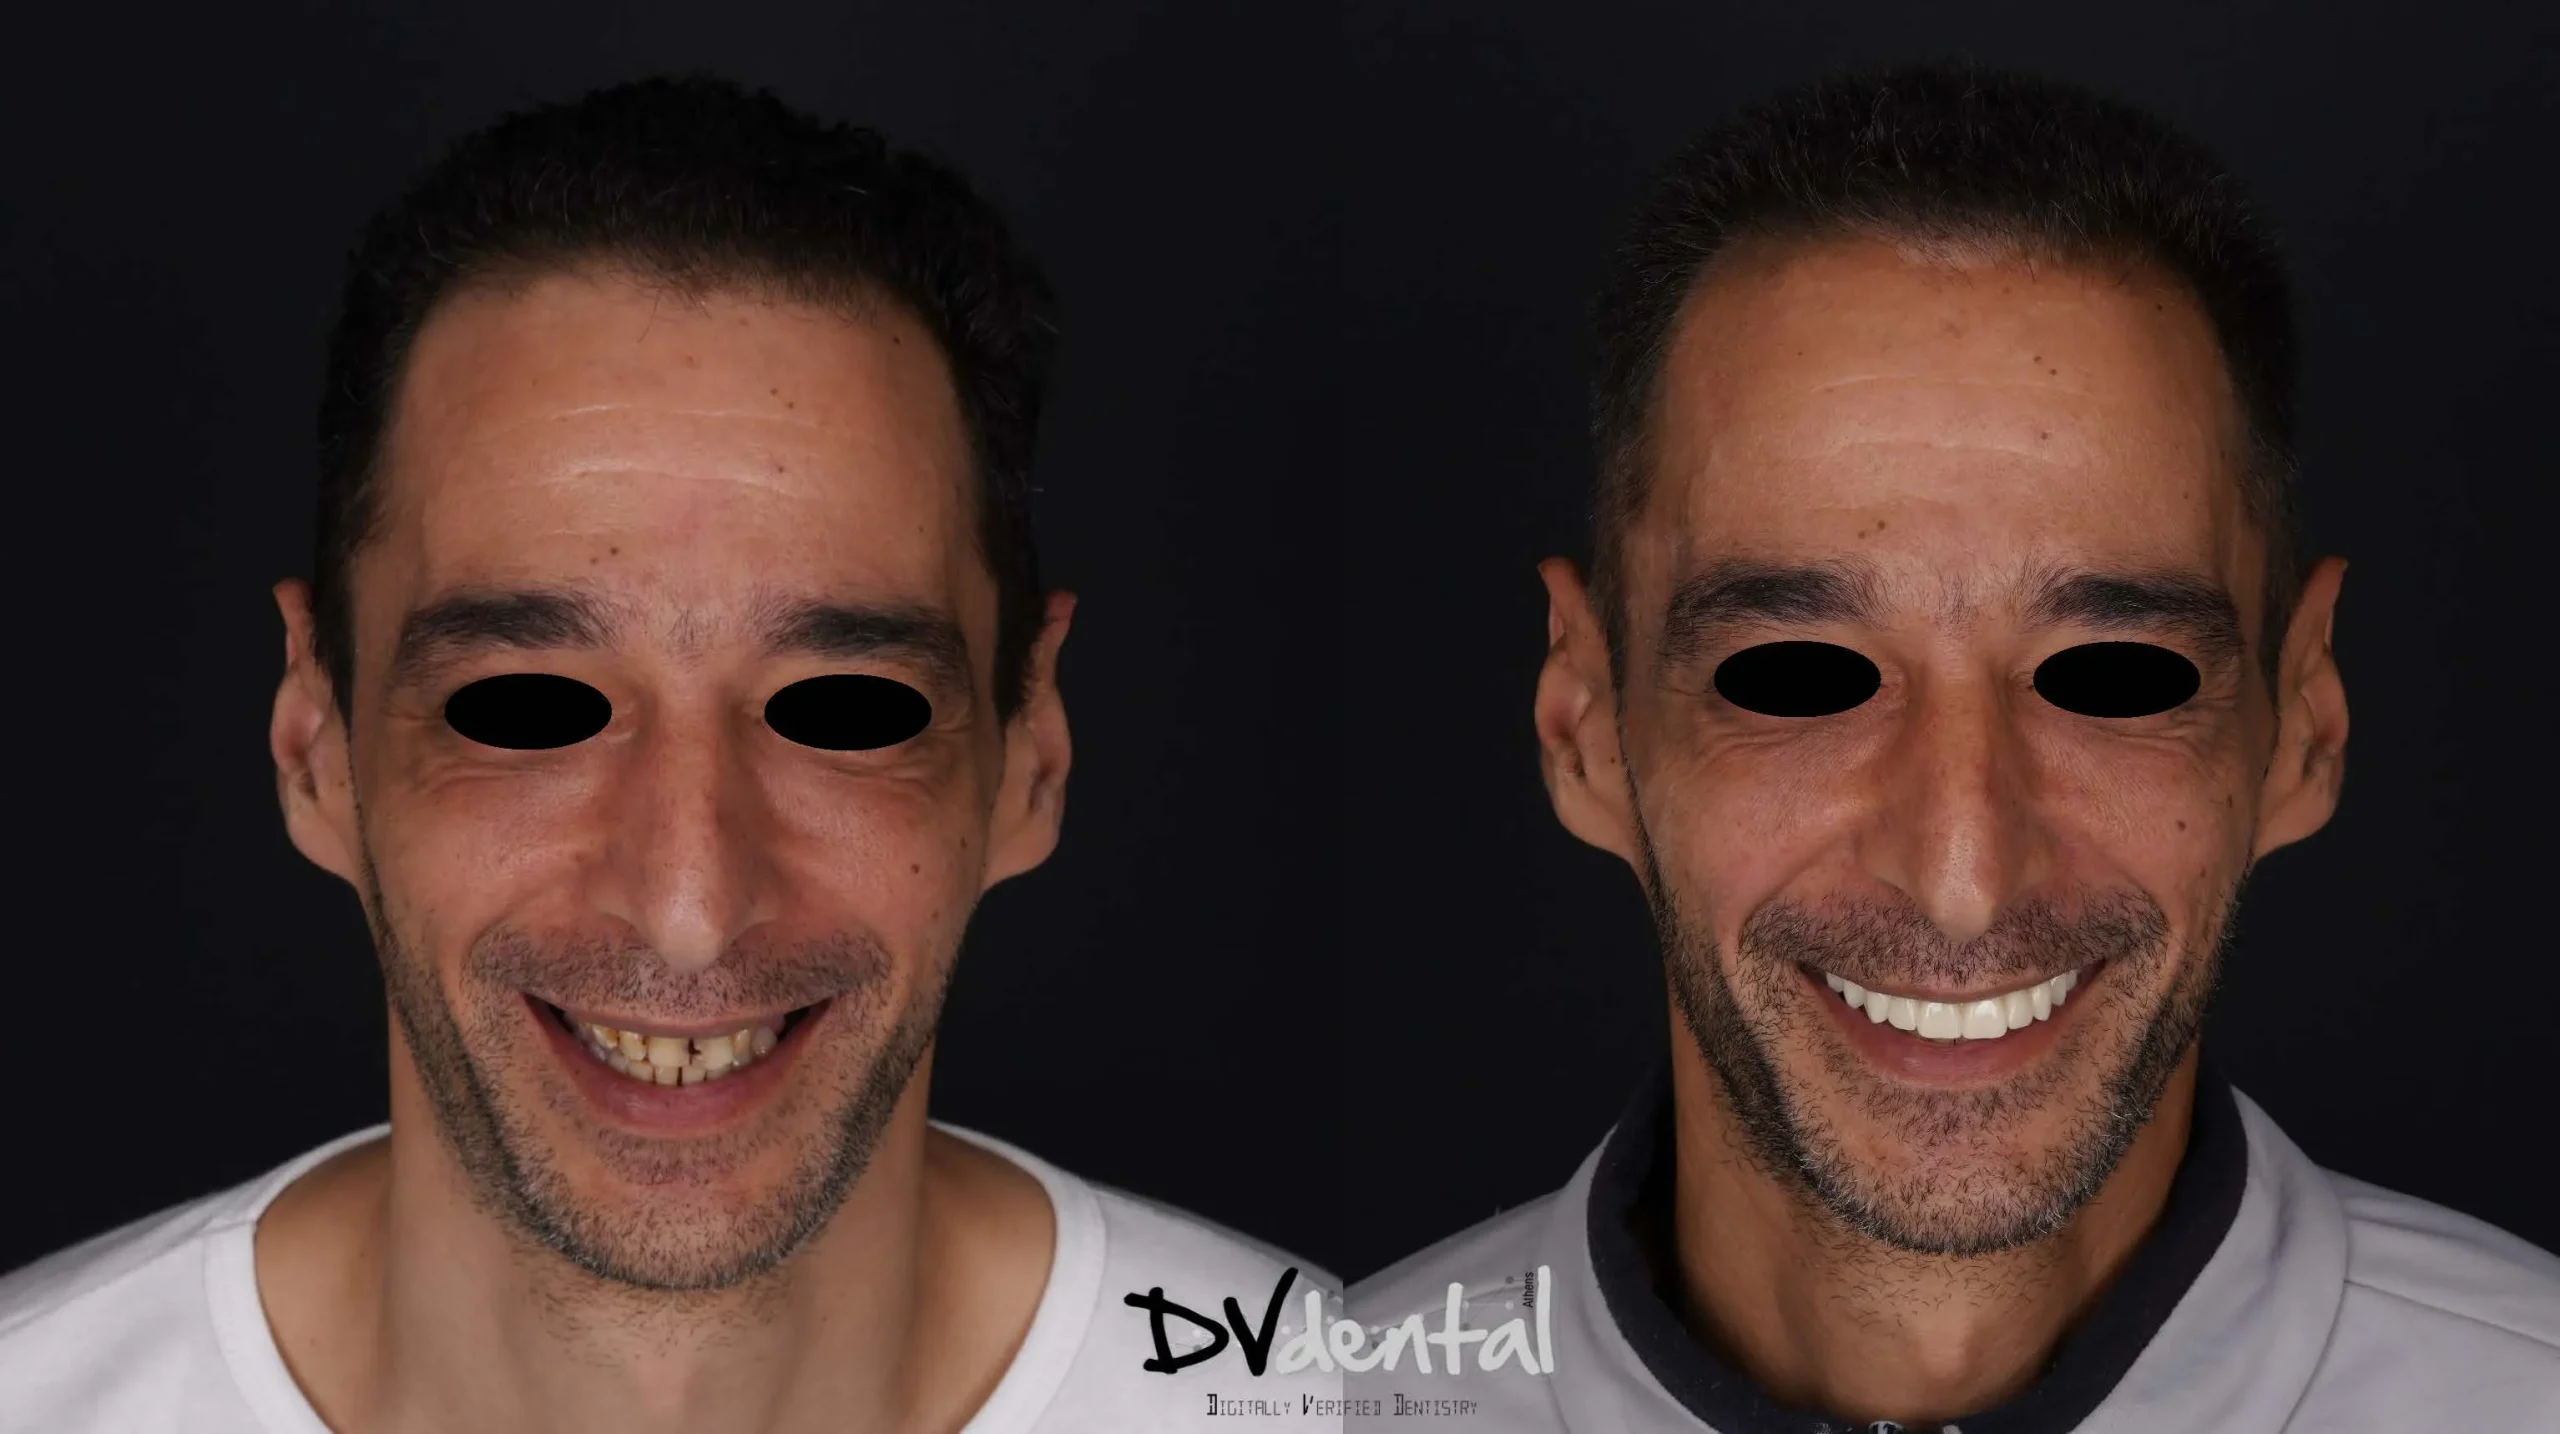
A 52-year-old female patient presented with significant decay, cysts, and fractures in several upper teeth, as revealed by X-ray examination. All available treatment options were thoroughly discussed with the patient, who chose to proceed with implant therapy for a more favorable long-term prognosis.
Treatment Planning and Data Collection
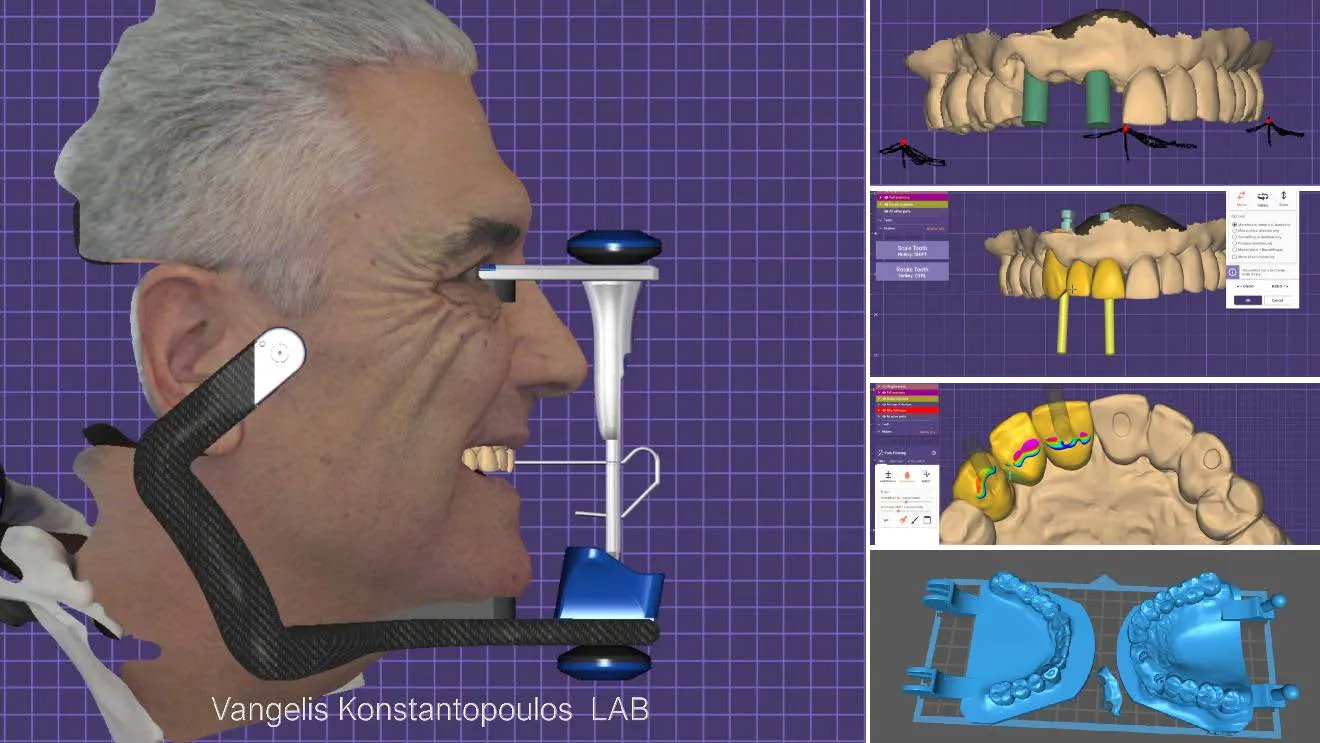
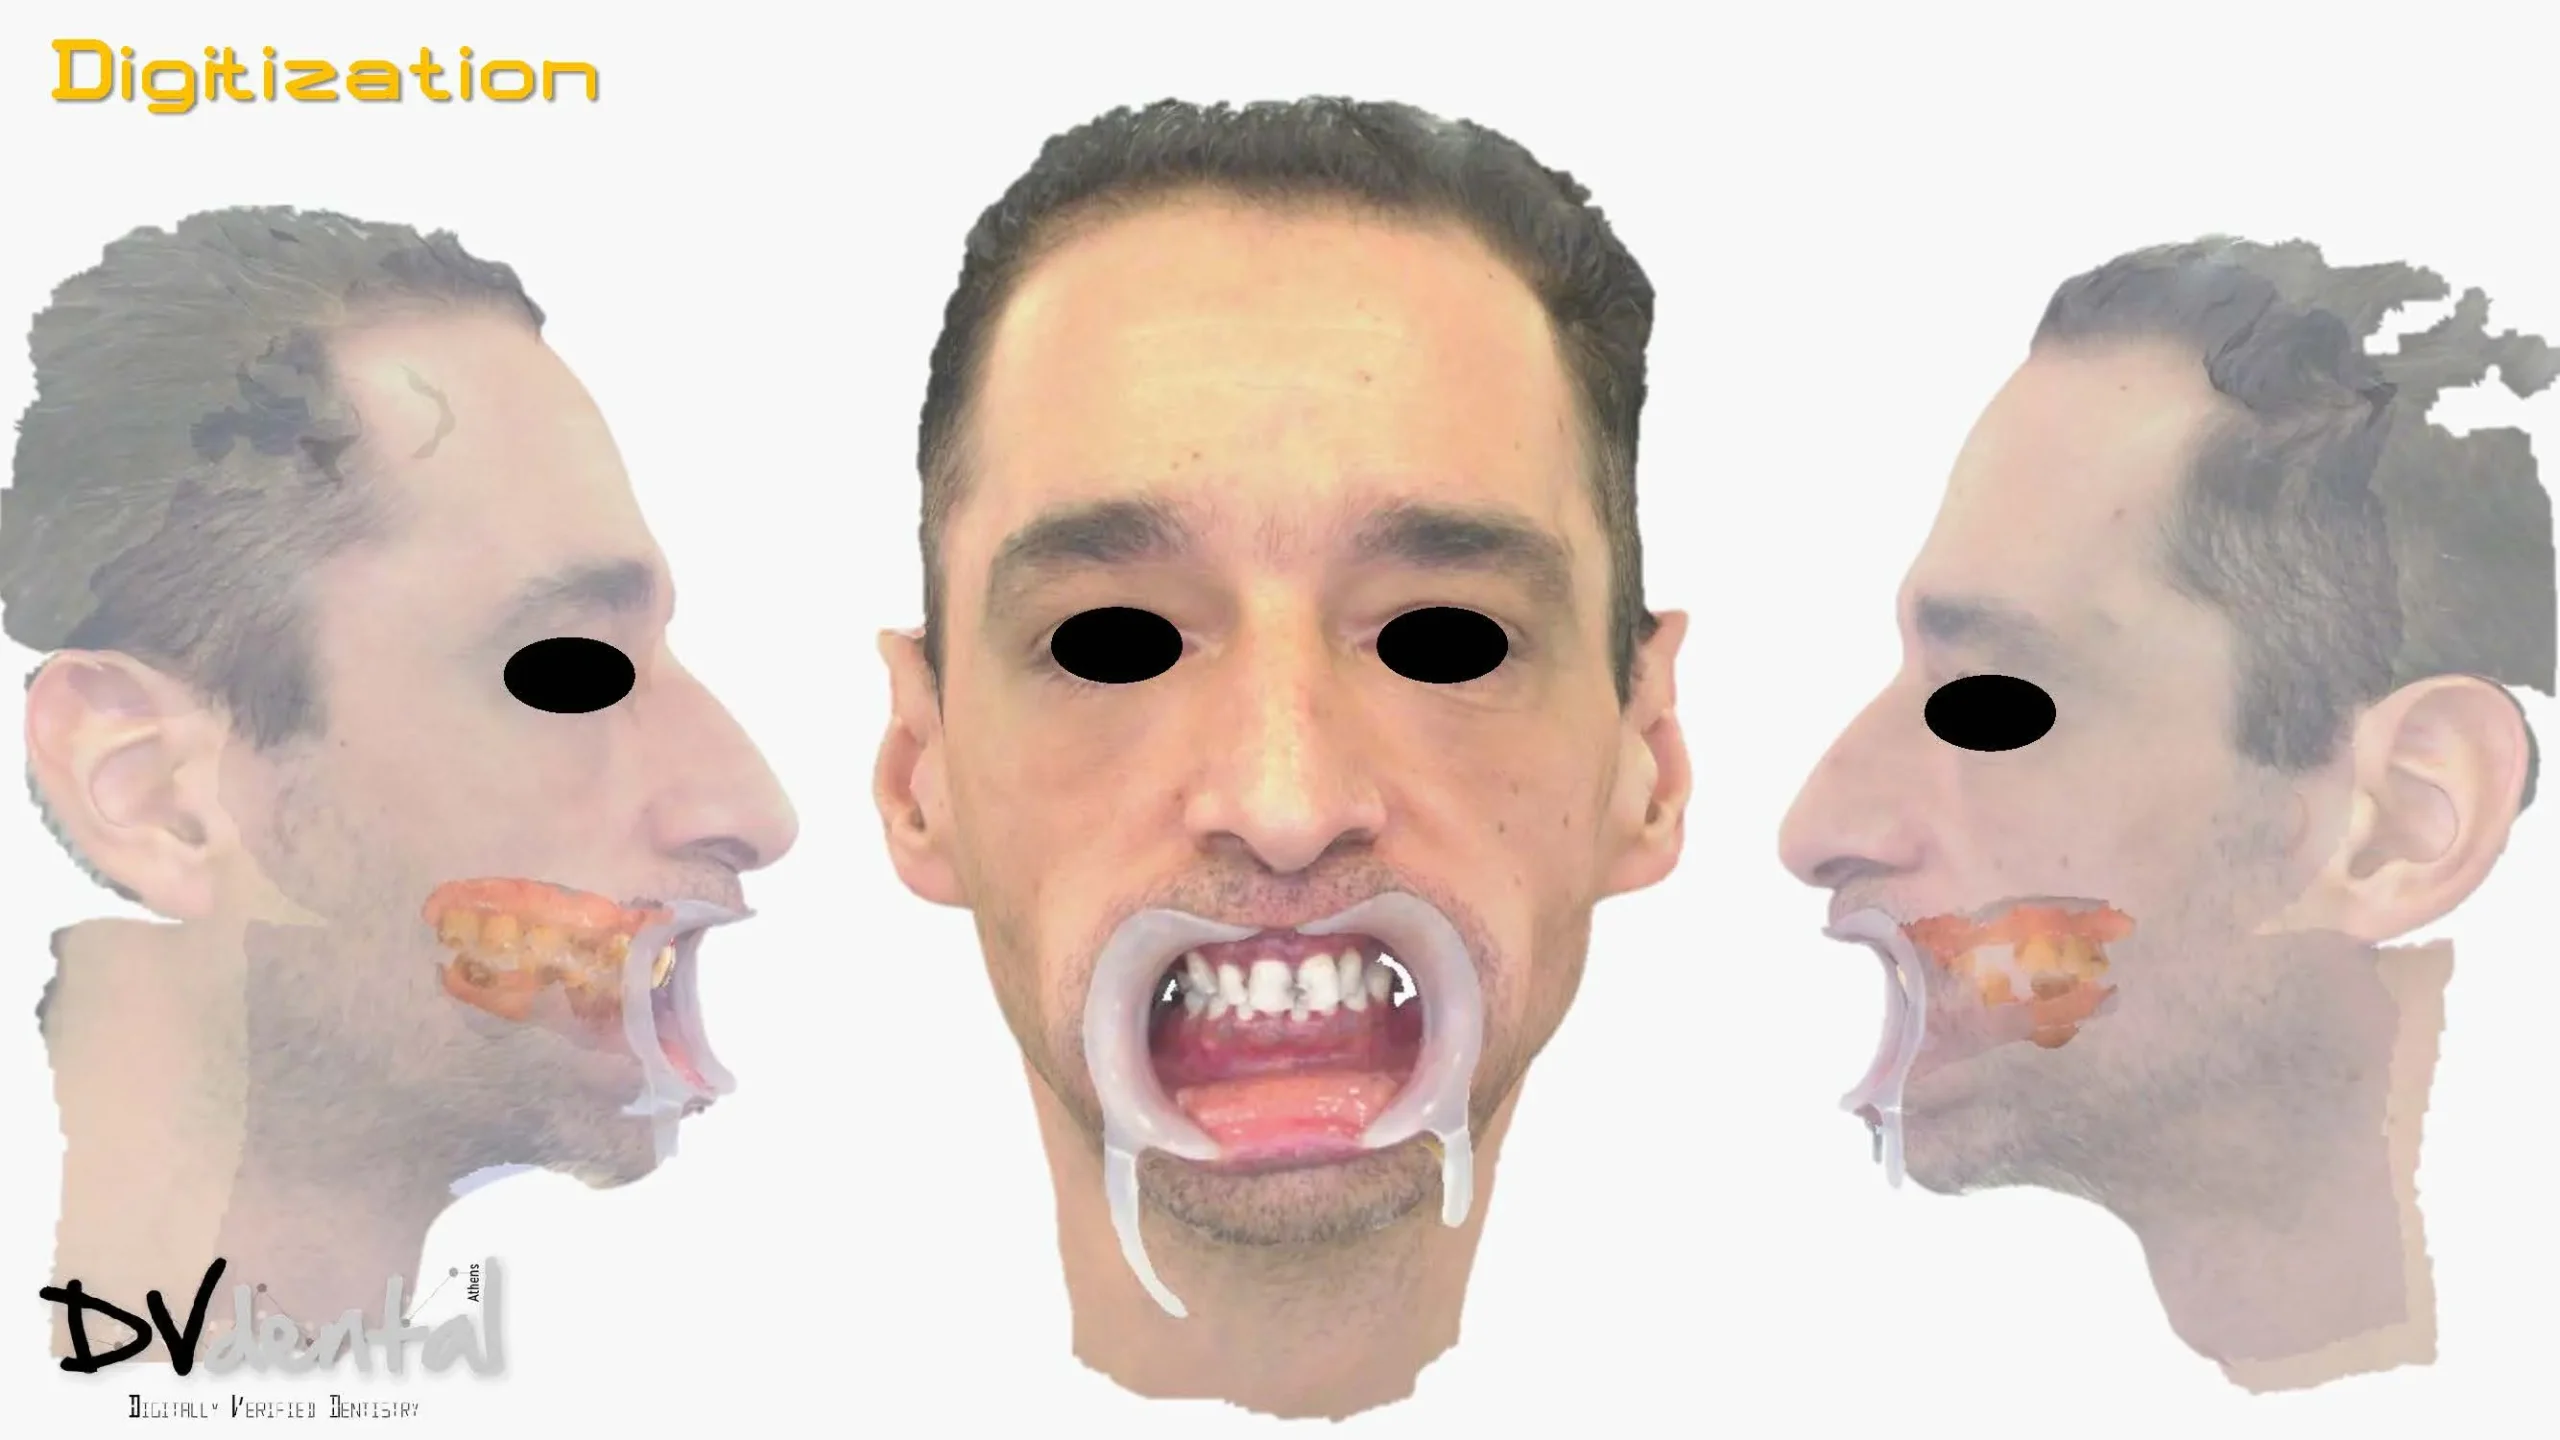
The dentist obtained the necessary digital records, including photos, face scans, intraoral impressions, and dynamic bite data, using MetiSmile and Aoralscan Elite to support precise implant planning and aesthetic restorations. Initially, a 2D smile design simulation was created, tailored to the patient’s specific needs. Once the proposed set-up was approved, the dentist began capturing the necessary oral and facial data. The Aoralscan Elite was used to scan both the upper and lower jaws, followed by Metismile for facial data acquisition. By registering and logging into the Shining 3D platform, the dentist gains seamless access to all the Shining 3D software. The intraoral scan data is automatically imported when scanning the patient’s face with the same account. Additionally, CT data can be easily integrated and aligned within the facial scanner software, creating a comprehensive dataset that includes maxillary, mandibular, facial, and CT information to guide the next design stage. Afterward, the dentist proceeded with a 3D facially driven prosthetic design. Implant placement was then digitally planned using the Nemoscan software.
Implant Planning and Surgery
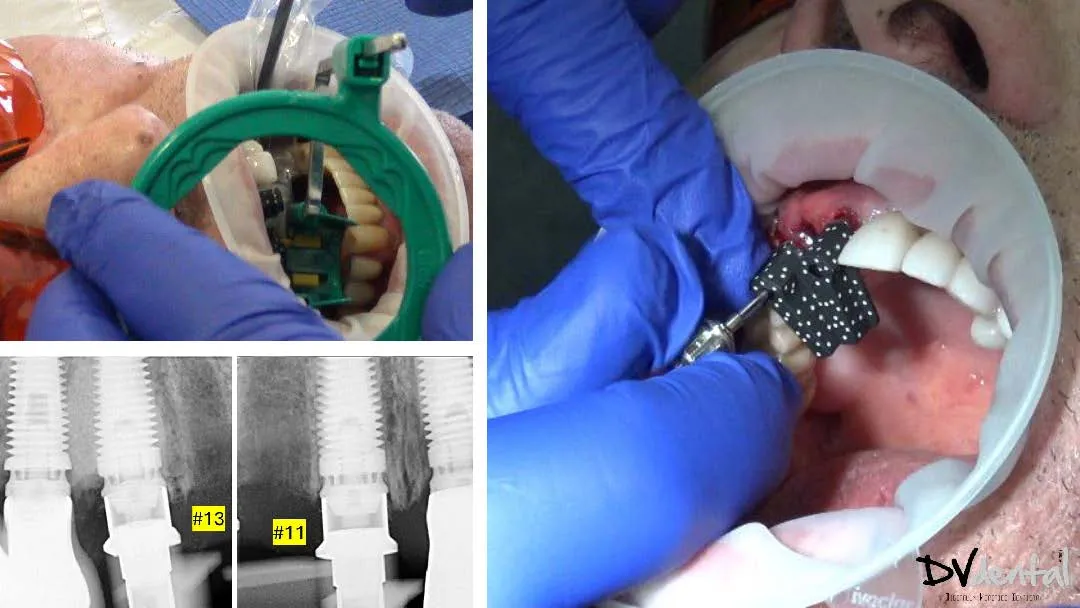
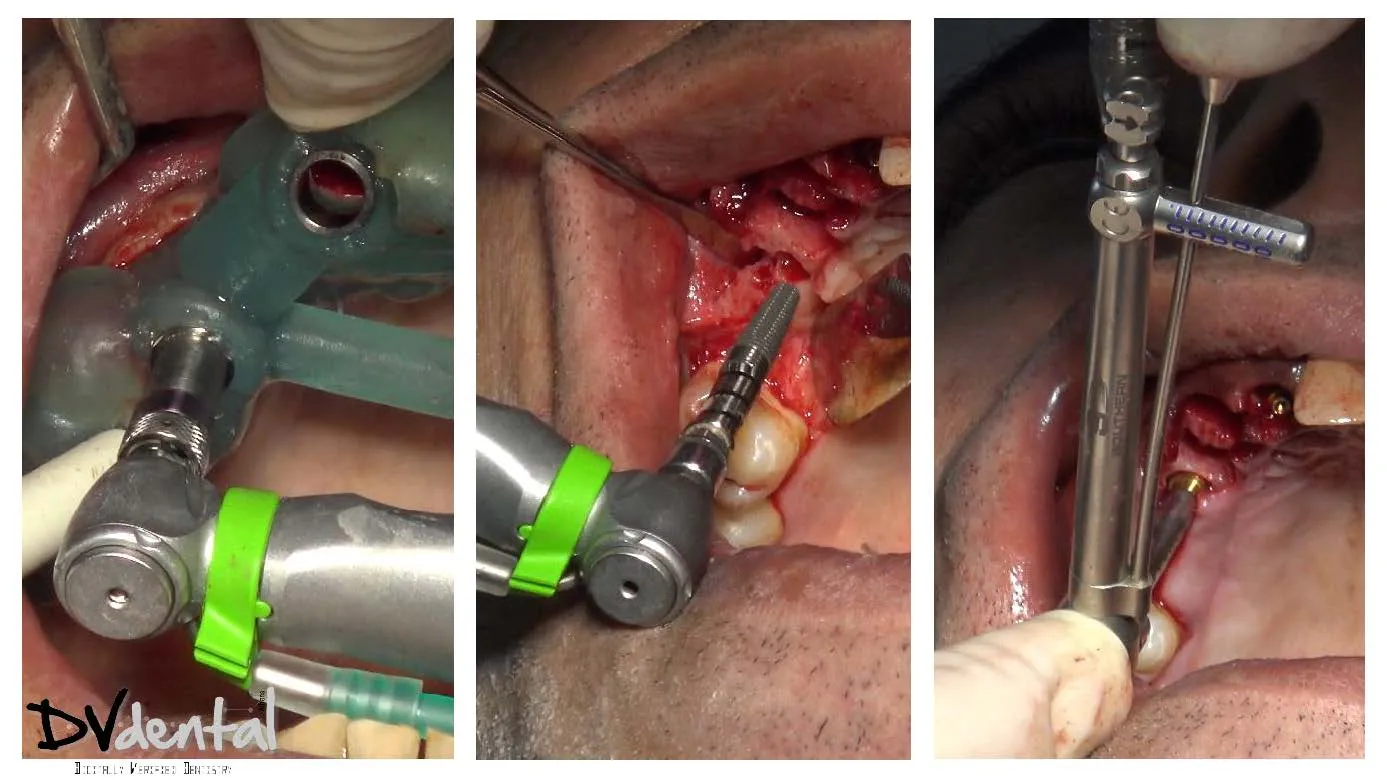
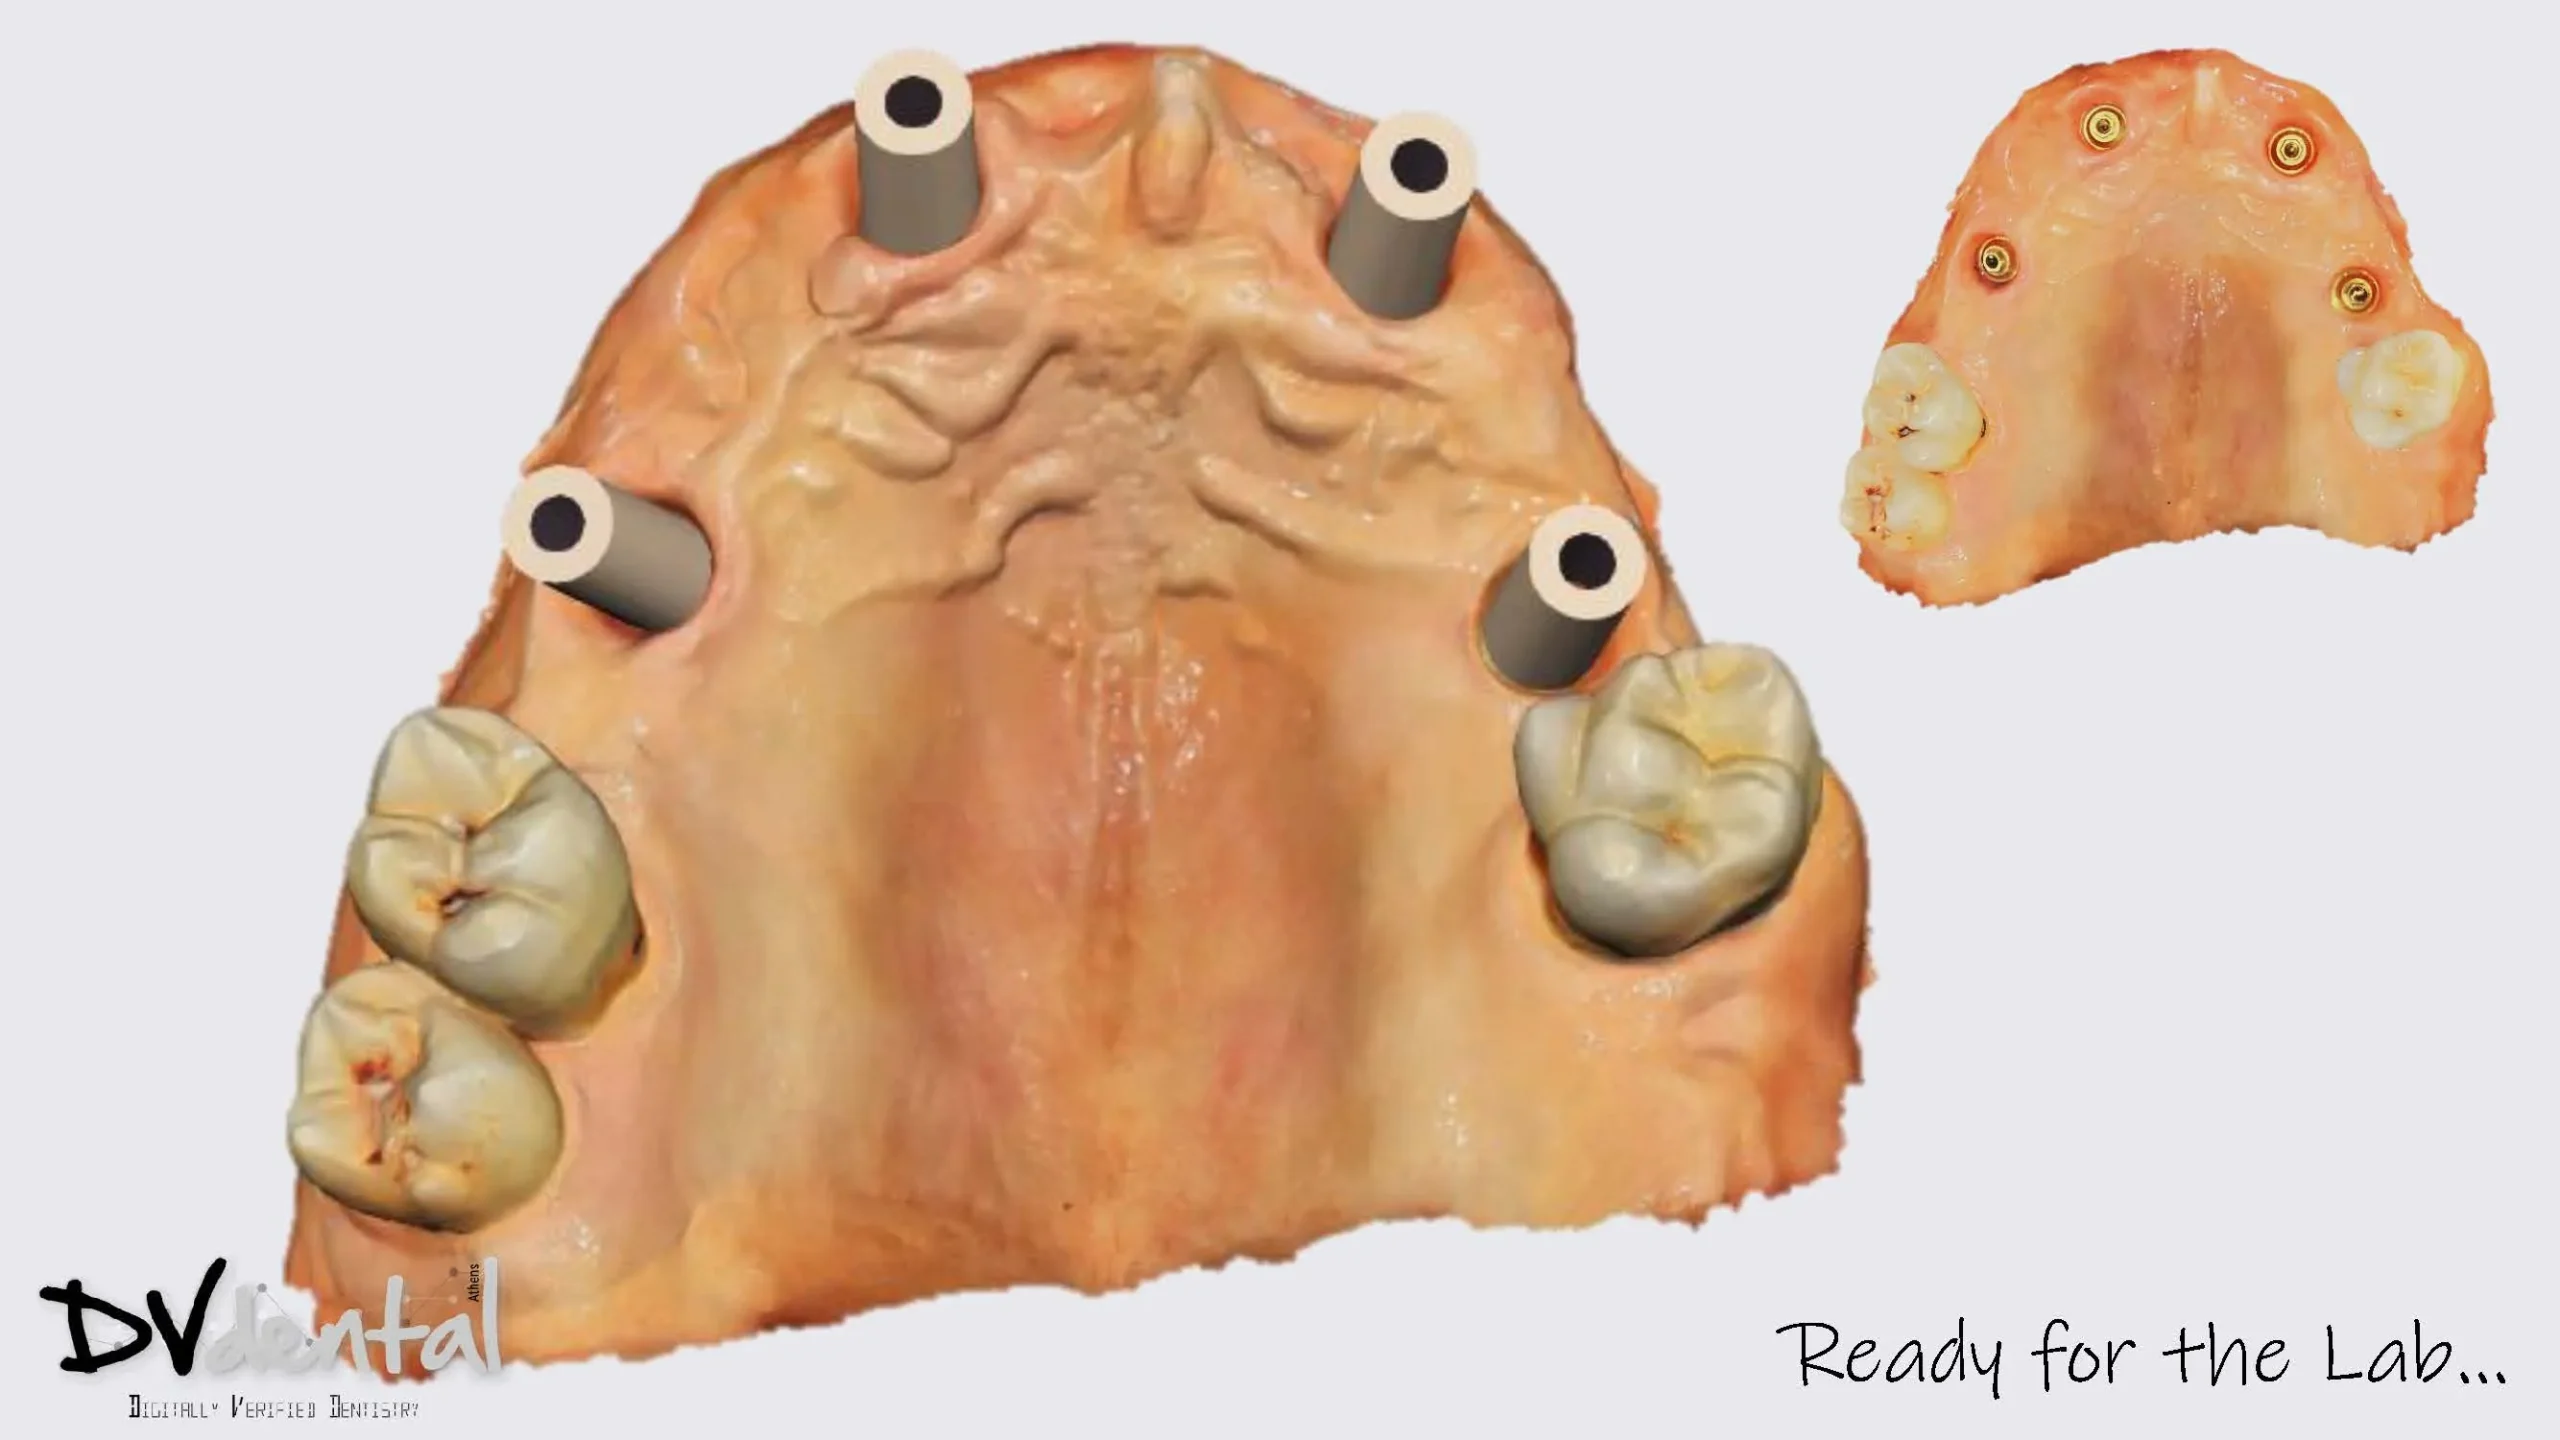
Due to inadequate retention of the tissue-supported surgical guide, teeth #15, #17, and #25 were retained to support a tooth-supported surgical guide, while all other teeth have been extracted. The areas around teeth #16, #14, #24, and #26 require internal sinus lifts due to insufficient bone thickness. Additionally, by using facial data as a reference, the dentist can accurately determine the optimal angle and direction for implant placement. Following the implant planning process, a surgical guide was generated and 3D printed for use during the implant surgical procedure.
Extract the residual roots and teeth as indicated in the preoperative plan, then perform step-by-step osteotomy preparation using the surgical guide to ensure precise implant placement.
Scanning After Surgery and Design
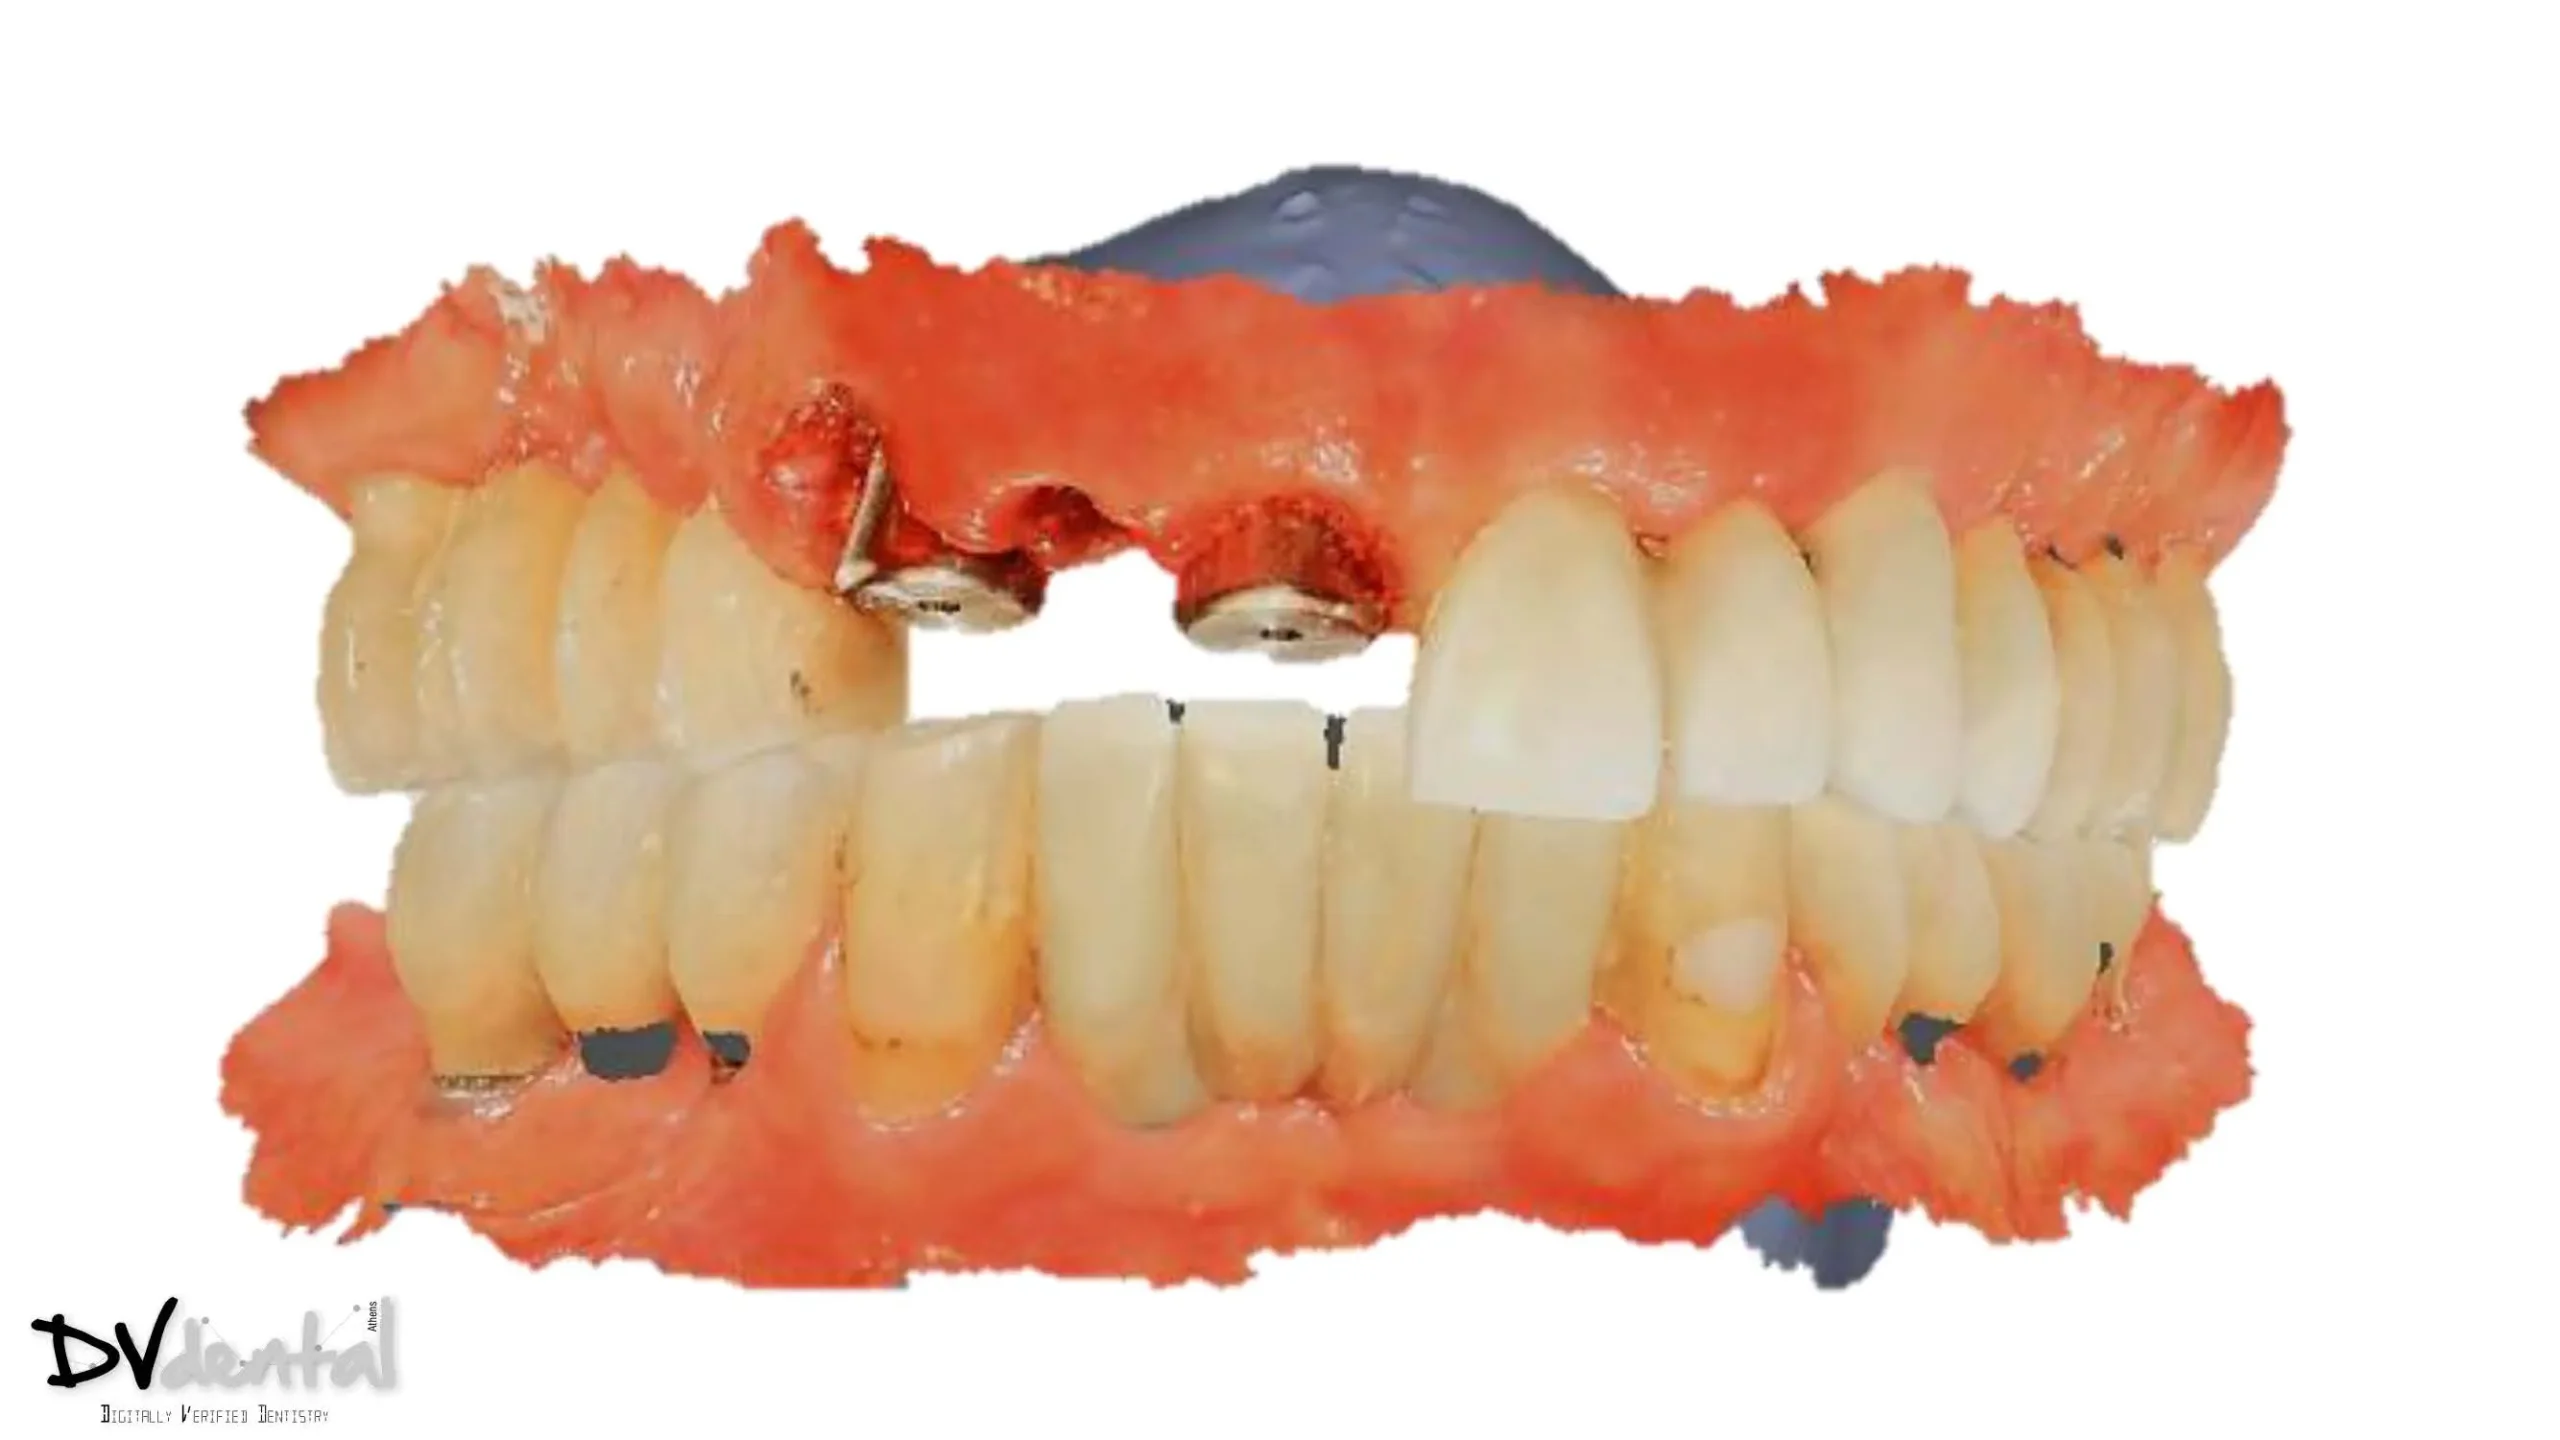
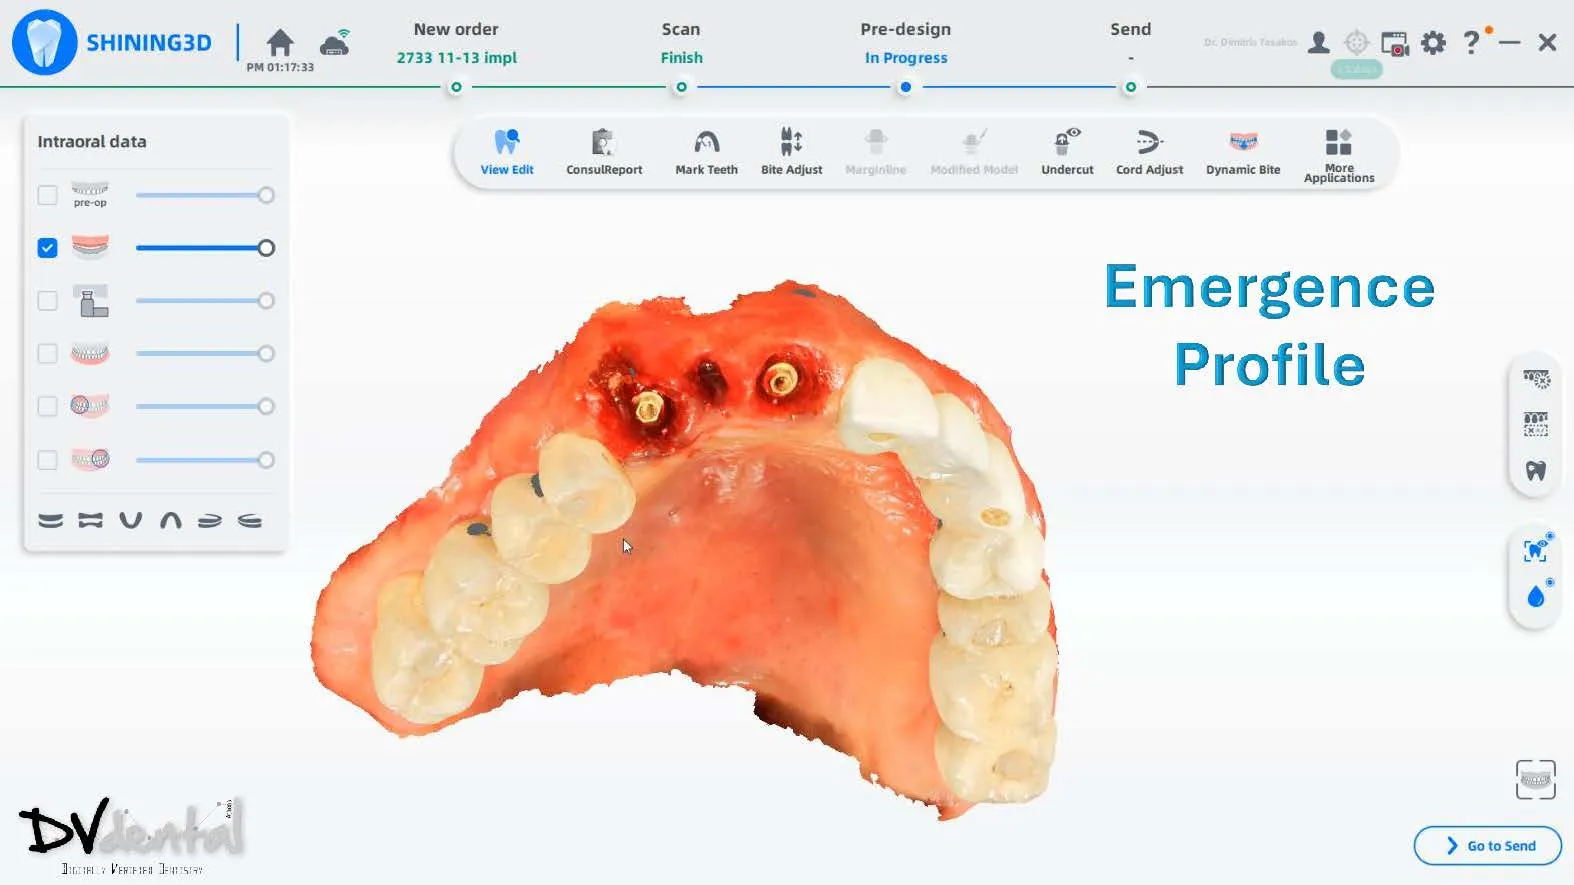
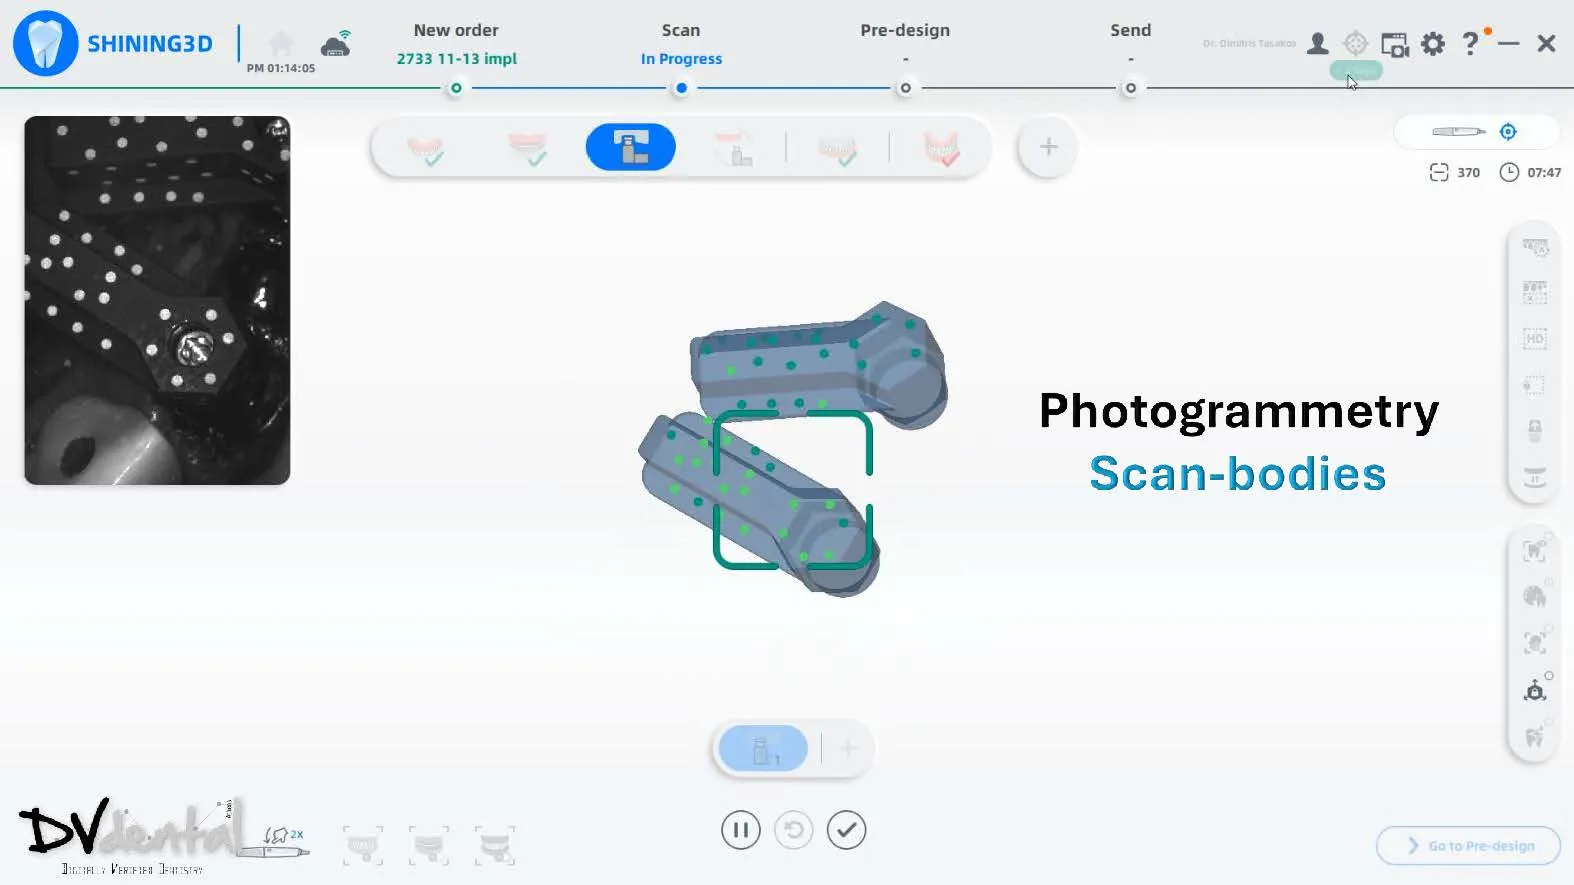
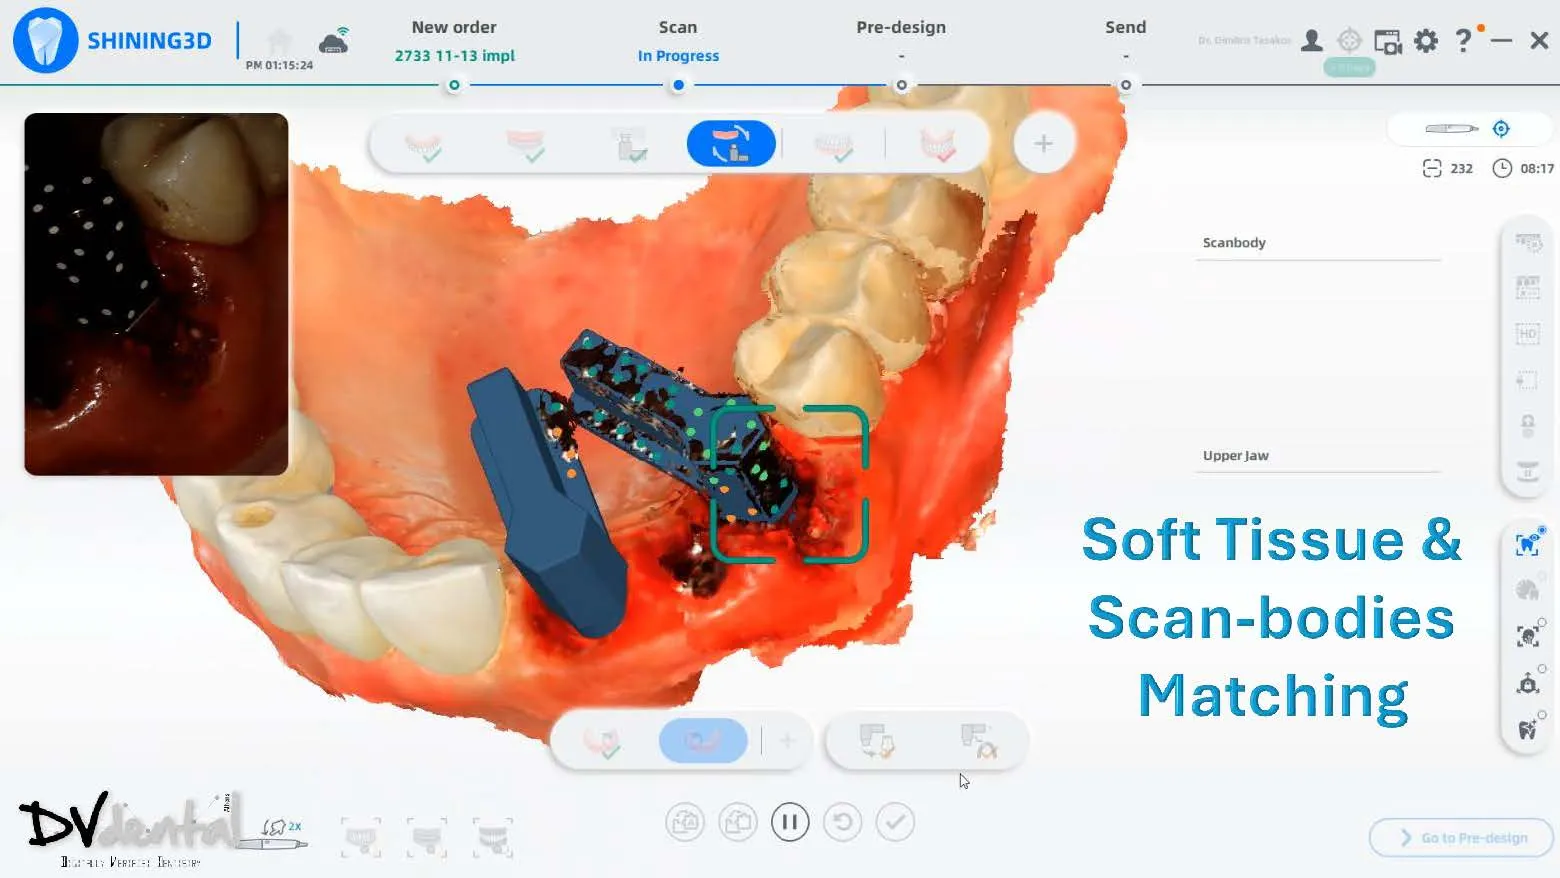
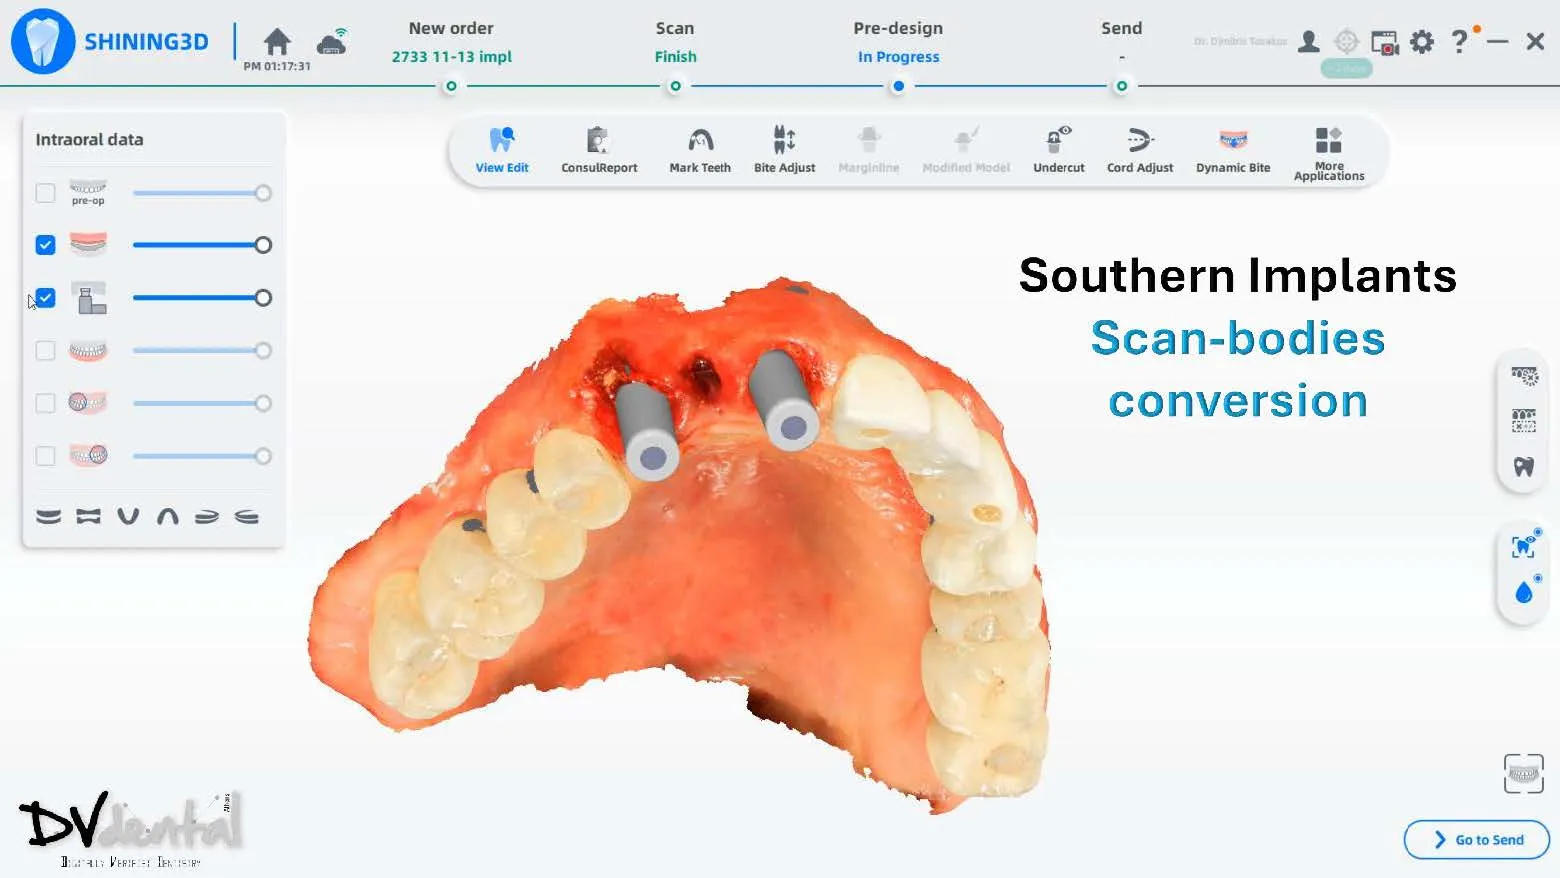
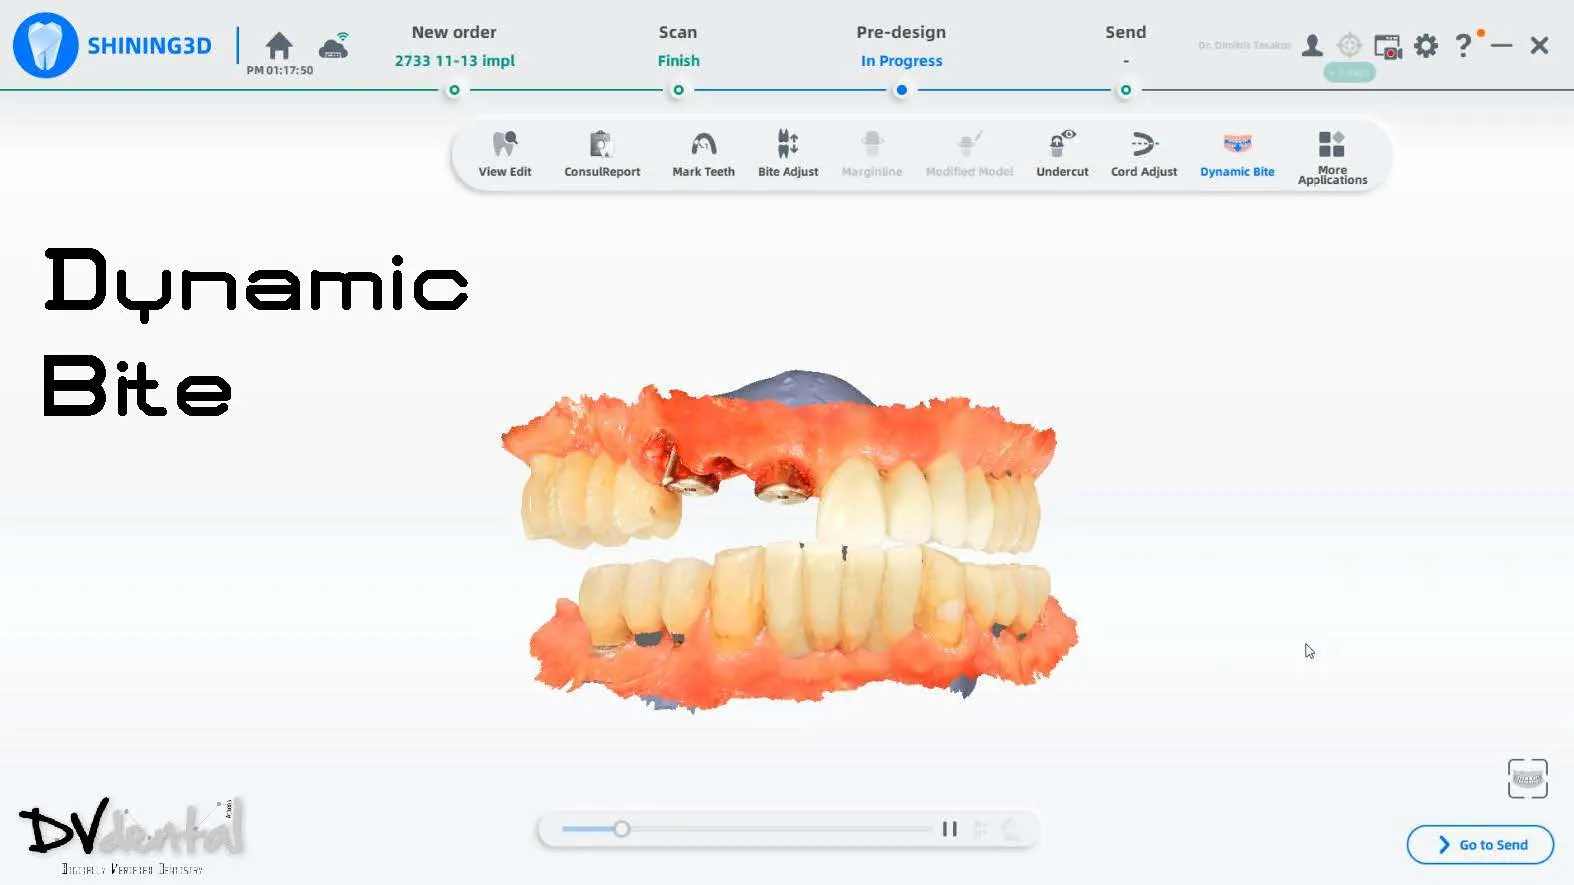
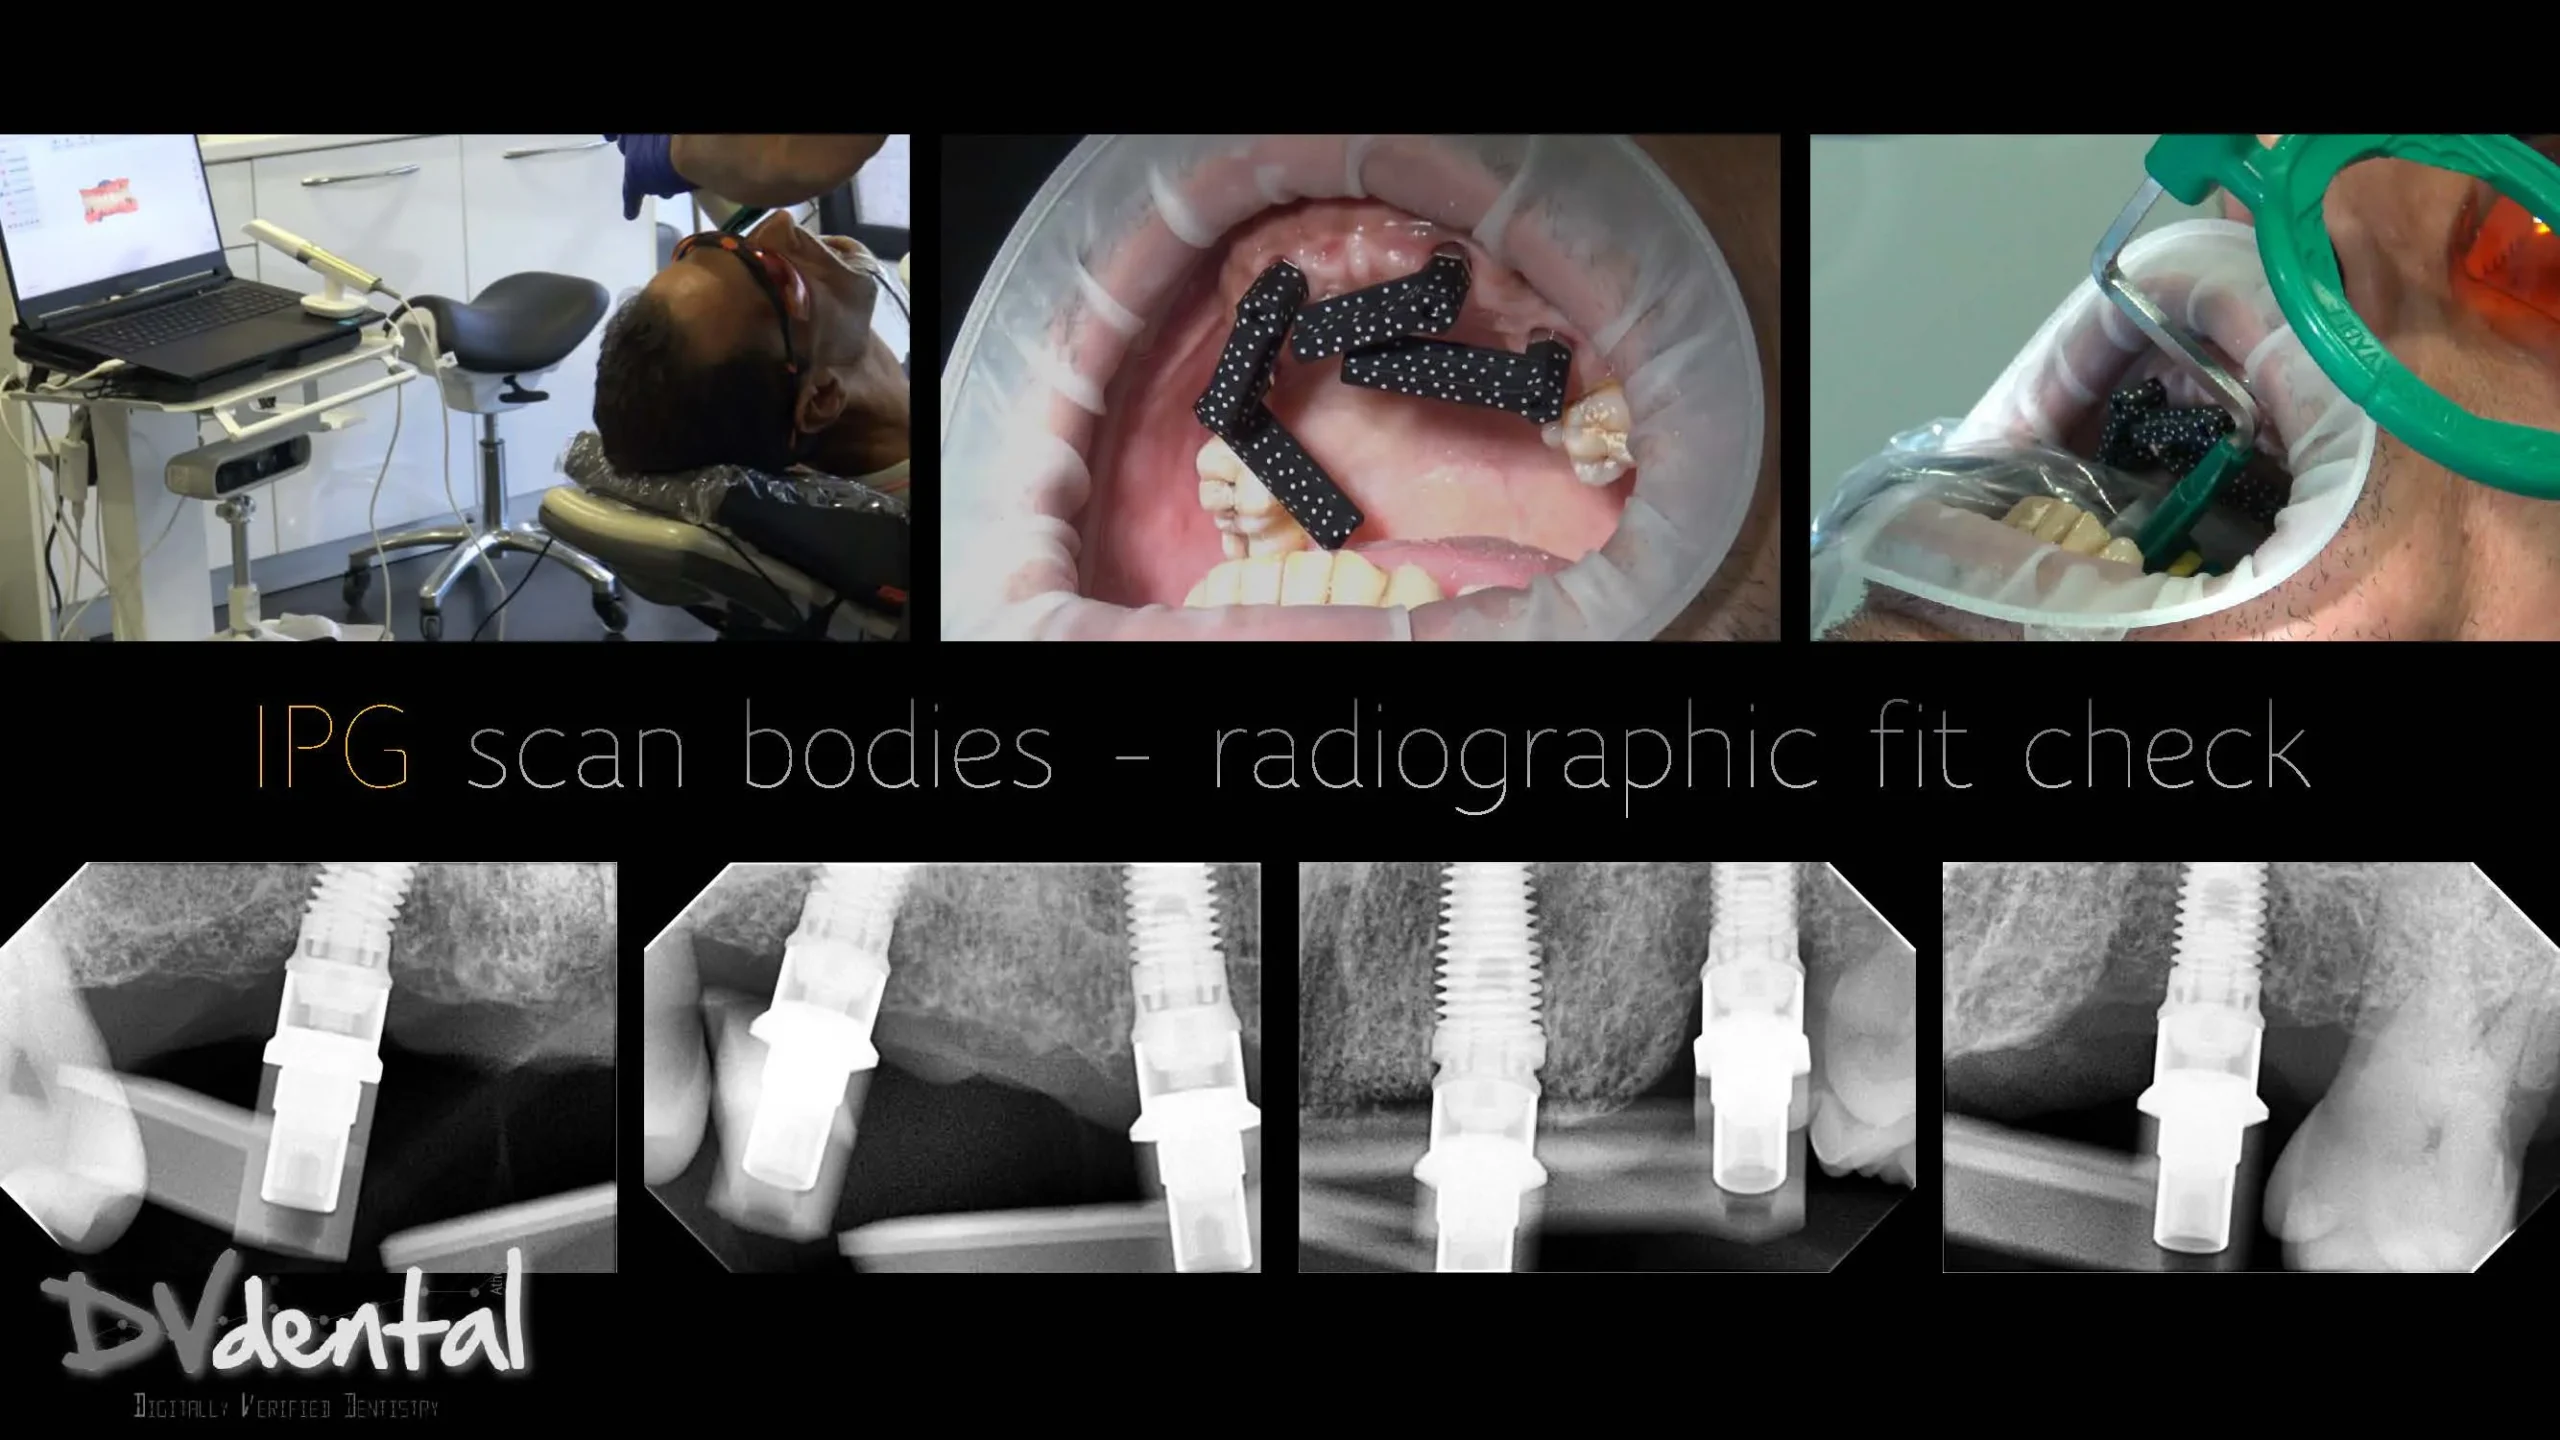
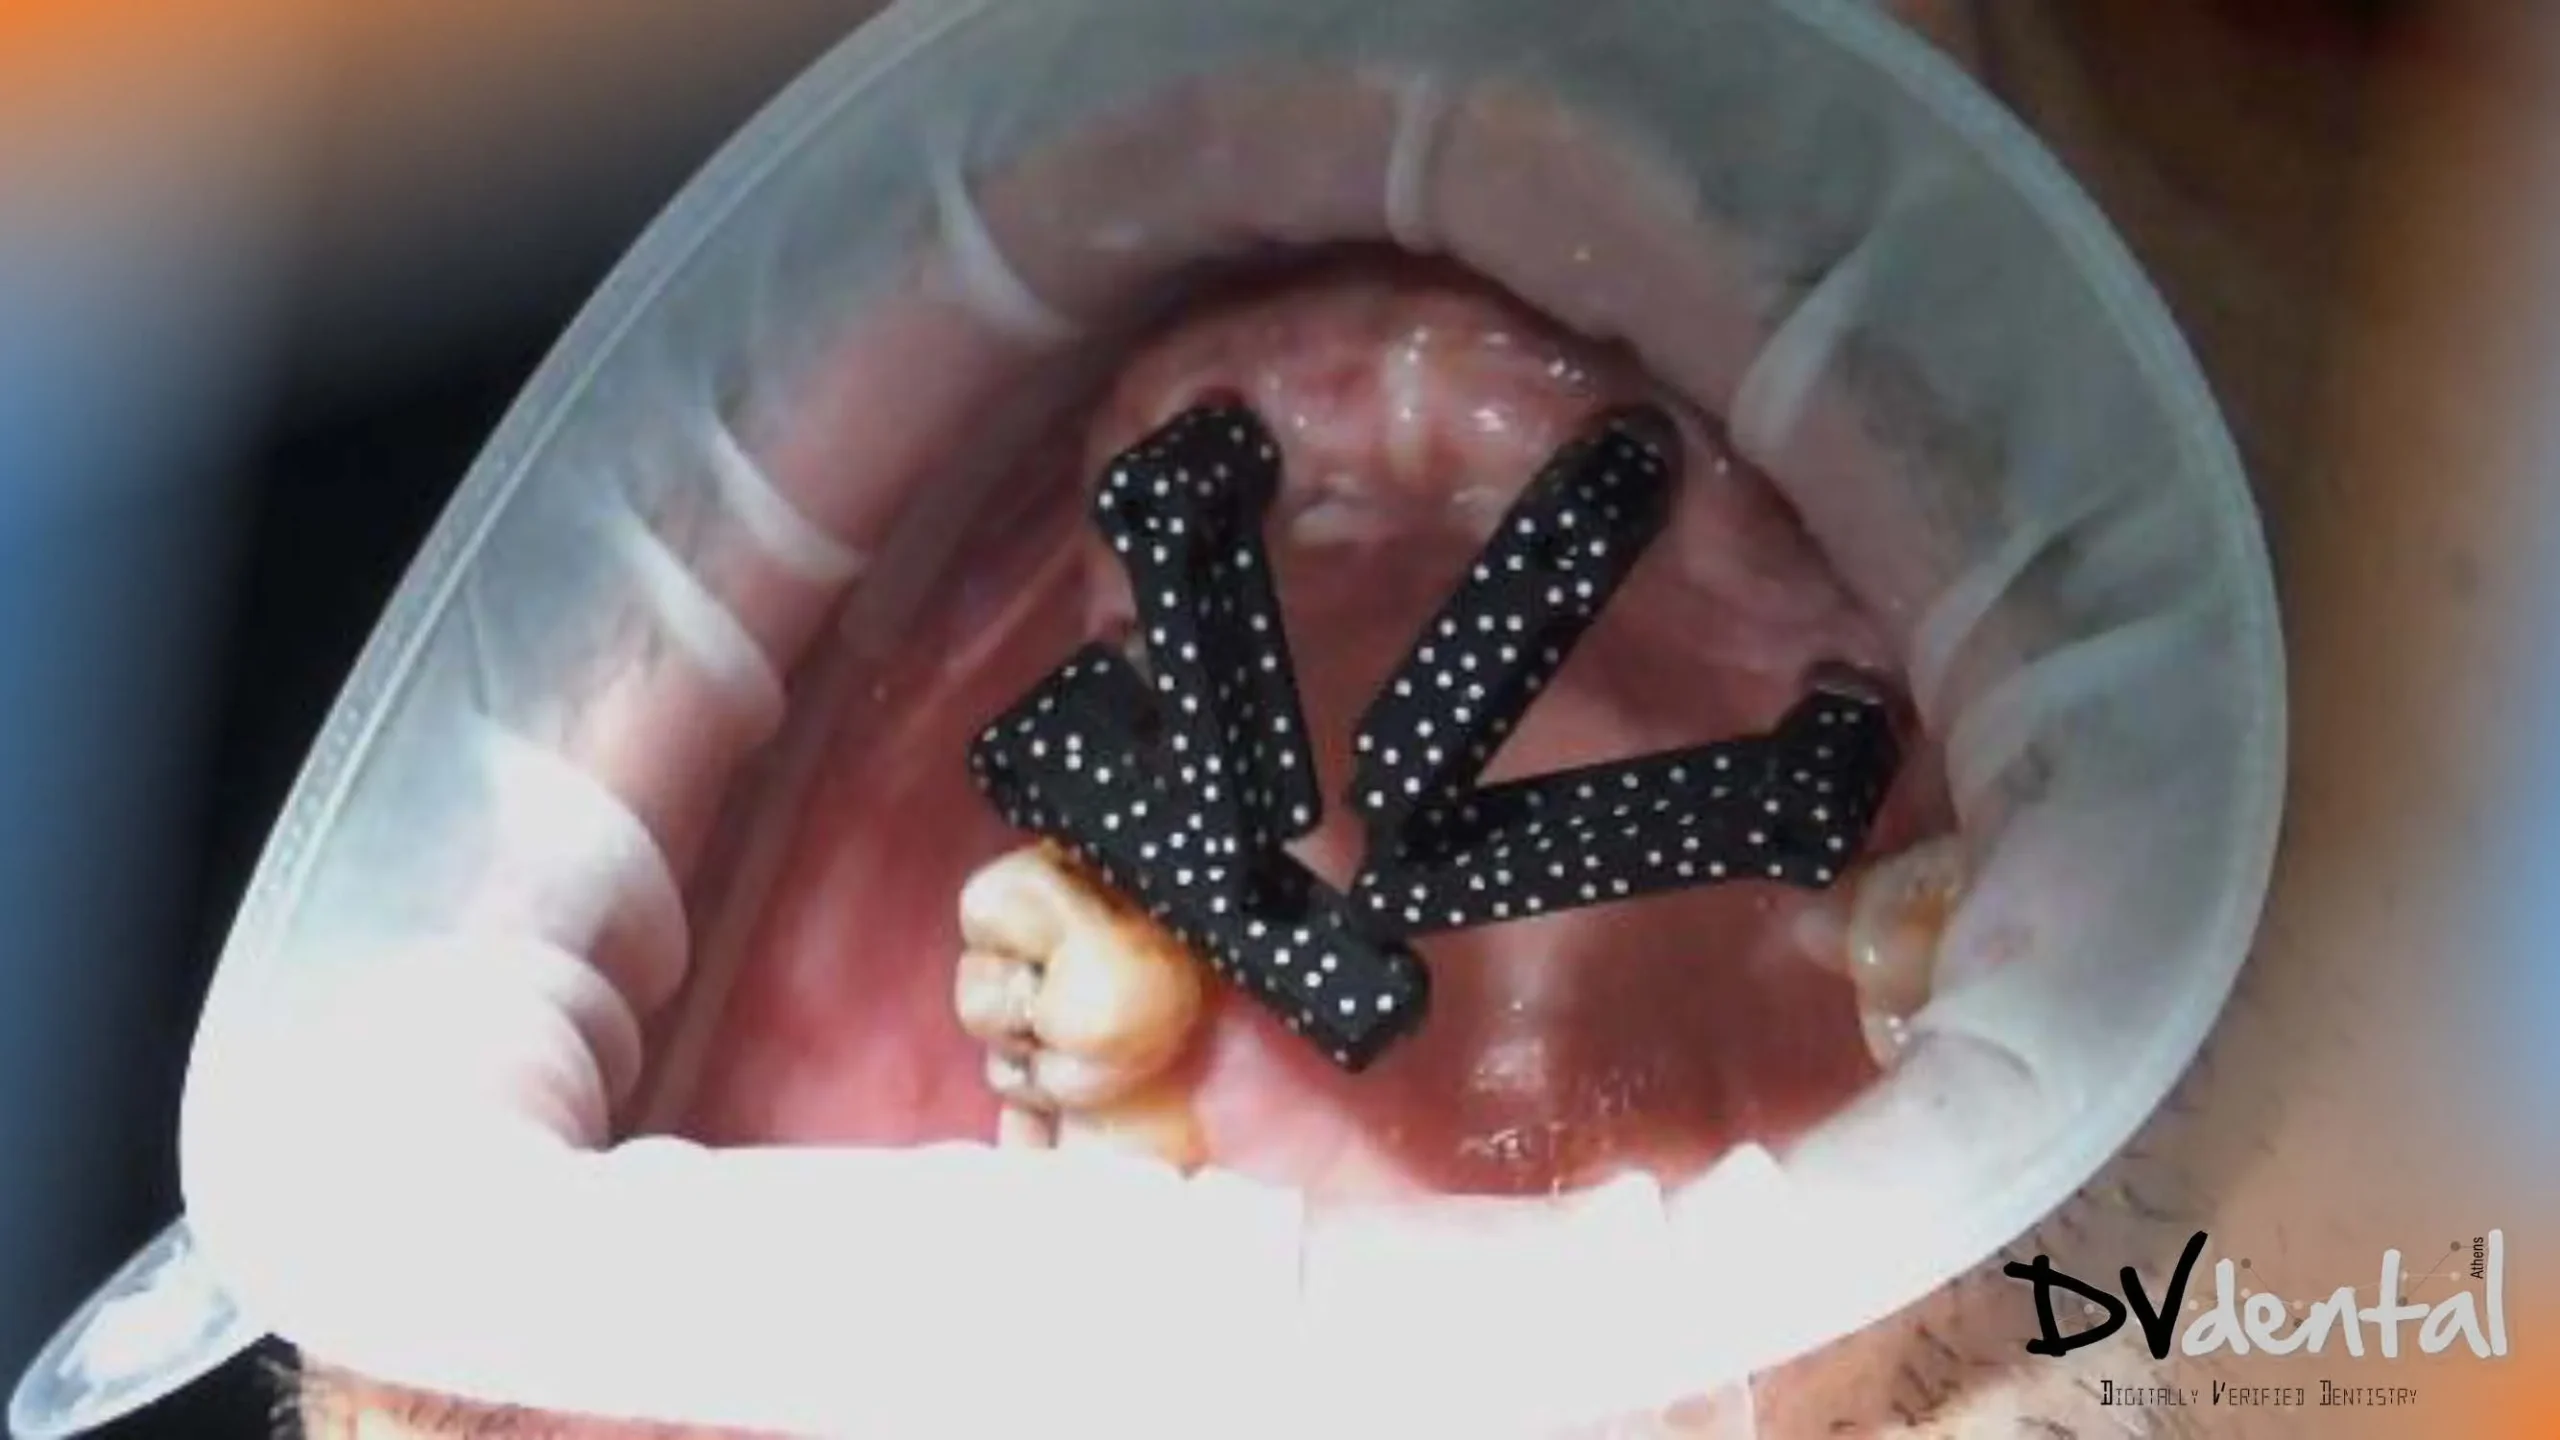
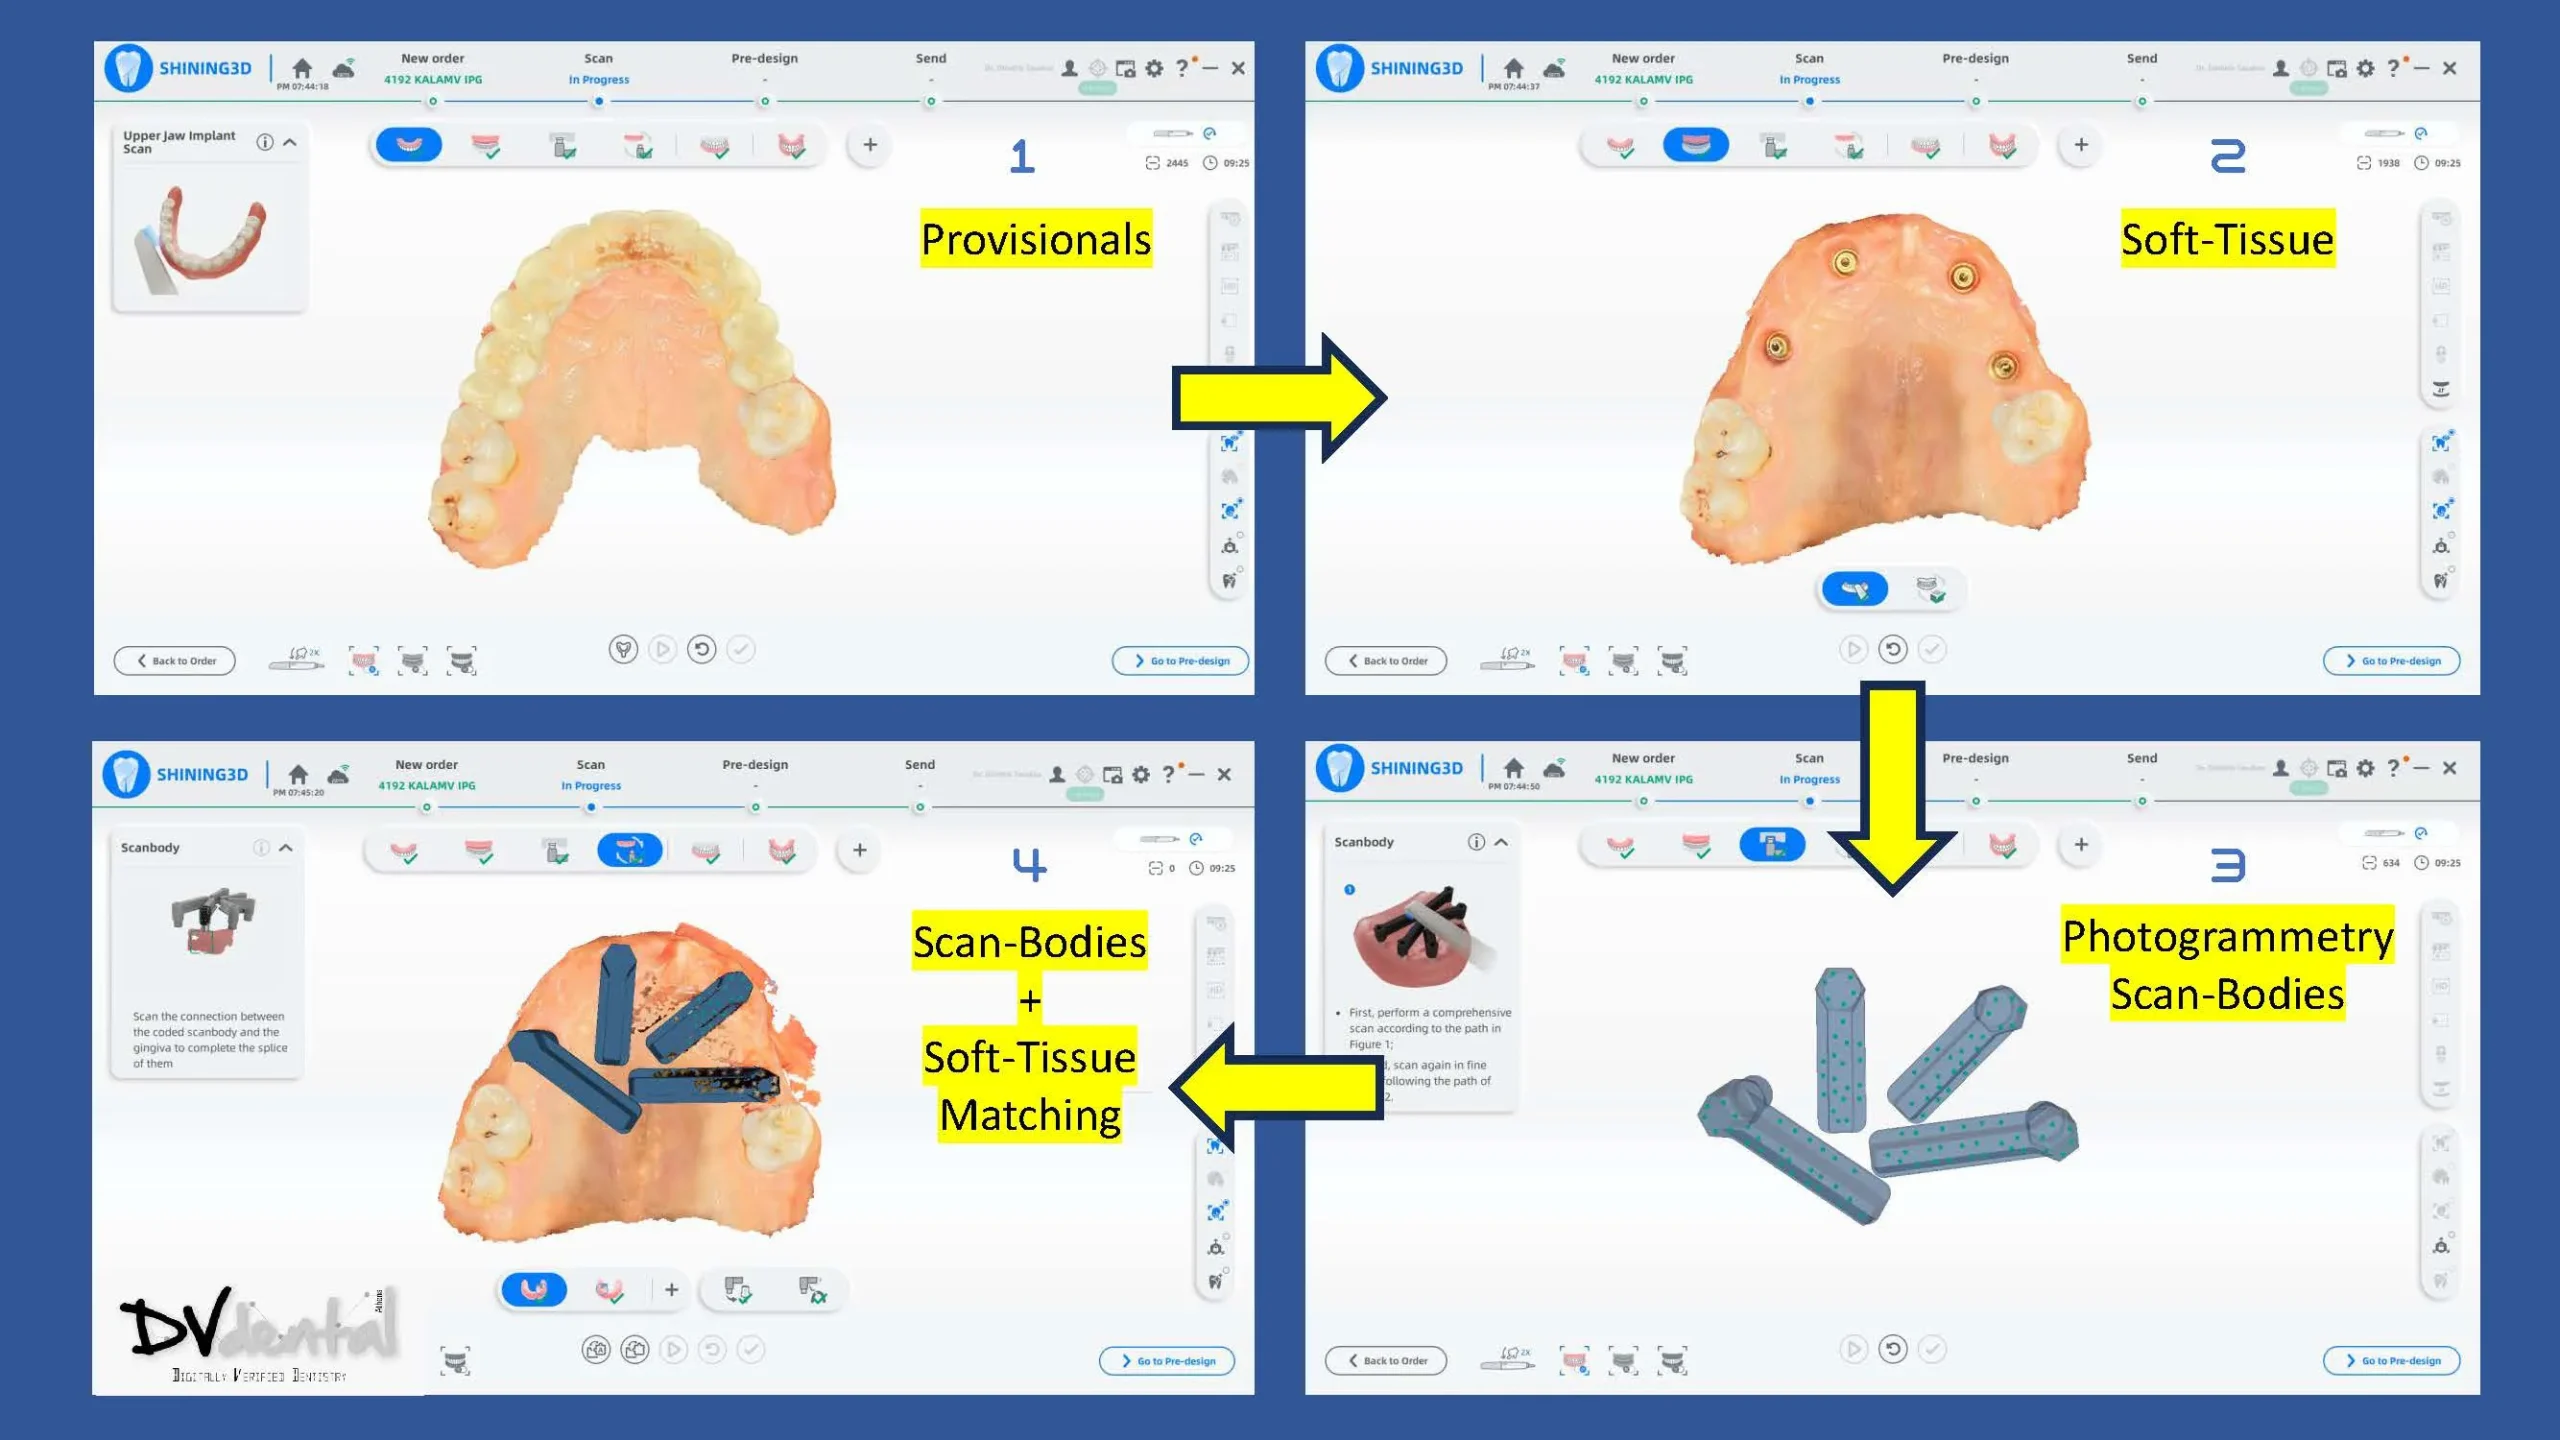
After suturing the soft tissue, ensure the surgical site is clean and free of blood. It is crucial to use Aoralscan Elite to capture the post-op data of the upper and lower jaw soft tissues, as well as implant positions, since soft tissue can undergo significant changes before and after implant surgery. To ensure the passive fit of the restoration, Aoralscan Elite uses photogrammetry technology to first capture data from the coded scanbody, which is then transferred to the corresponding implant scanbody library for restoration designing later.
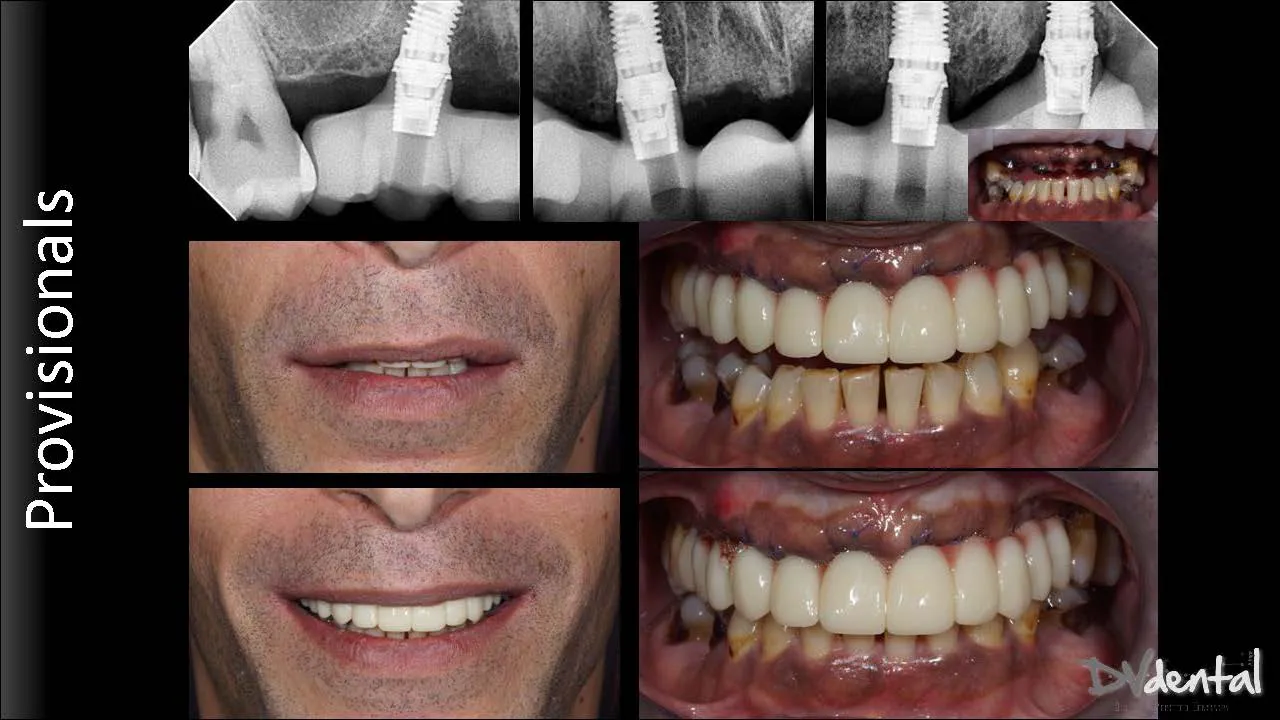
Dentist used the facial data for mounting on the virtual articulator to determine the midline, designed the temporary restoration. Since dynamic occlusion data has already been captured with Aoralscan Elite, dentist can minimize occlusion interference during adjustments. Create the digital models, then print the models and temporary restorations for an extraoral try-in before placing them in the patient’s mouth.
Immediate Loading
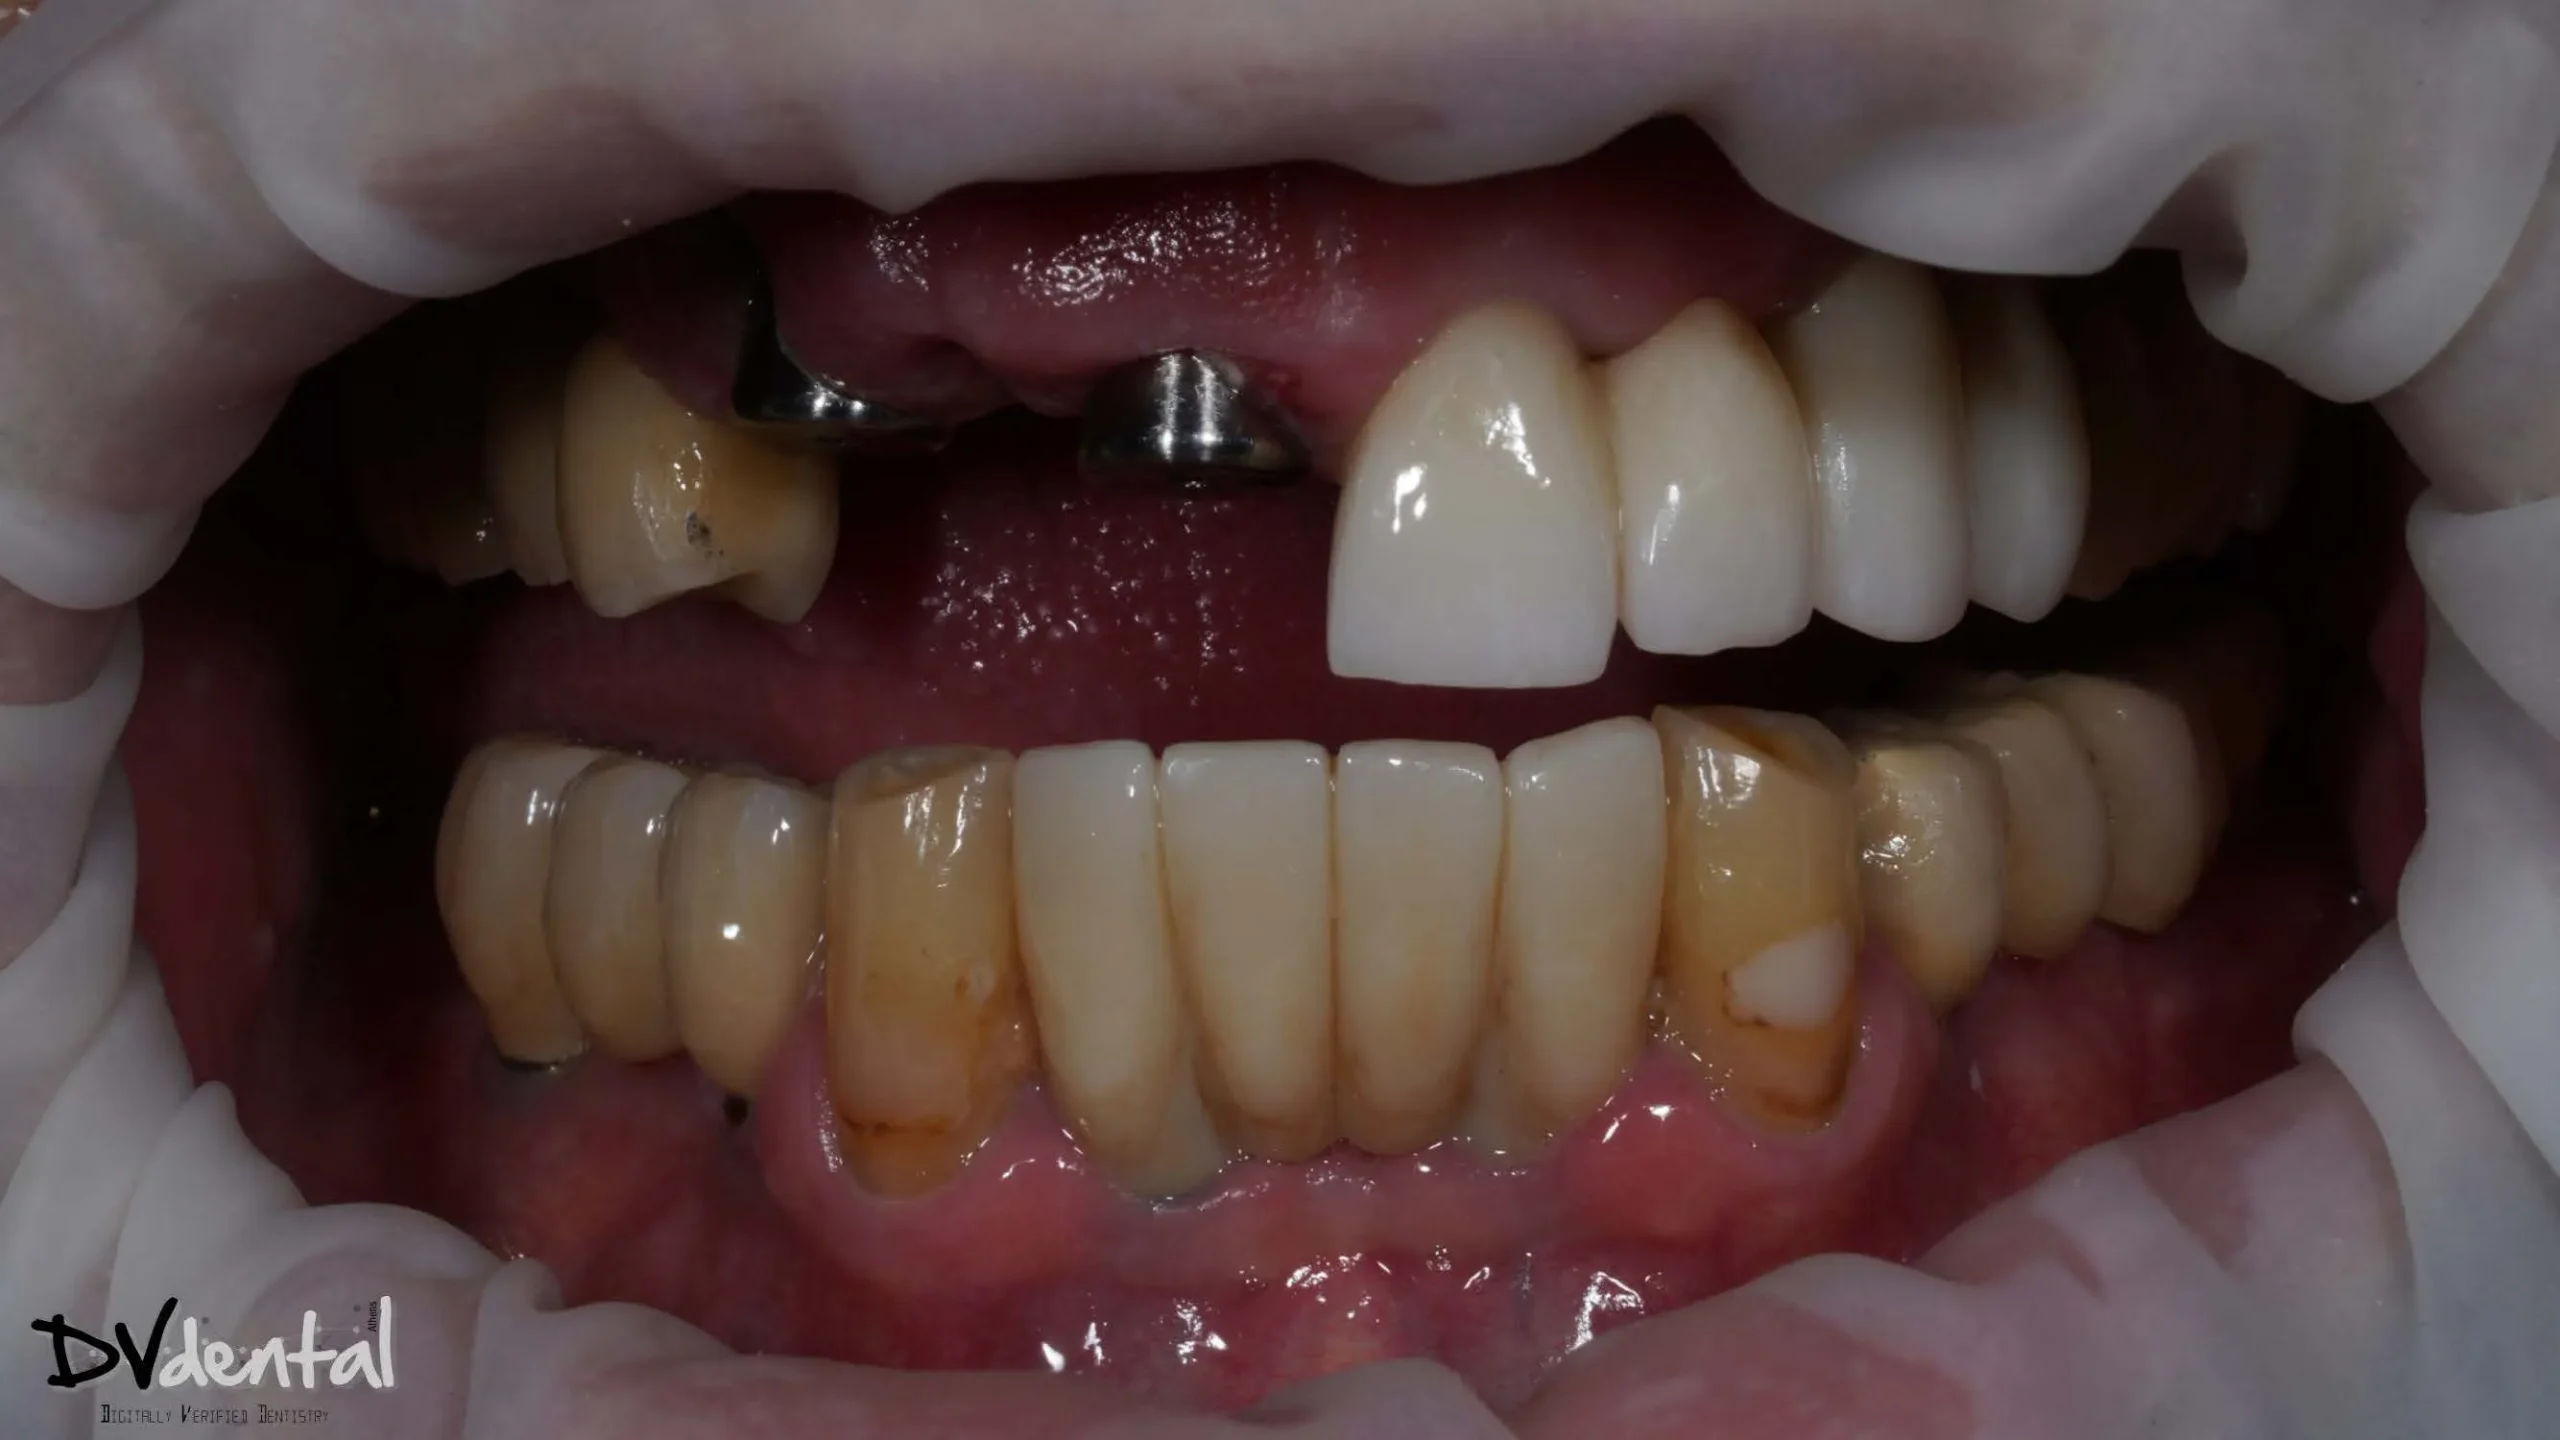
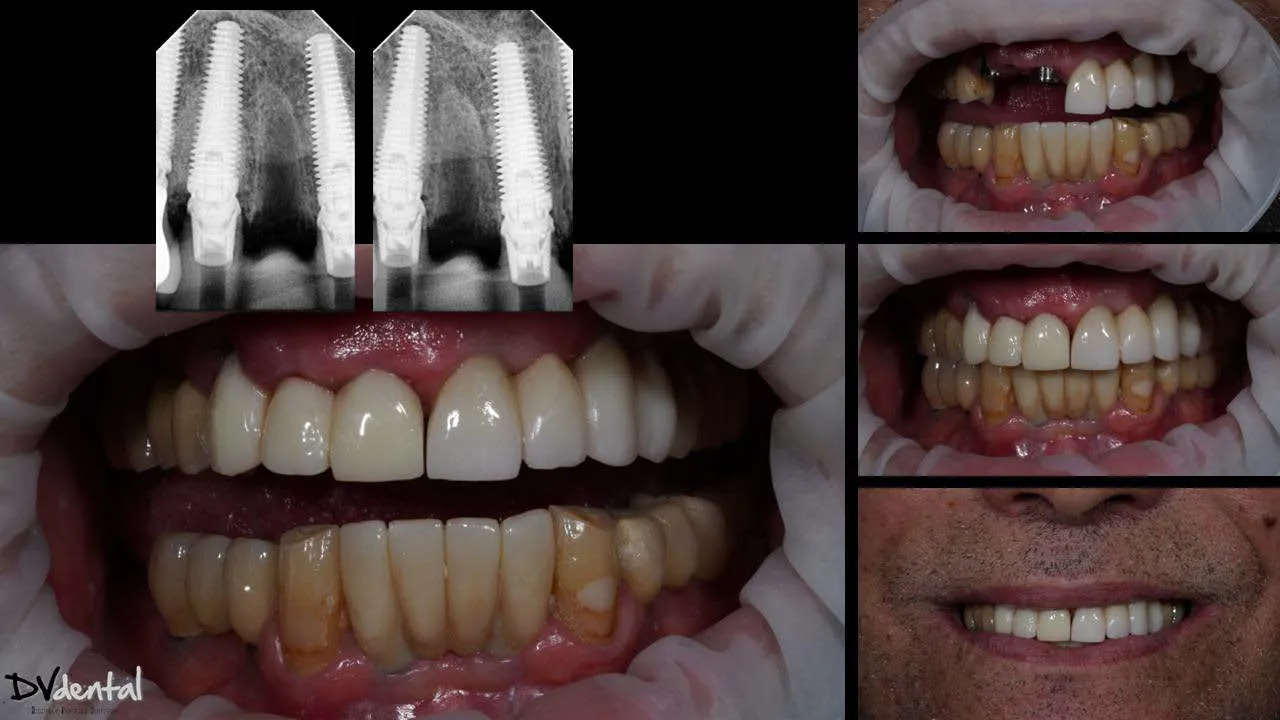
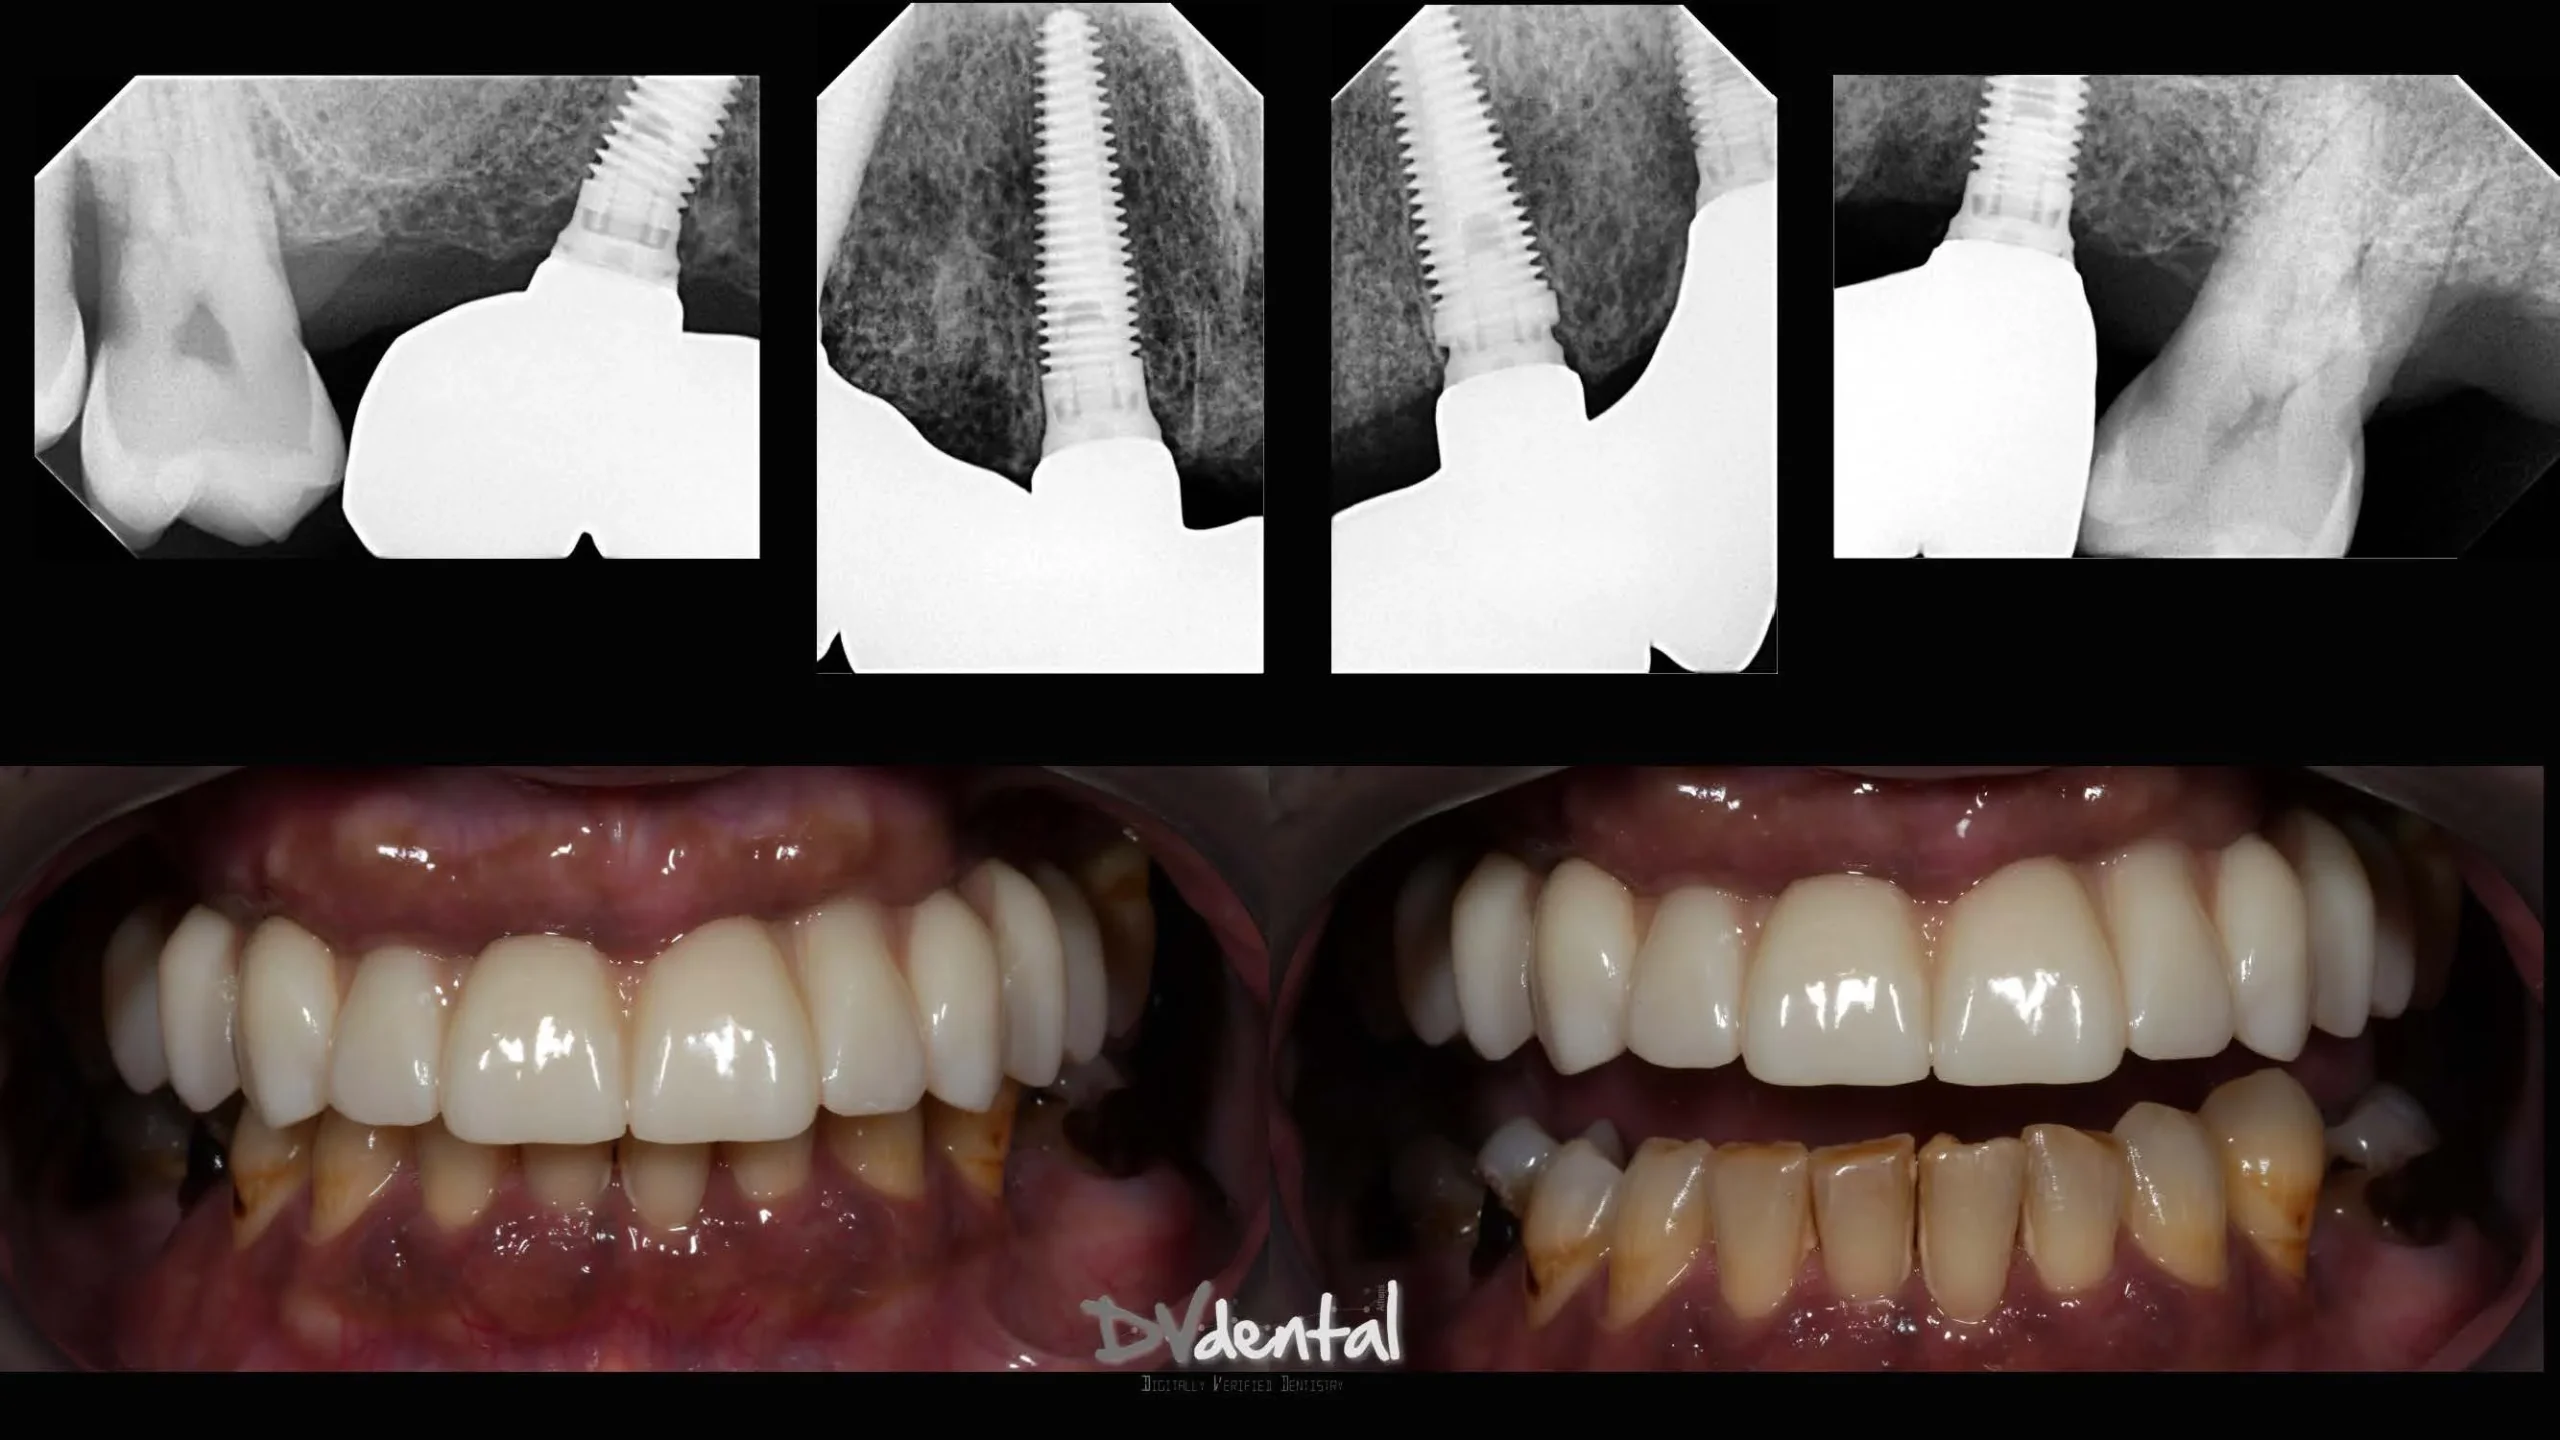
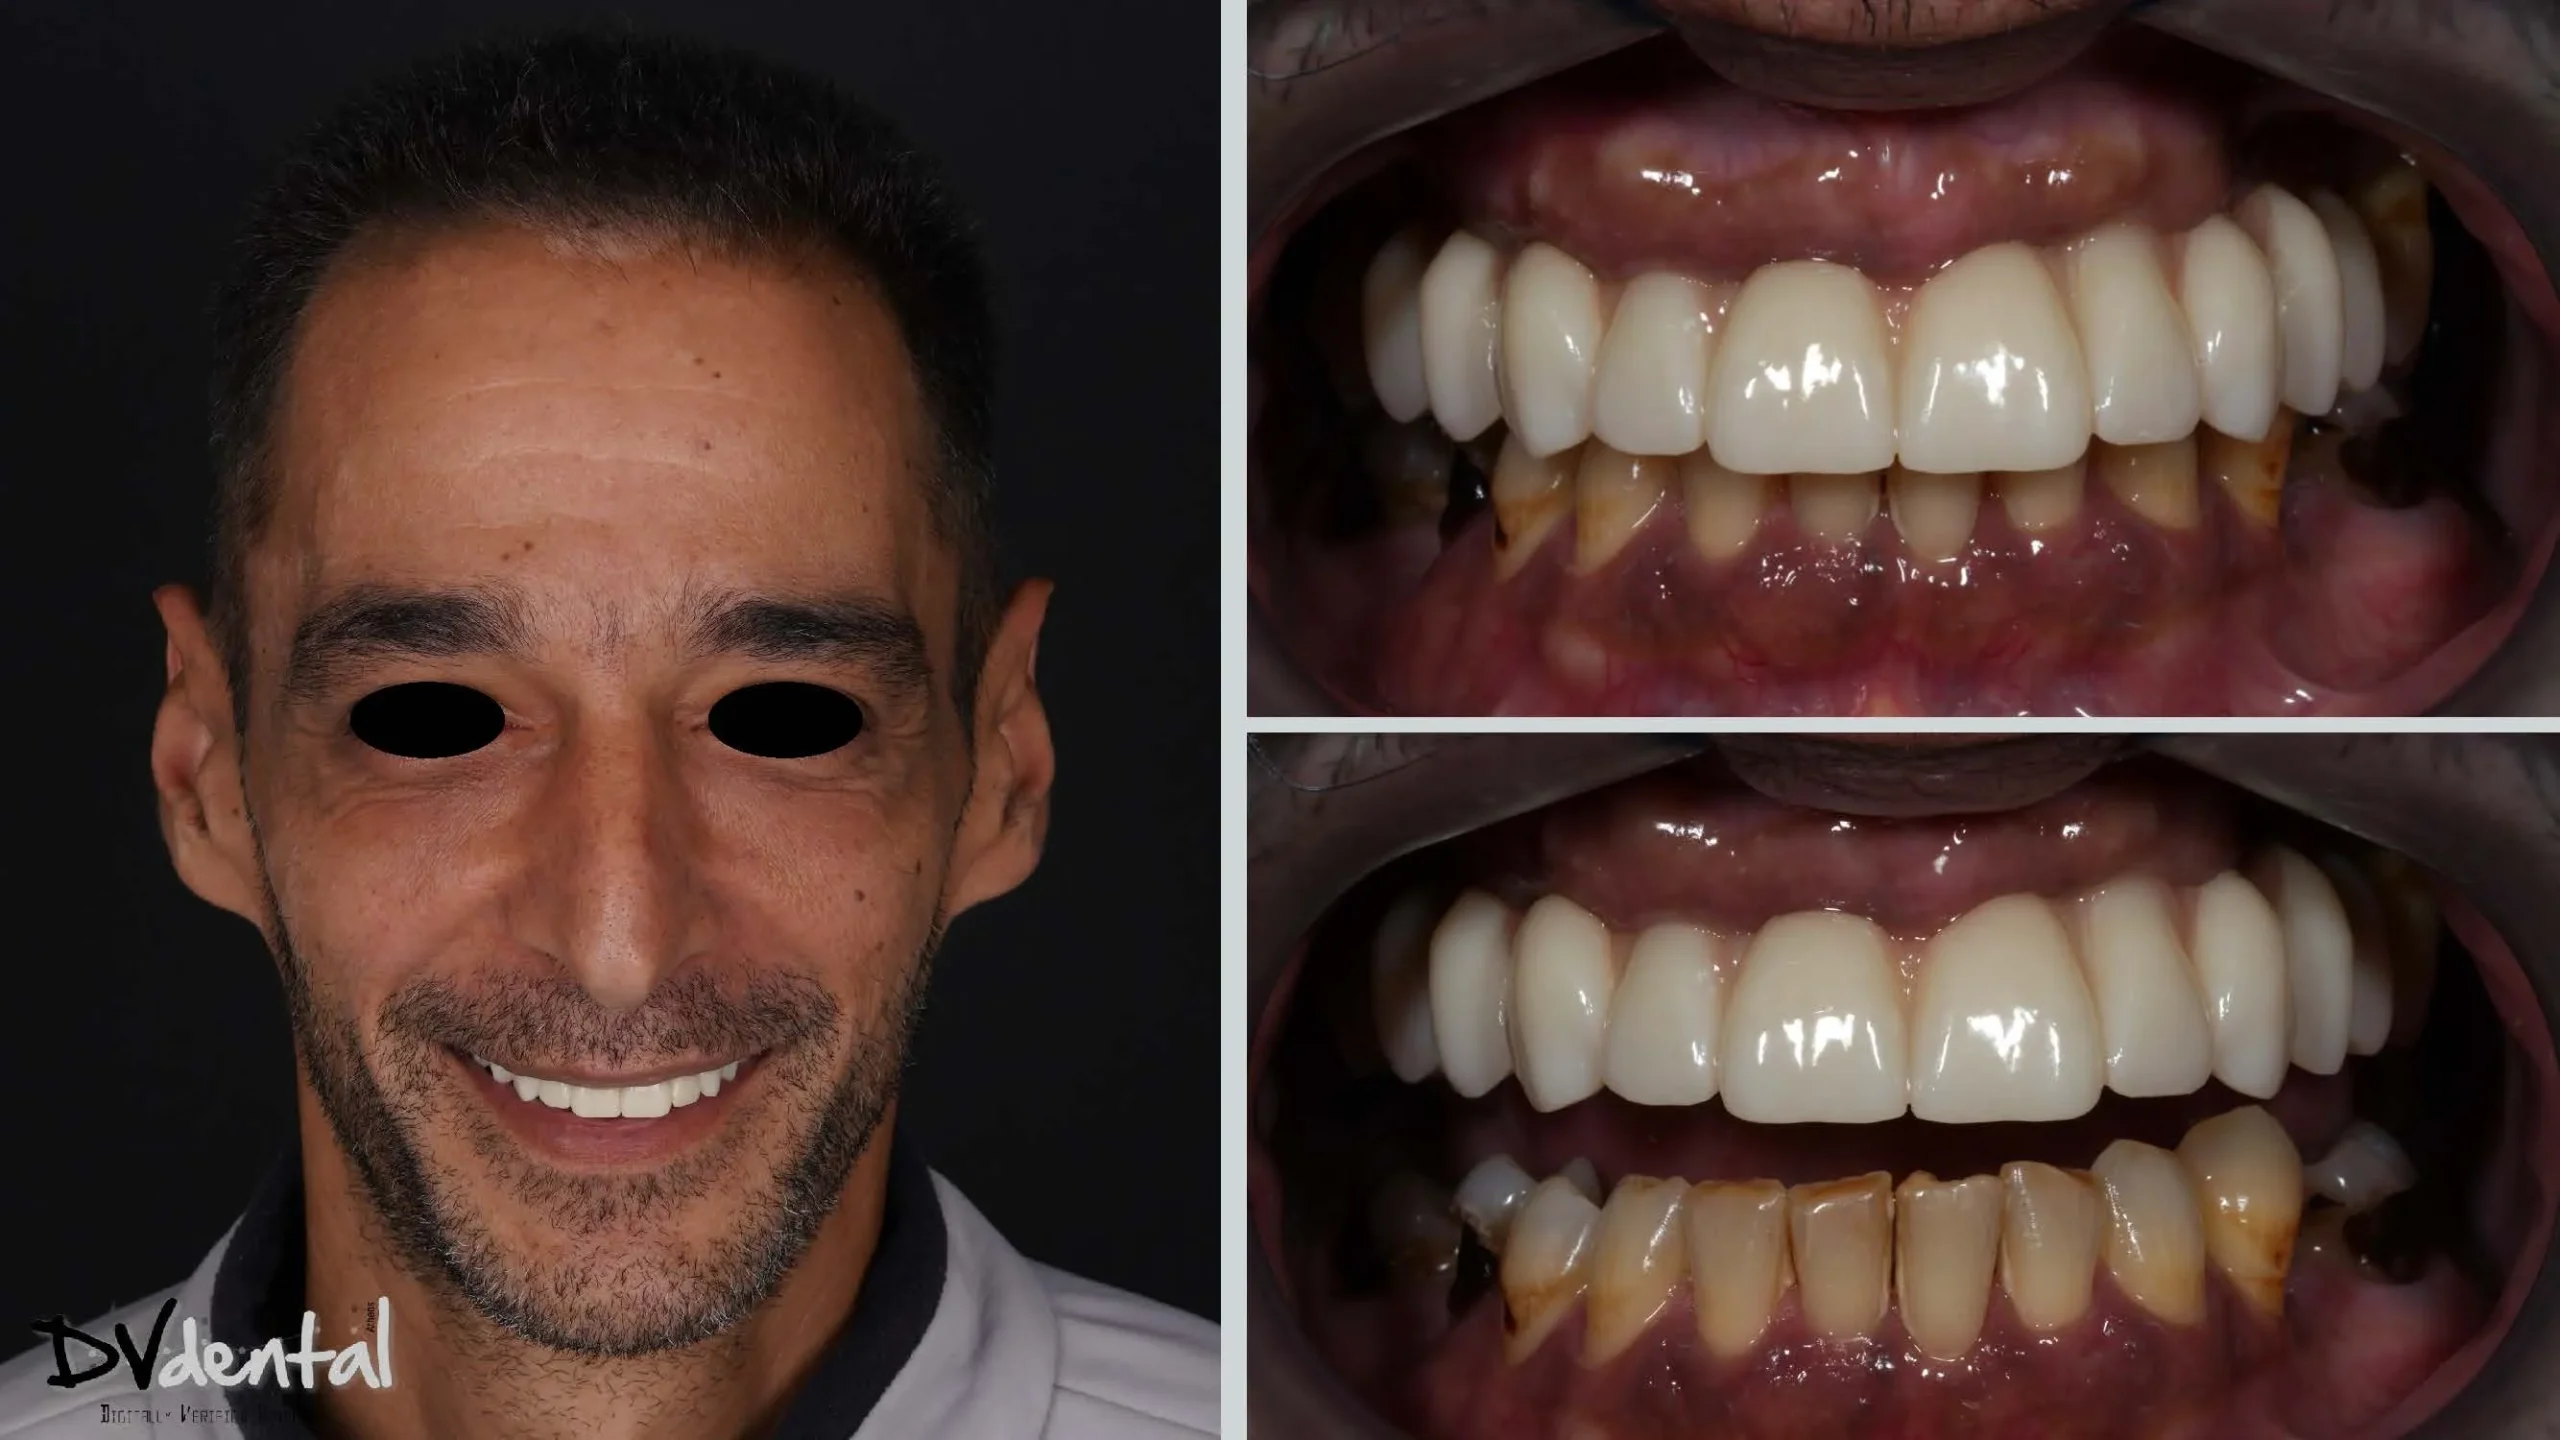
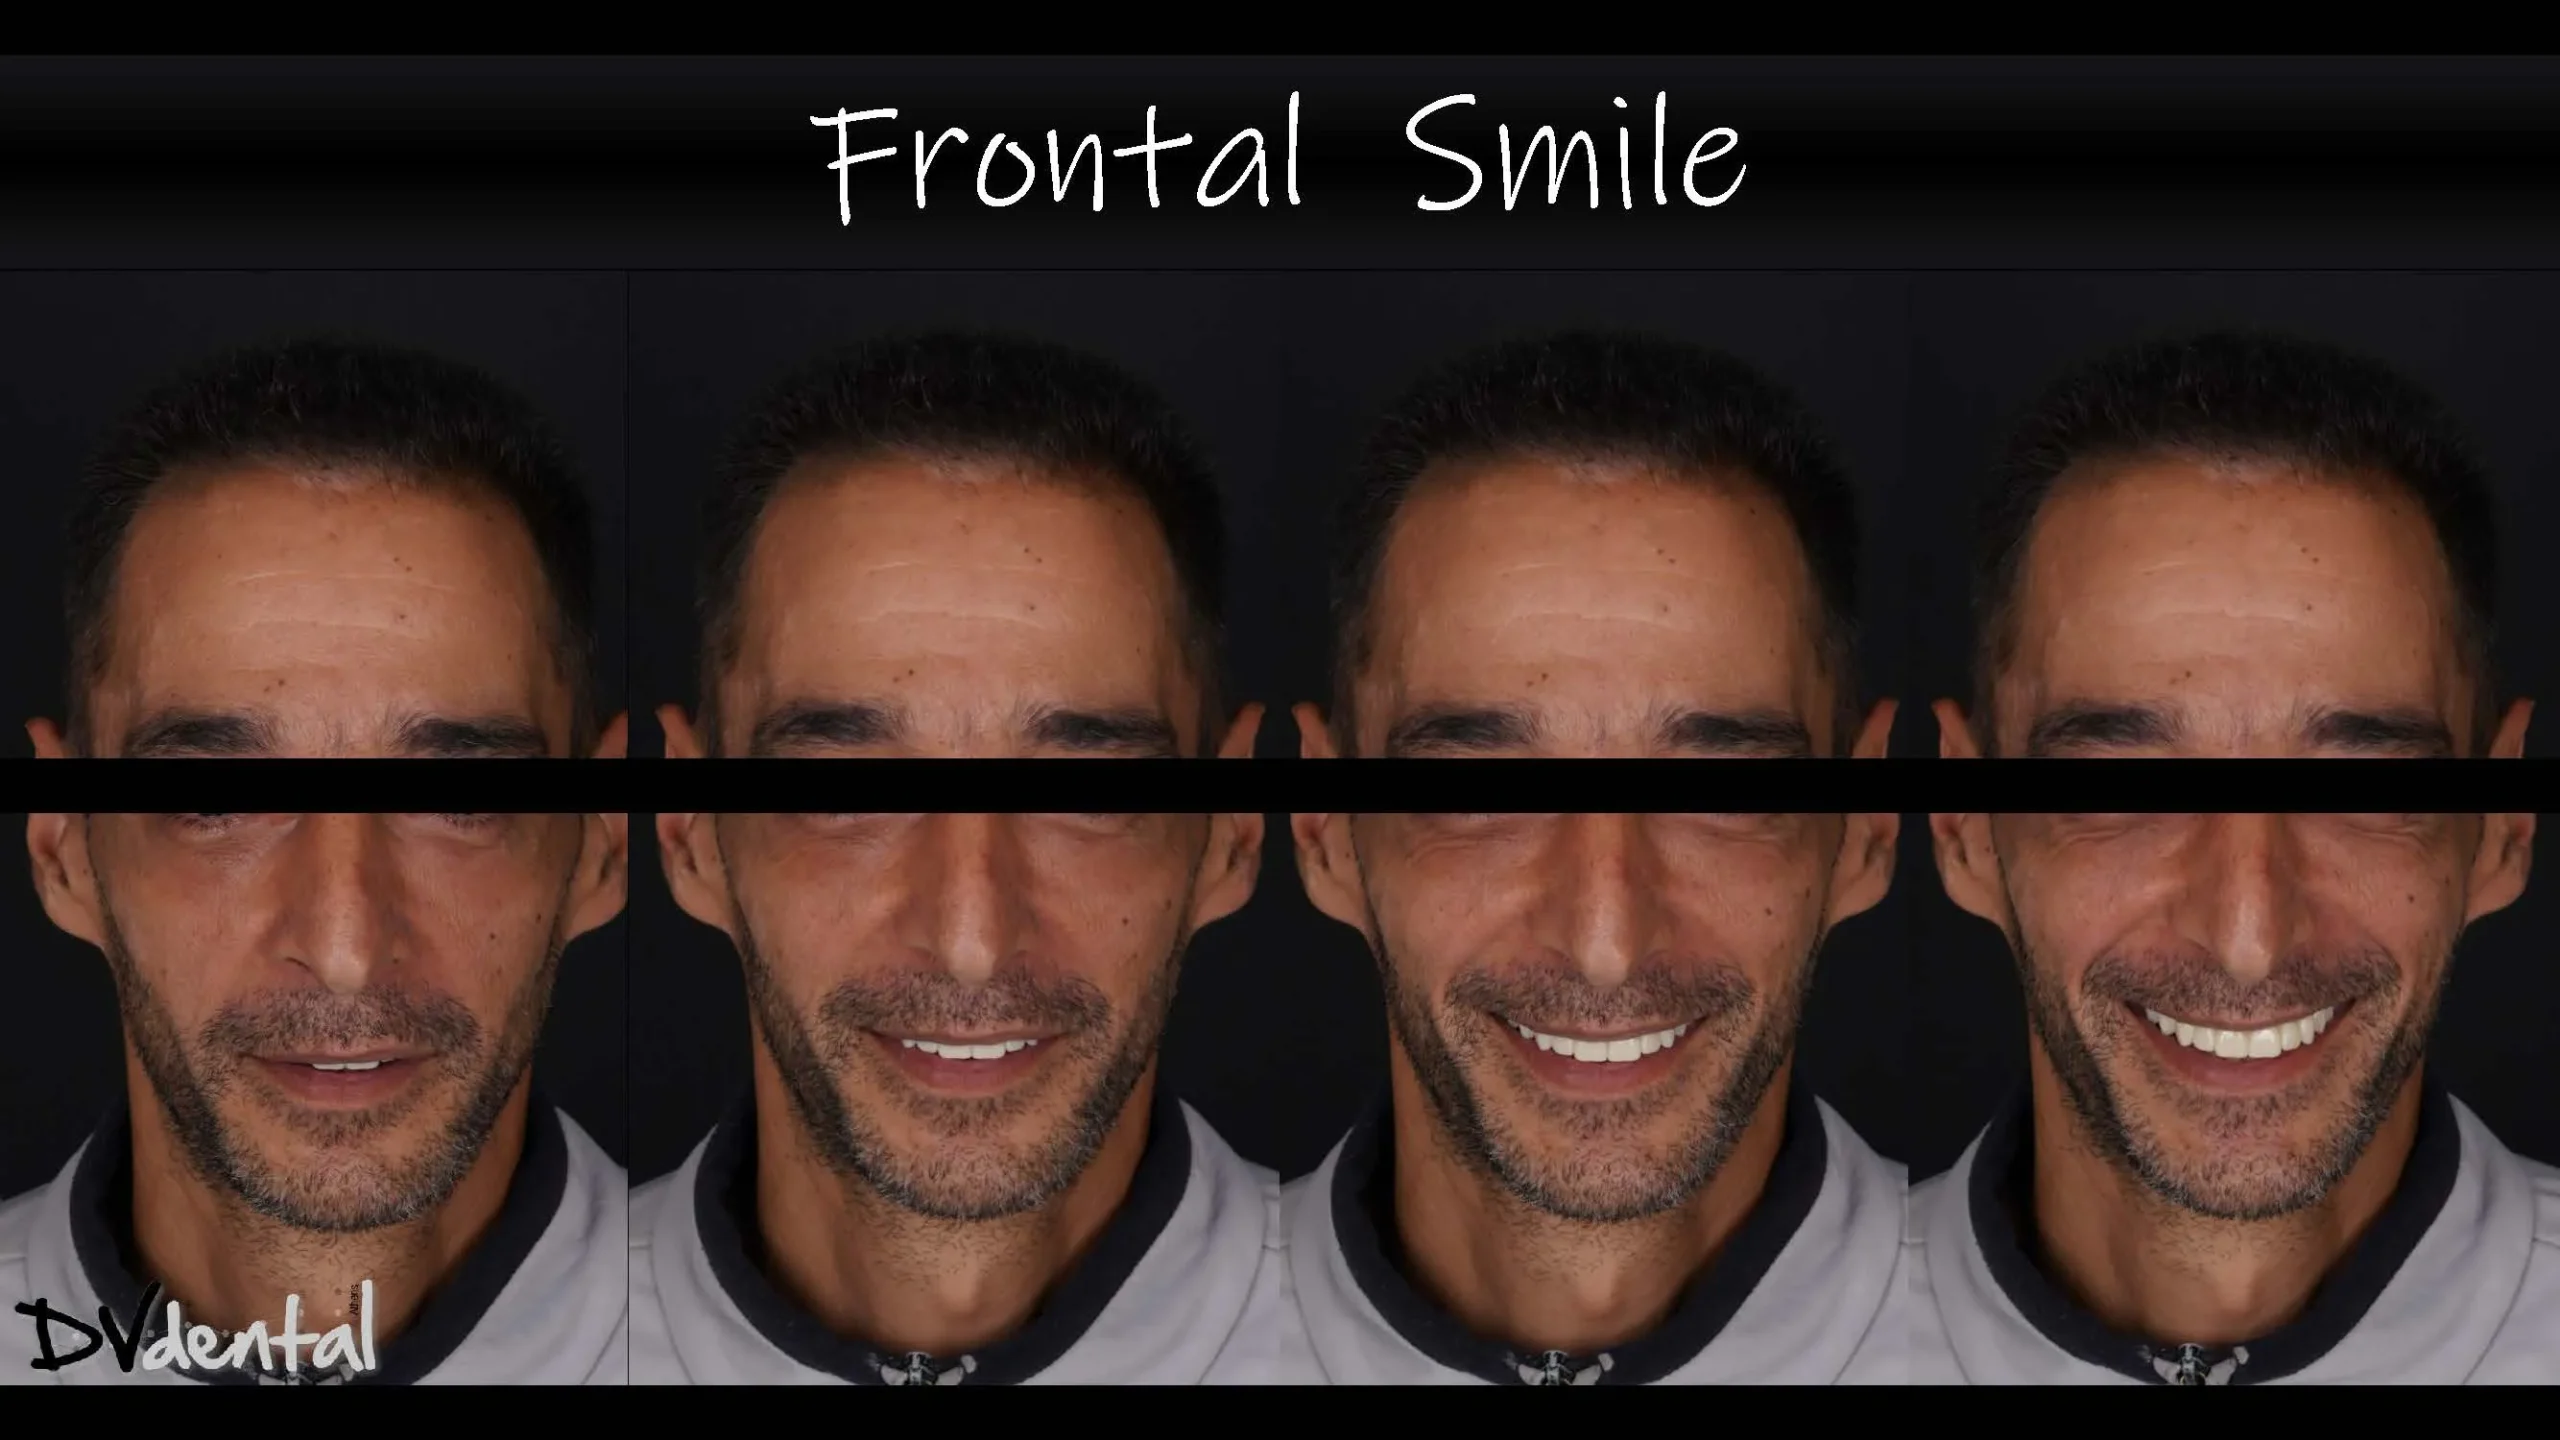
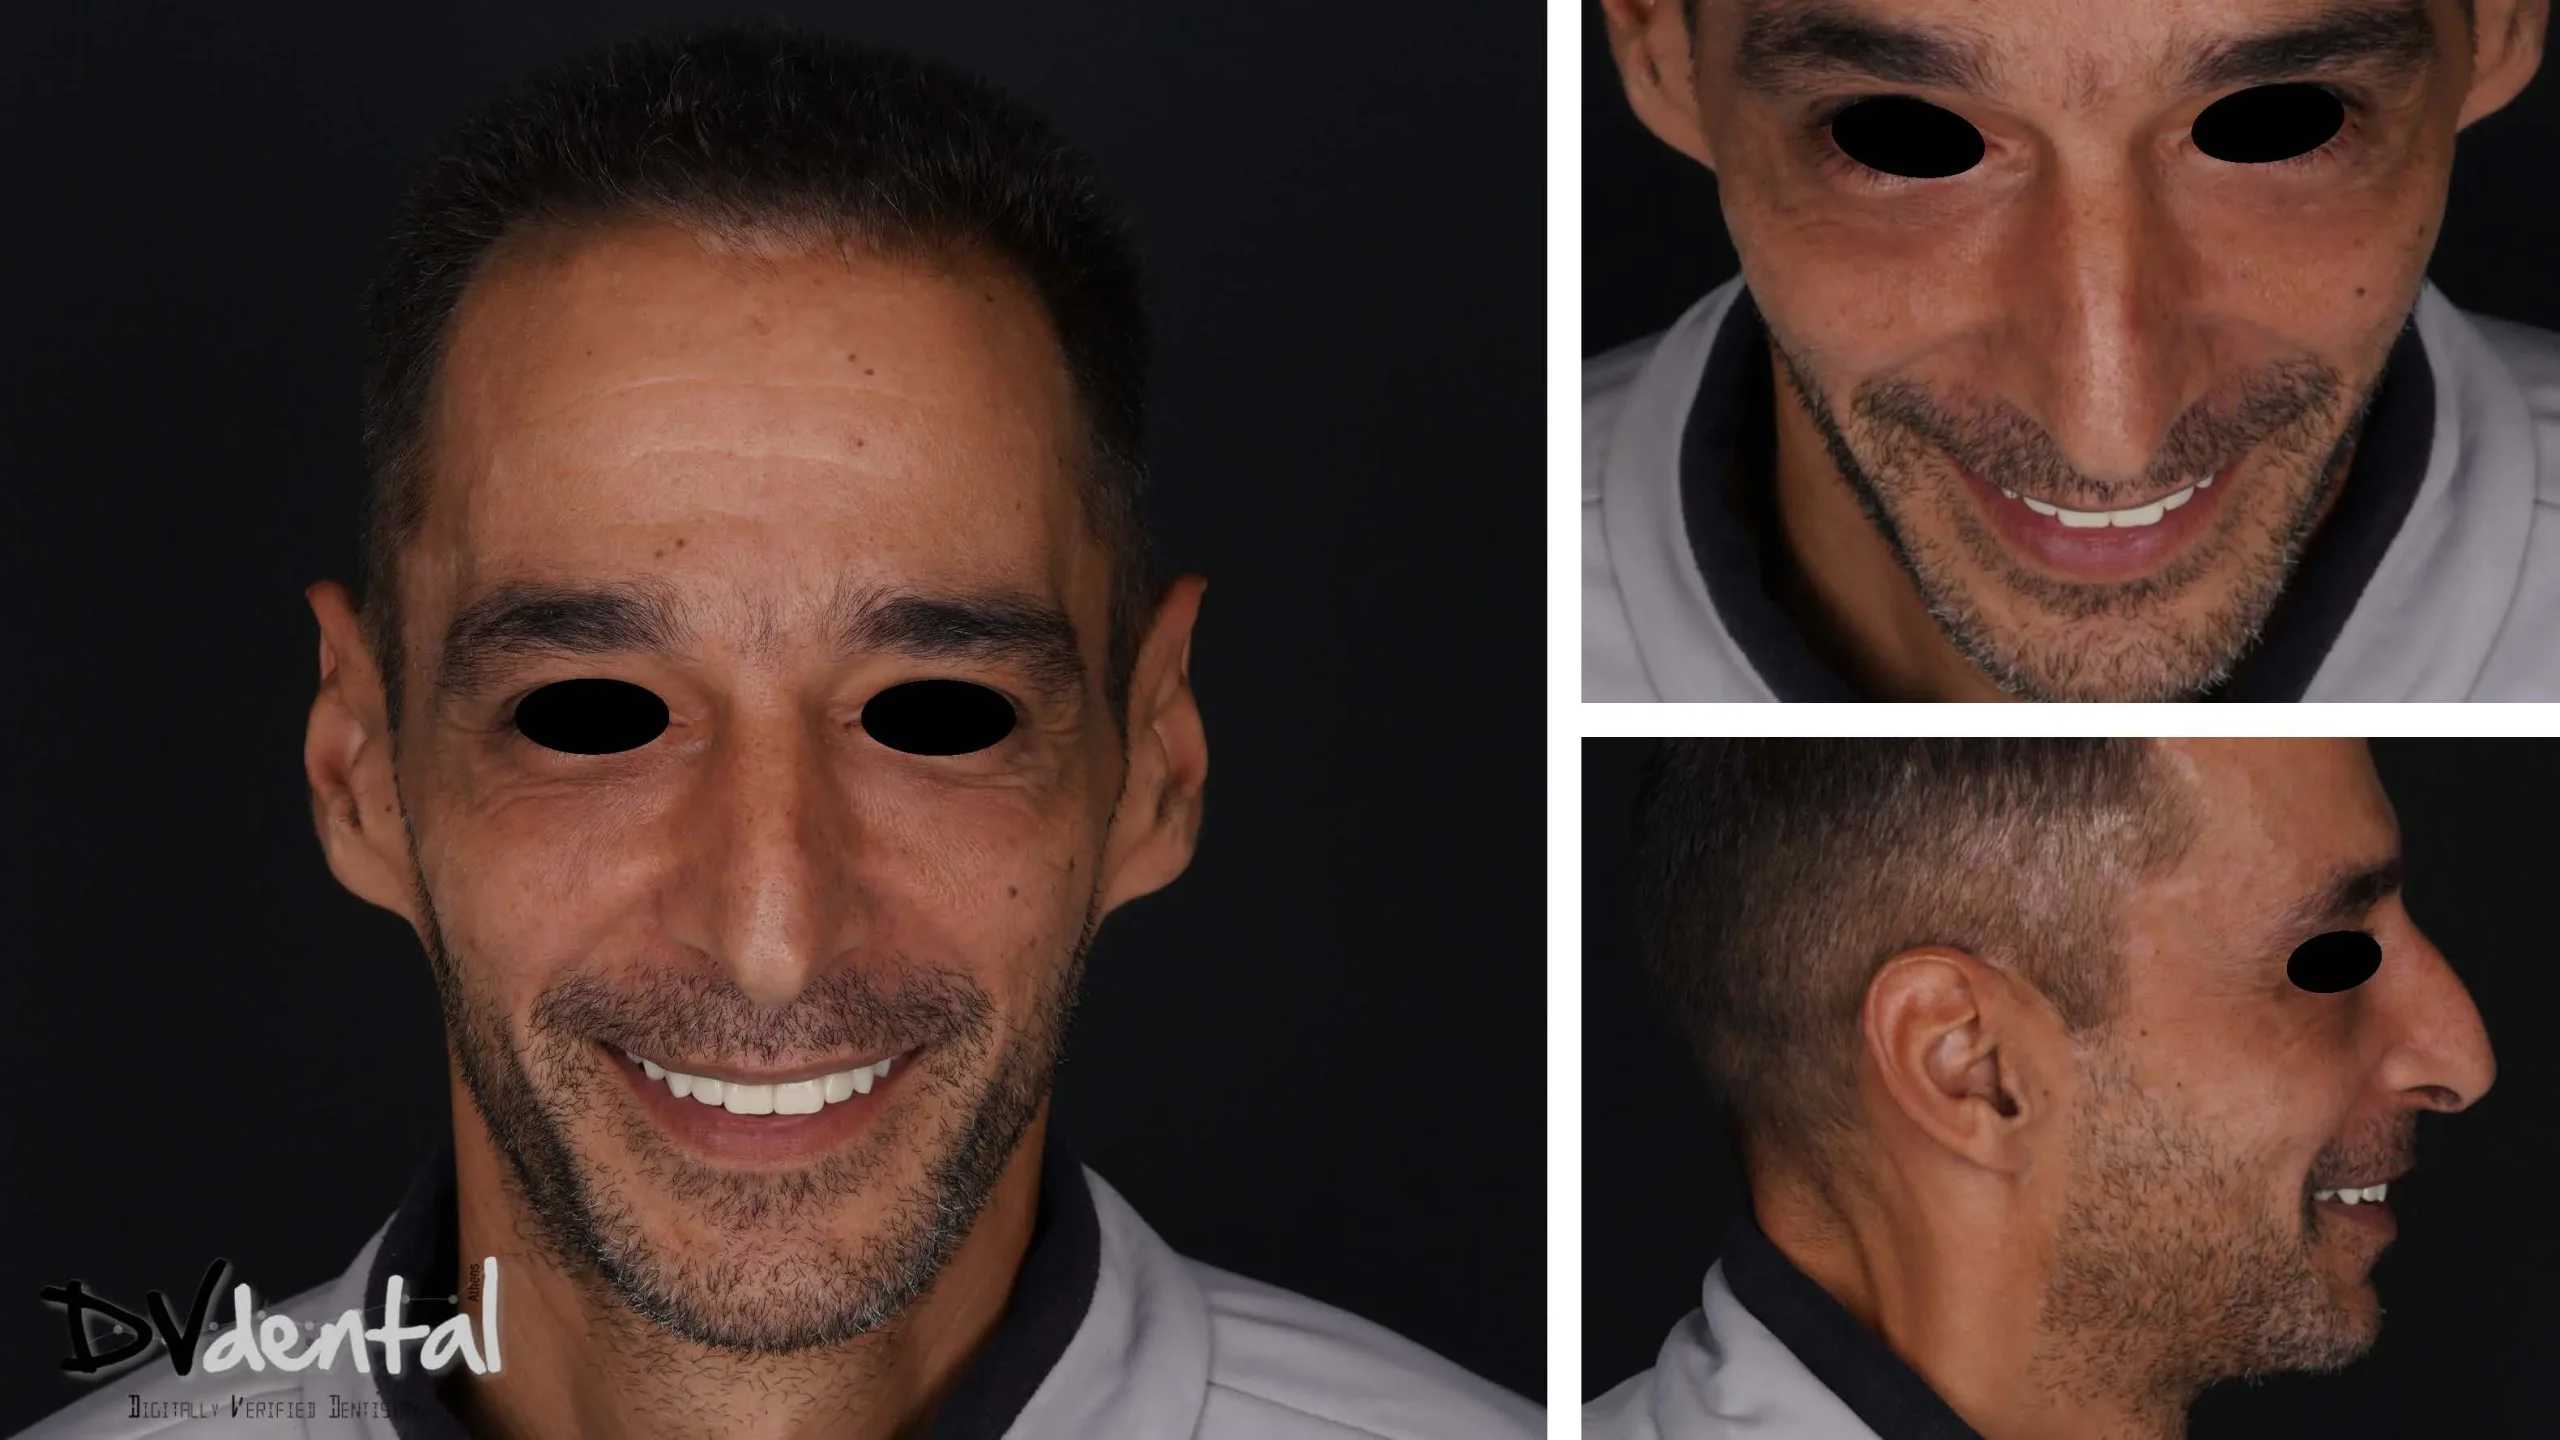
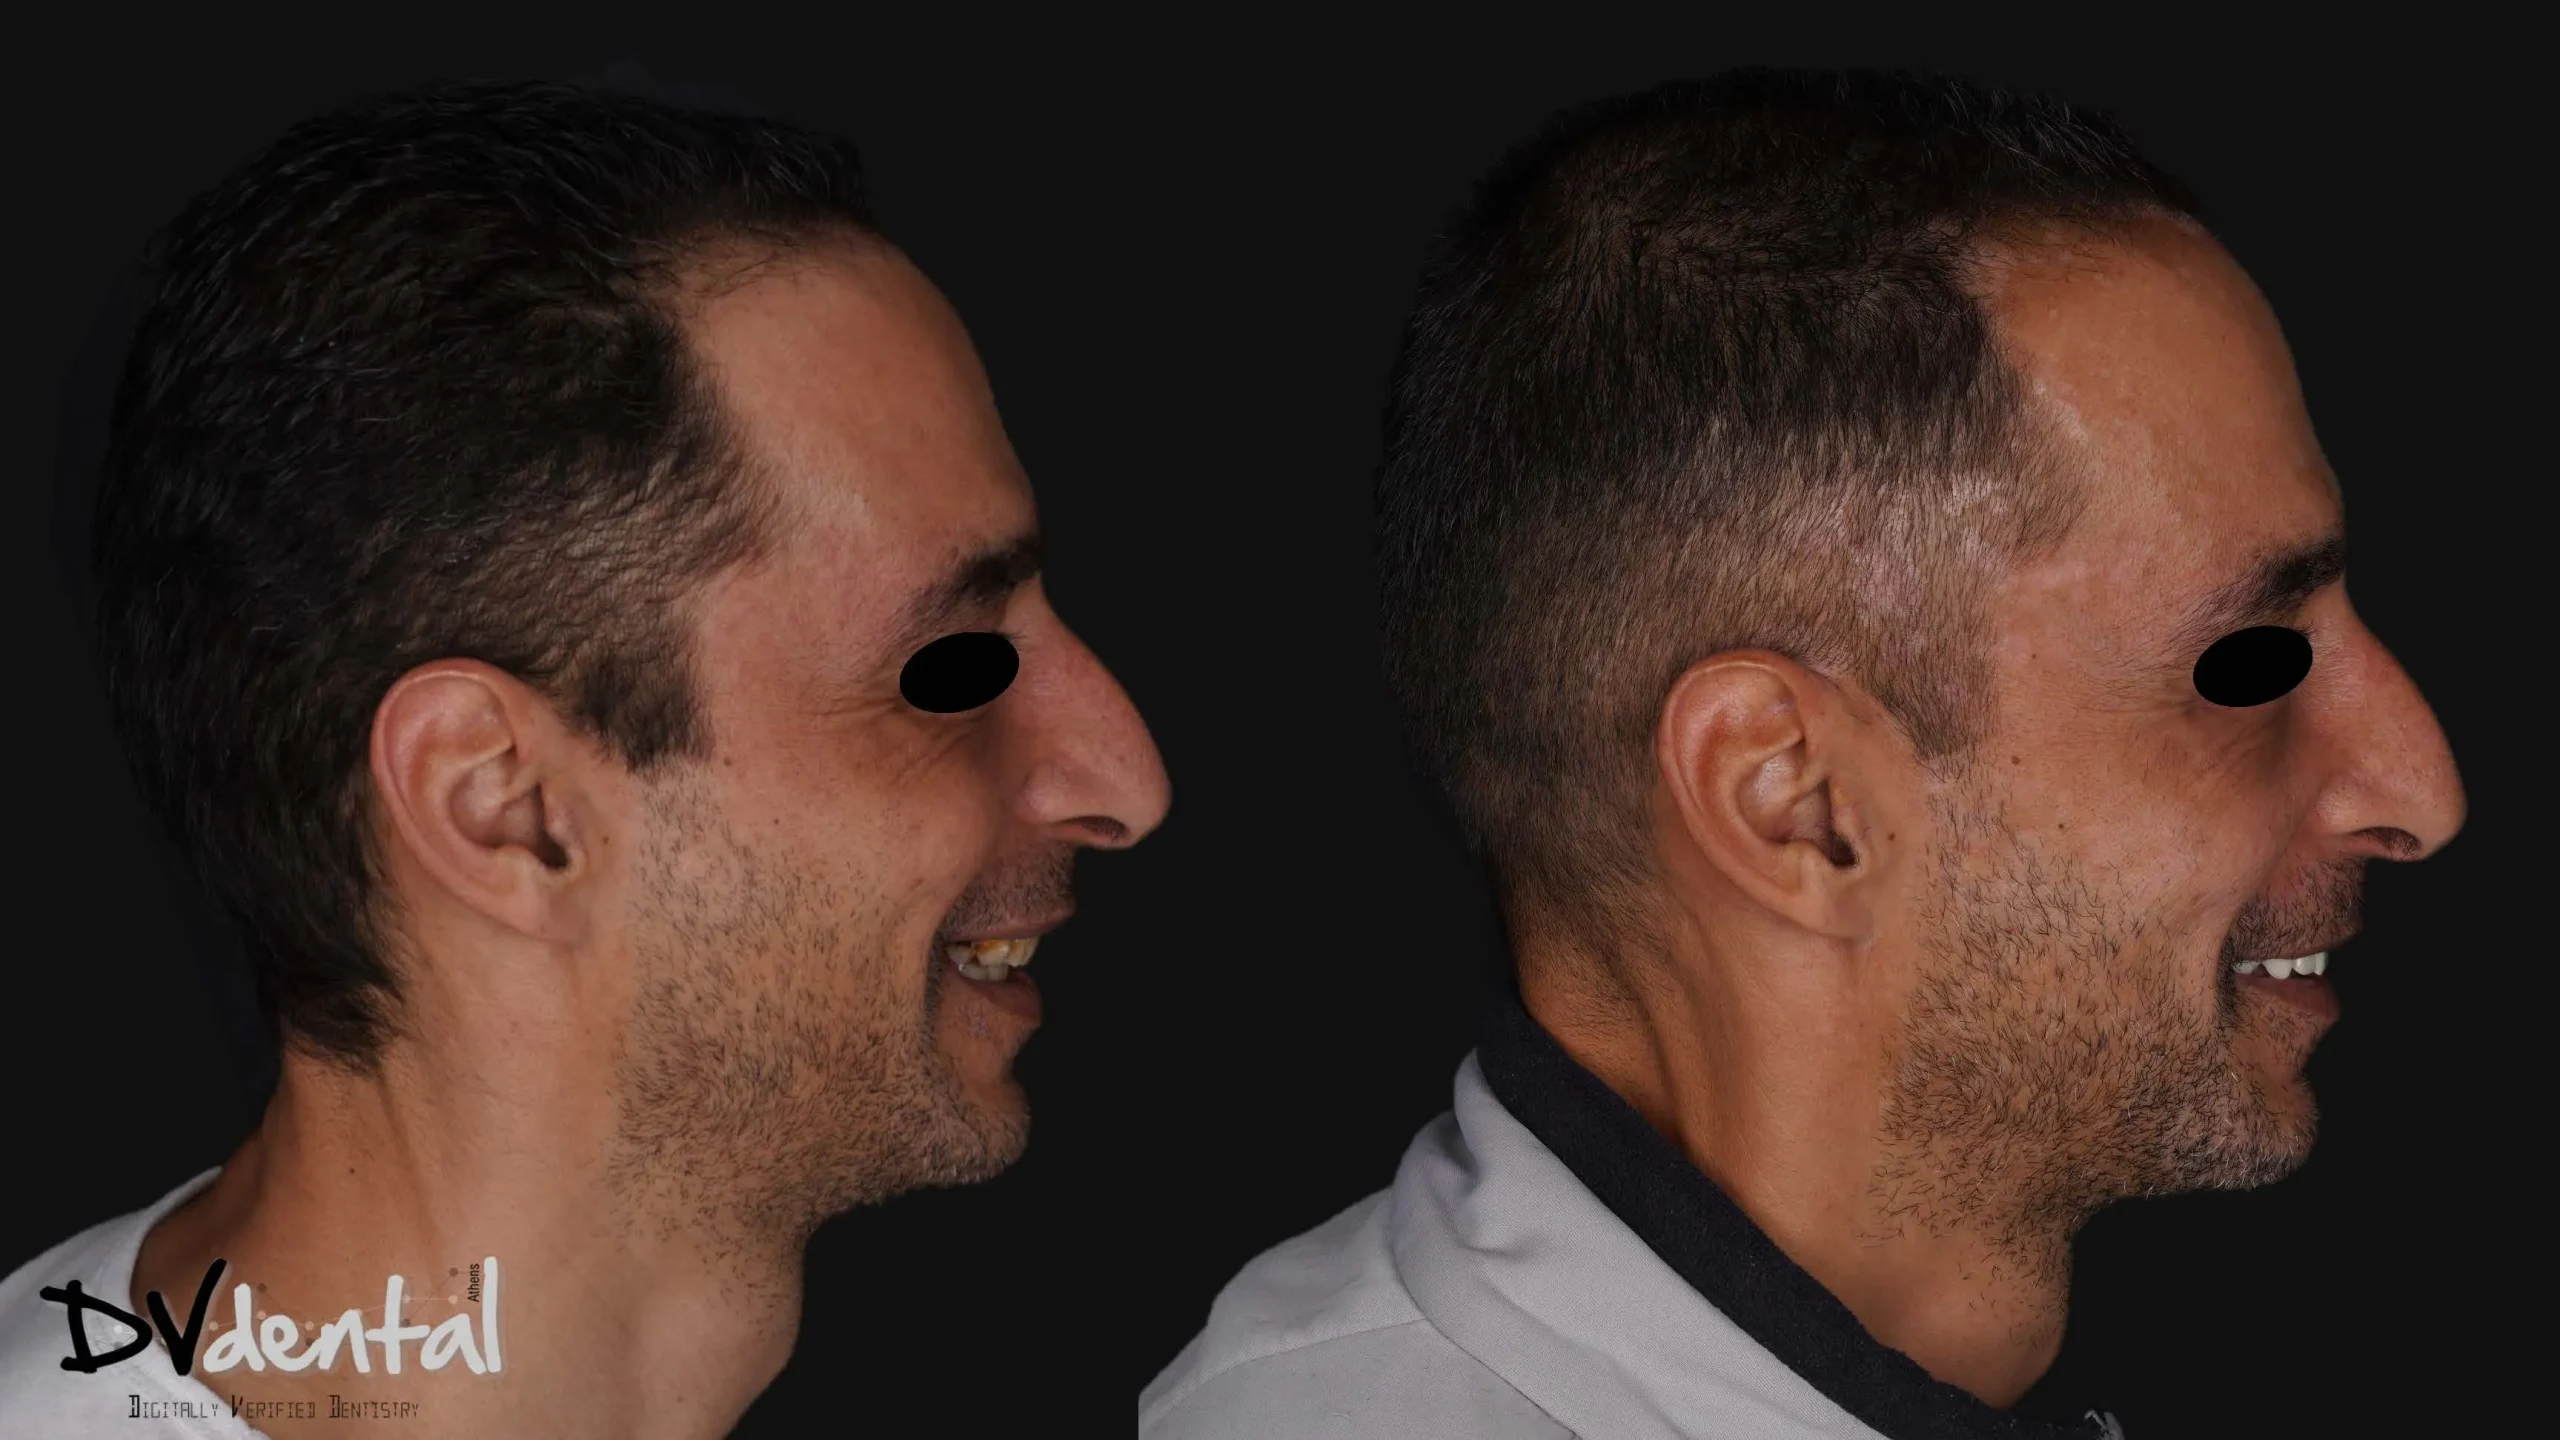
Once the temporary restorations were ready, the dentist performed the try-in in the patient’s mouth. The temporary restorations were fitted passively onto the multi-unit abutments, and X-ray examination confirmed its well-seated. The occlusion is even, with no high points or interference. The tooth shape, midline, and incisal edge position are closely aligned with the preoperative simulation, and the patient is very satisfied with the outcome.


Immediate loading case with two Southern Co-Axis implants in the anterior region
Surgery by Dr. Costa Nicolopoulos | Prostho by Dr. Dimitris Tasakos | Lab by Vangelis Konstantopoulos
4 Implants in the Upper Jaw
From provisional phase to permanent prosthesis
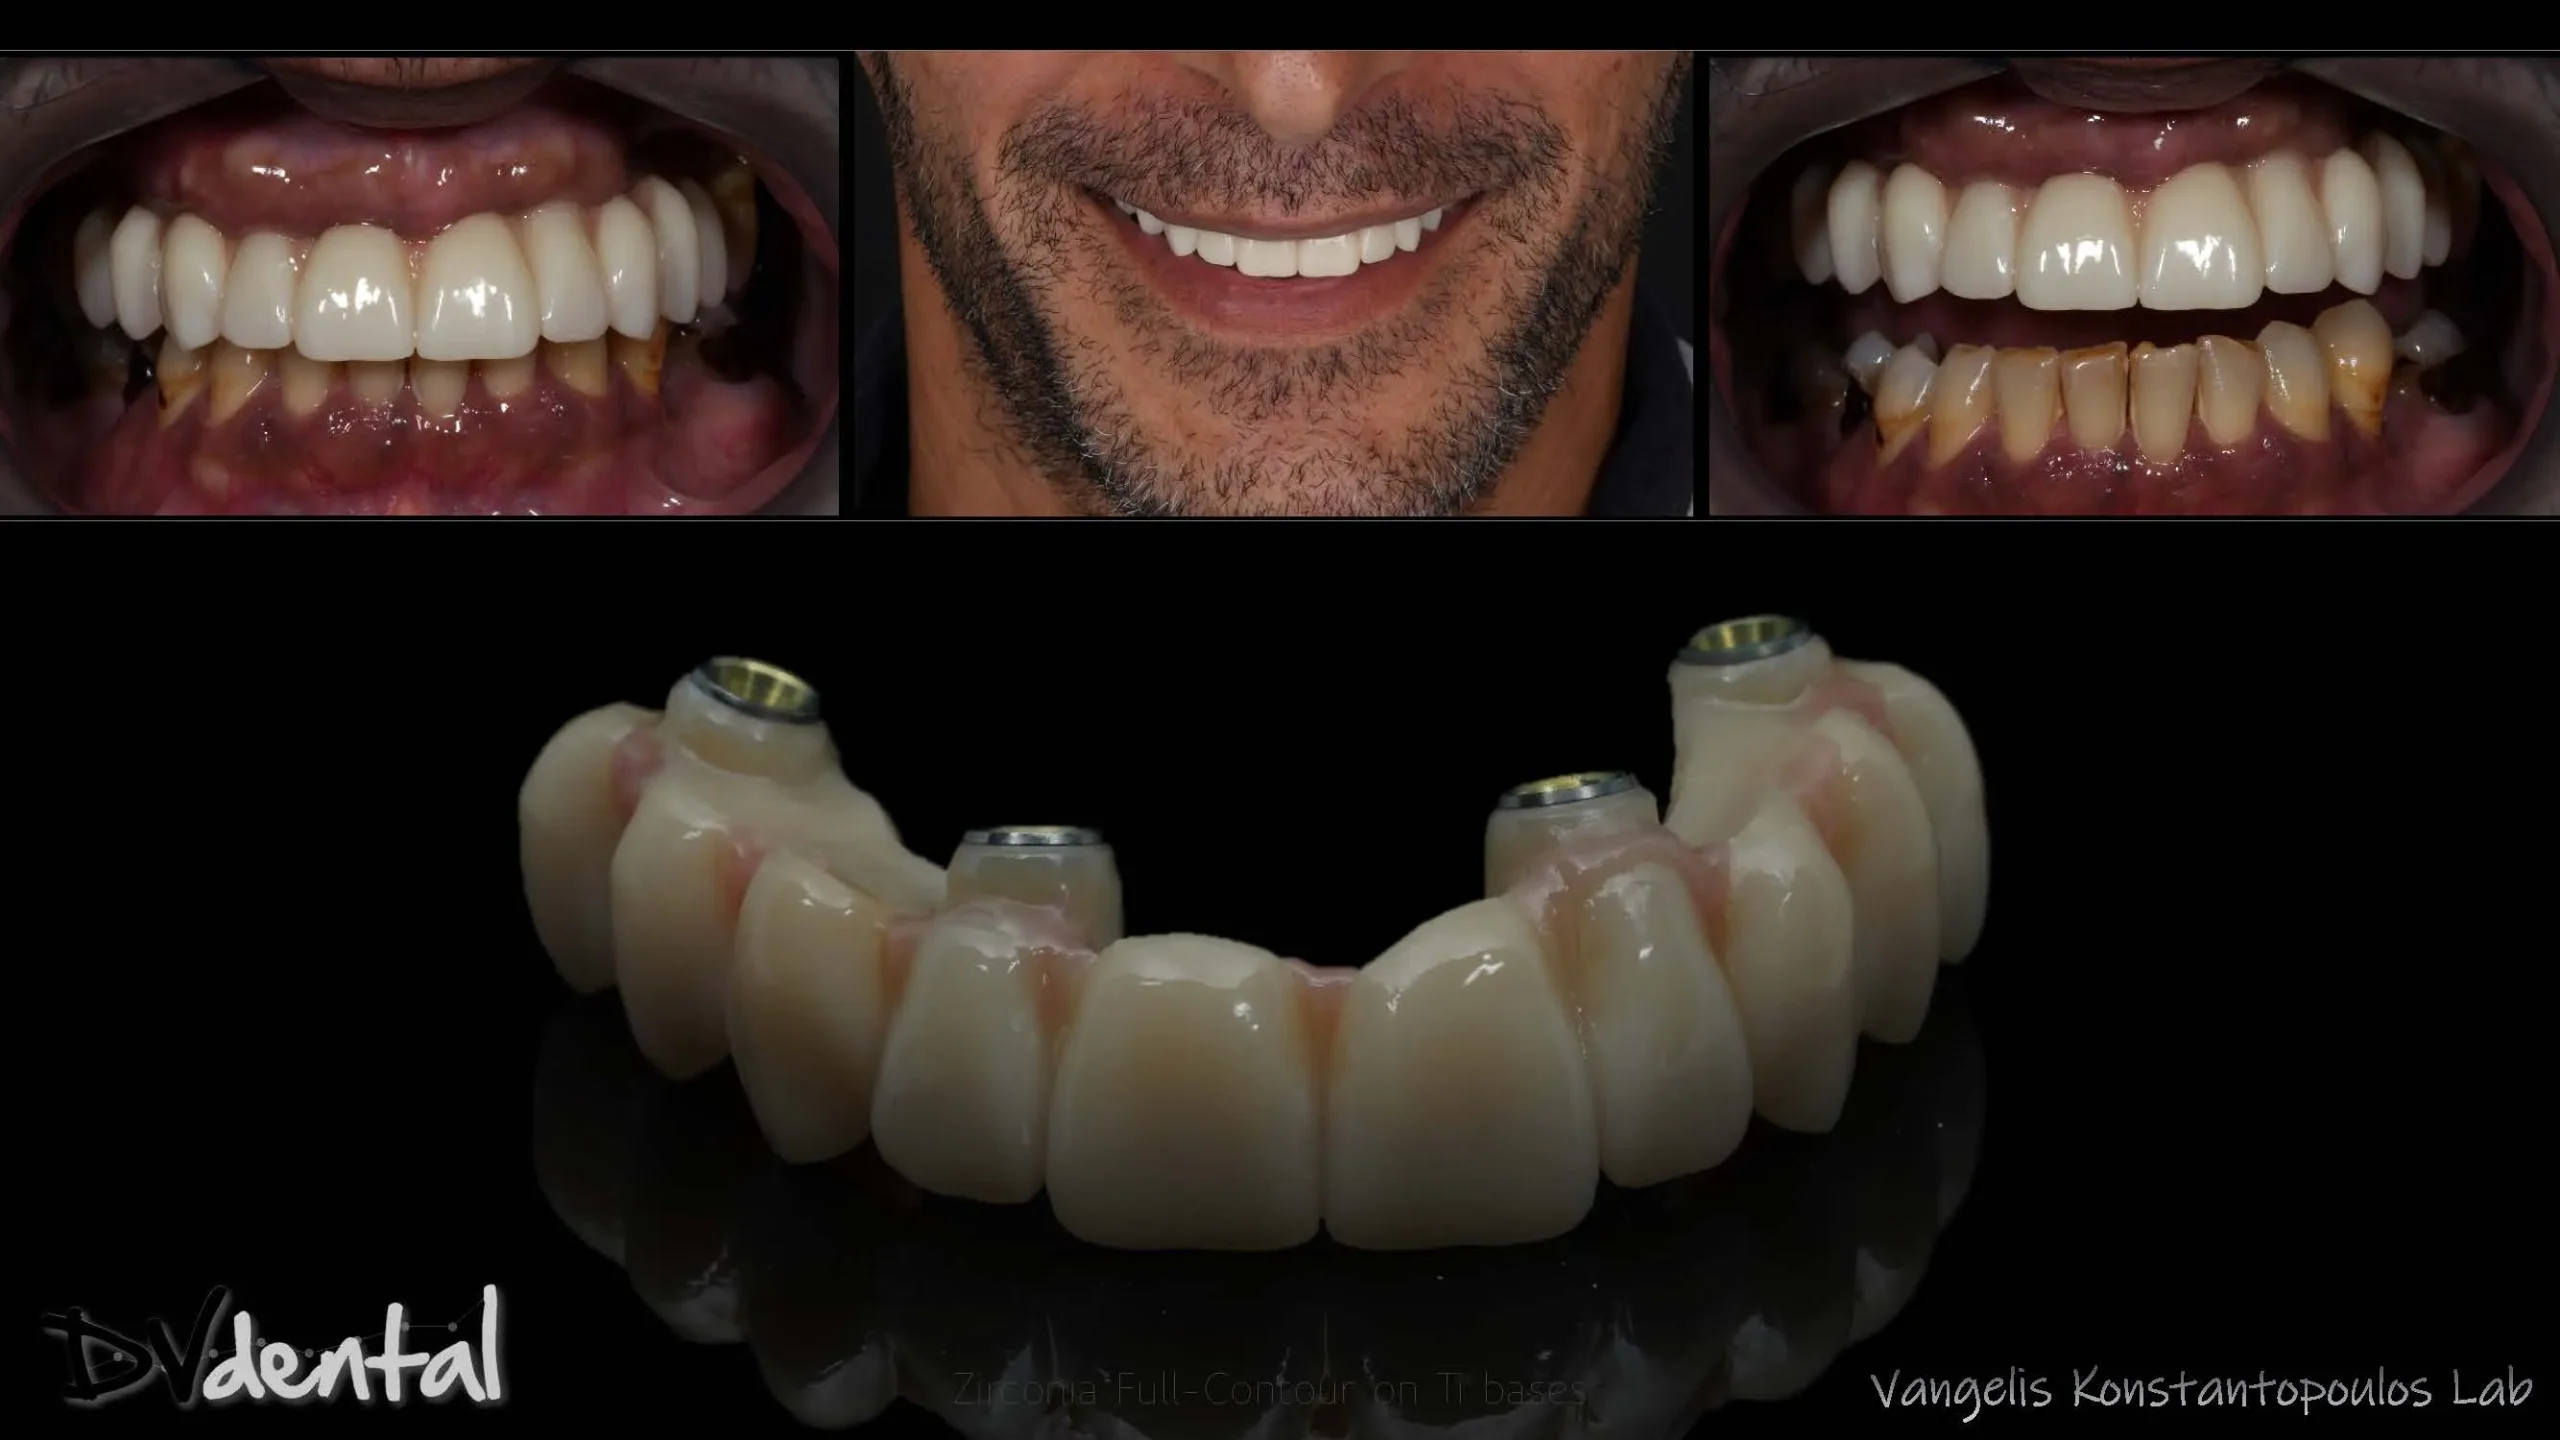
A case with 4 Southern Implants in the maxilla, External Hex (3 Co-Axis 12d and 1 straight) with Compact Conical Abutments
Surgery by Dr. Costa Nicolopoulos | DSD protocol – Prostho by Dr. Dimitris Tasakos, Dr Konstantinos Papaioannou | Lab by Vangelis Konstantopoulos
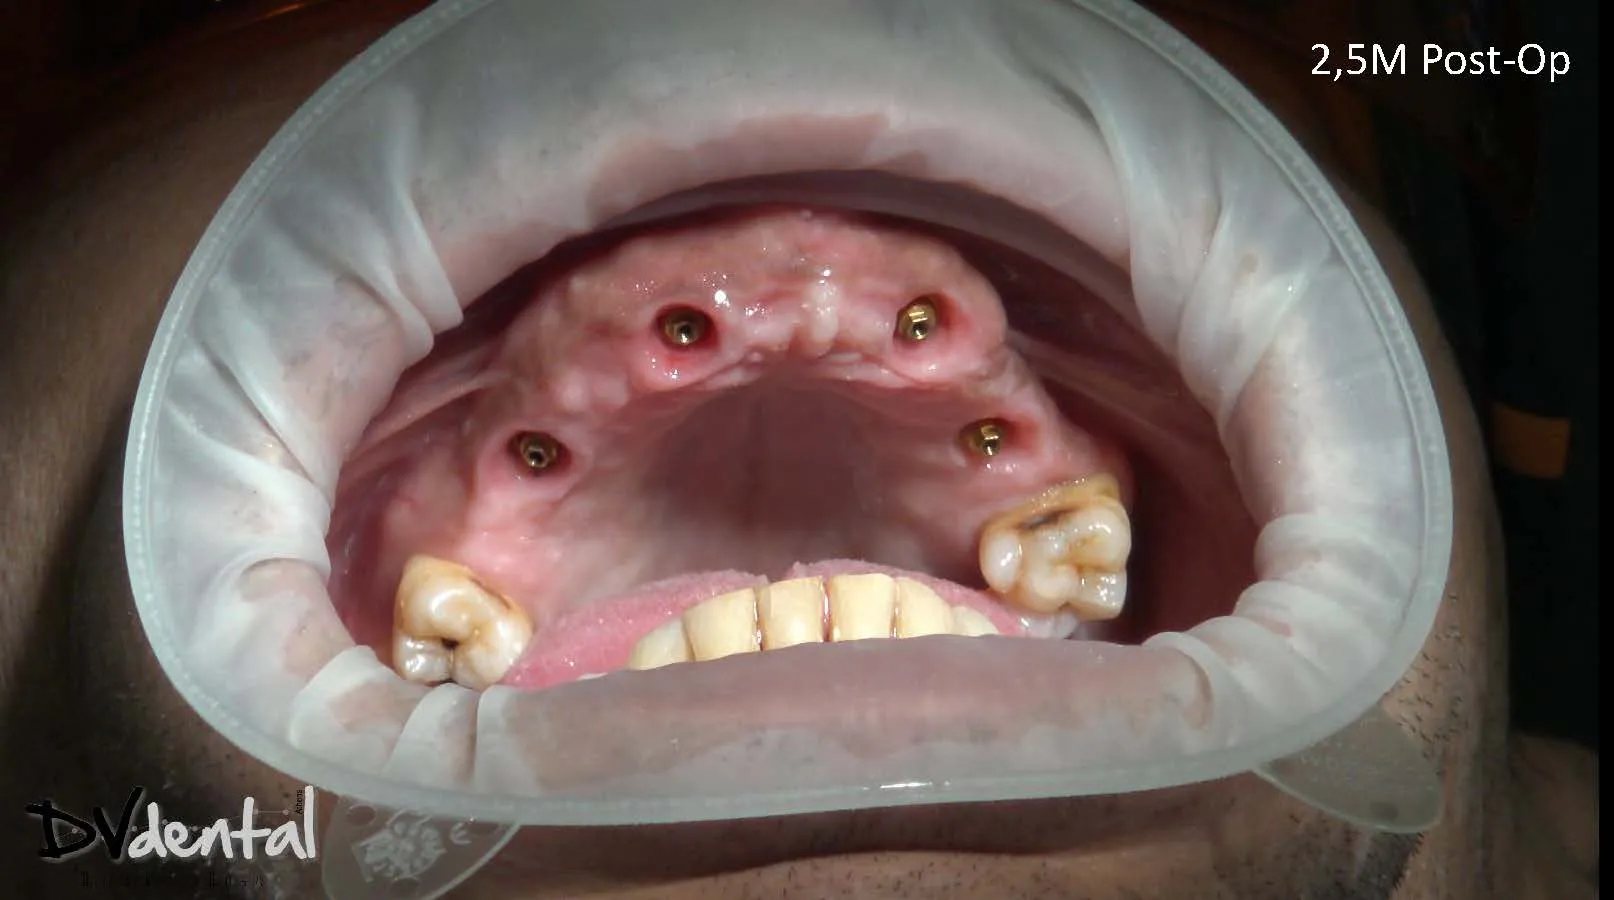
Description: In the first stage of our treatment, we did the patient digitization with Aoral 3, MetiSmile and photos according to the DSD protocol. After the facially driven prosthetic set-up, we did the Guided Implant placement and we placed 4 Southern Implants, External Hex (3 Co-Axis 12d and 1 straight) with Compact Conical Abutments, and we delivered the provisional prosthesis in the same day. We left the patient on provisionals for 2,5 months.
In the second stage we did all the DSD documentation protocol again. The intraoral digital impressions were done and with Elite and we captured the dynamic bite of the patient in order to functionally copy the provisionals.
The implants position was captured by Elite’s IPG unique technology.
In the CAD-CAM phase, the lab used all the information (accurate & precise implant position, emergence profile & soft tissue, face-scan, dynamic bite) in order to produce a monolithic Zr prosthesis on Ti bases, that fulfills the aesthetic and functional needs of our patient.
The good and passive fit of our prosthesis was checked clinically and radiographically. After the final photos, the final outcome verified that everything was done according to our design (quality control).


Increasing the Vertical Dimension
Surgery by Dr. Costa Nicolopoulos | Prostho by Dr. Fotis Melas | Lab by Scalk Both


Avoiding Grafts with Max & Co-Axis Southern Implants “Real solutions for Real problems “
Surgery by Dr. Costa Nicolopoulos | Prostho by Dr. Fotis Melas


